User’s Manual—SNAP™ 500 Gen 1 and Gen 2 23
Classification: Avery Dennison - Public
2. If the line voltage does not match the voltage for your location, contact your
local AVERY DENNISON supplier.
In the U.S.A., call (937) 865-2123.
Outside the U.S.A., please contact your local AVERY DENNISON supplier.
WARNING: Some older printers require internal changes
when switching the line (mains) voltage from 115V to
230V. Refer to Appendix 1 for instructions. Failure to
follow the instructions may result in damage to the printer.
CAUTION: If the number in the window DOES NOT match
the AC power line intended to be supplied to the printer,
DO NOT plug in the power cord.
WARNING: Attempting to open the AC power entry with
the AC power cord already inserted will damage the AC
entry.
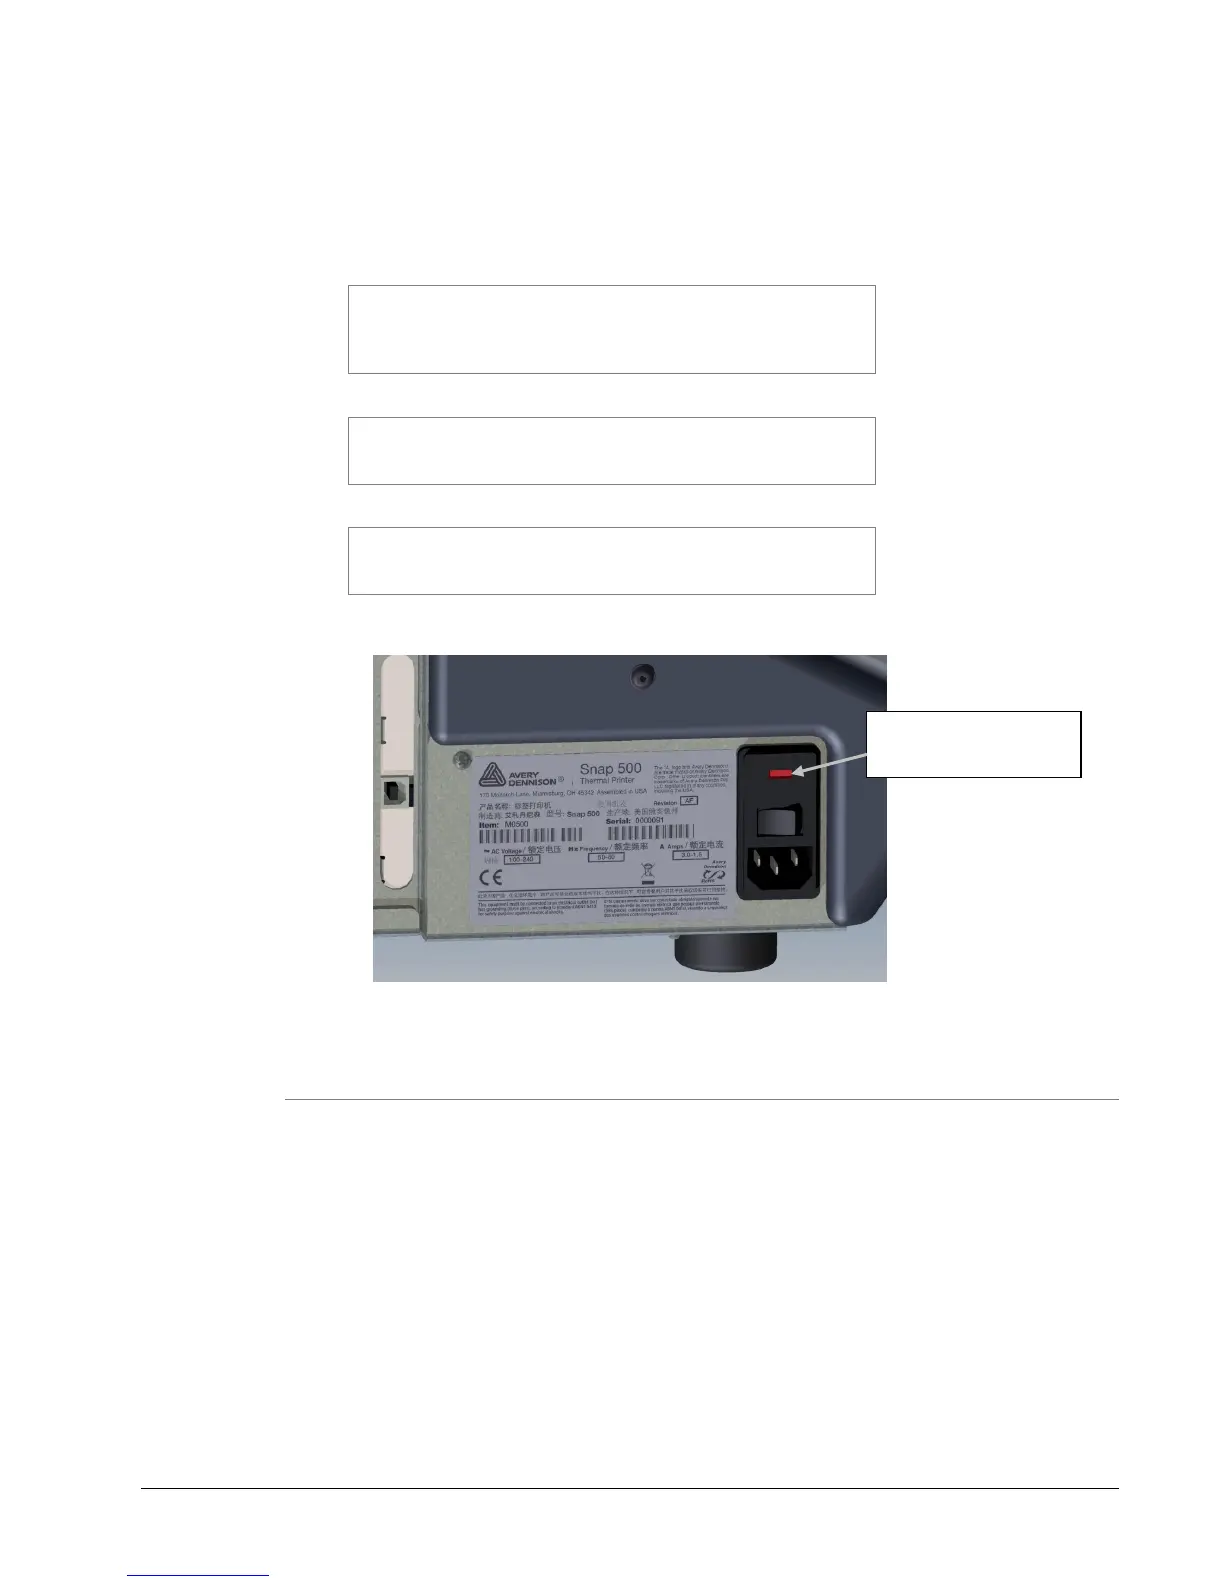
Figure 5: Right Side of Printer – Rear View
3.5.4 Installing the Power Cord
A quick-disconnect power cord is shipped with each 115V printer. The cord for
115V printers will use the standard three-prong plug used in the U.S.A.
If a power cord is not supplied with your printer, and your printer is operating at a
voltage other than 115V, obtain a power cord for your application. The power
cord should have an IEC-320-C13 plug on one end and the appropriate plug for
your power receptacle at the other end.
1. Locate the AC power entry receptacle on the backside of the printer just
below the power switch (see Figure 5).
2. Plug the power cord into the AC power entry receptacle.
Blank, No Fusing or
Strapping Required