601–426 /17 F70 Series128
6. Adjust the value by using the arrow keys. (See note below).
7. Repeat step 4 and 5 to adjust the rest of the blending zones.
8. Exit the menu by using the exit button on the remote control.
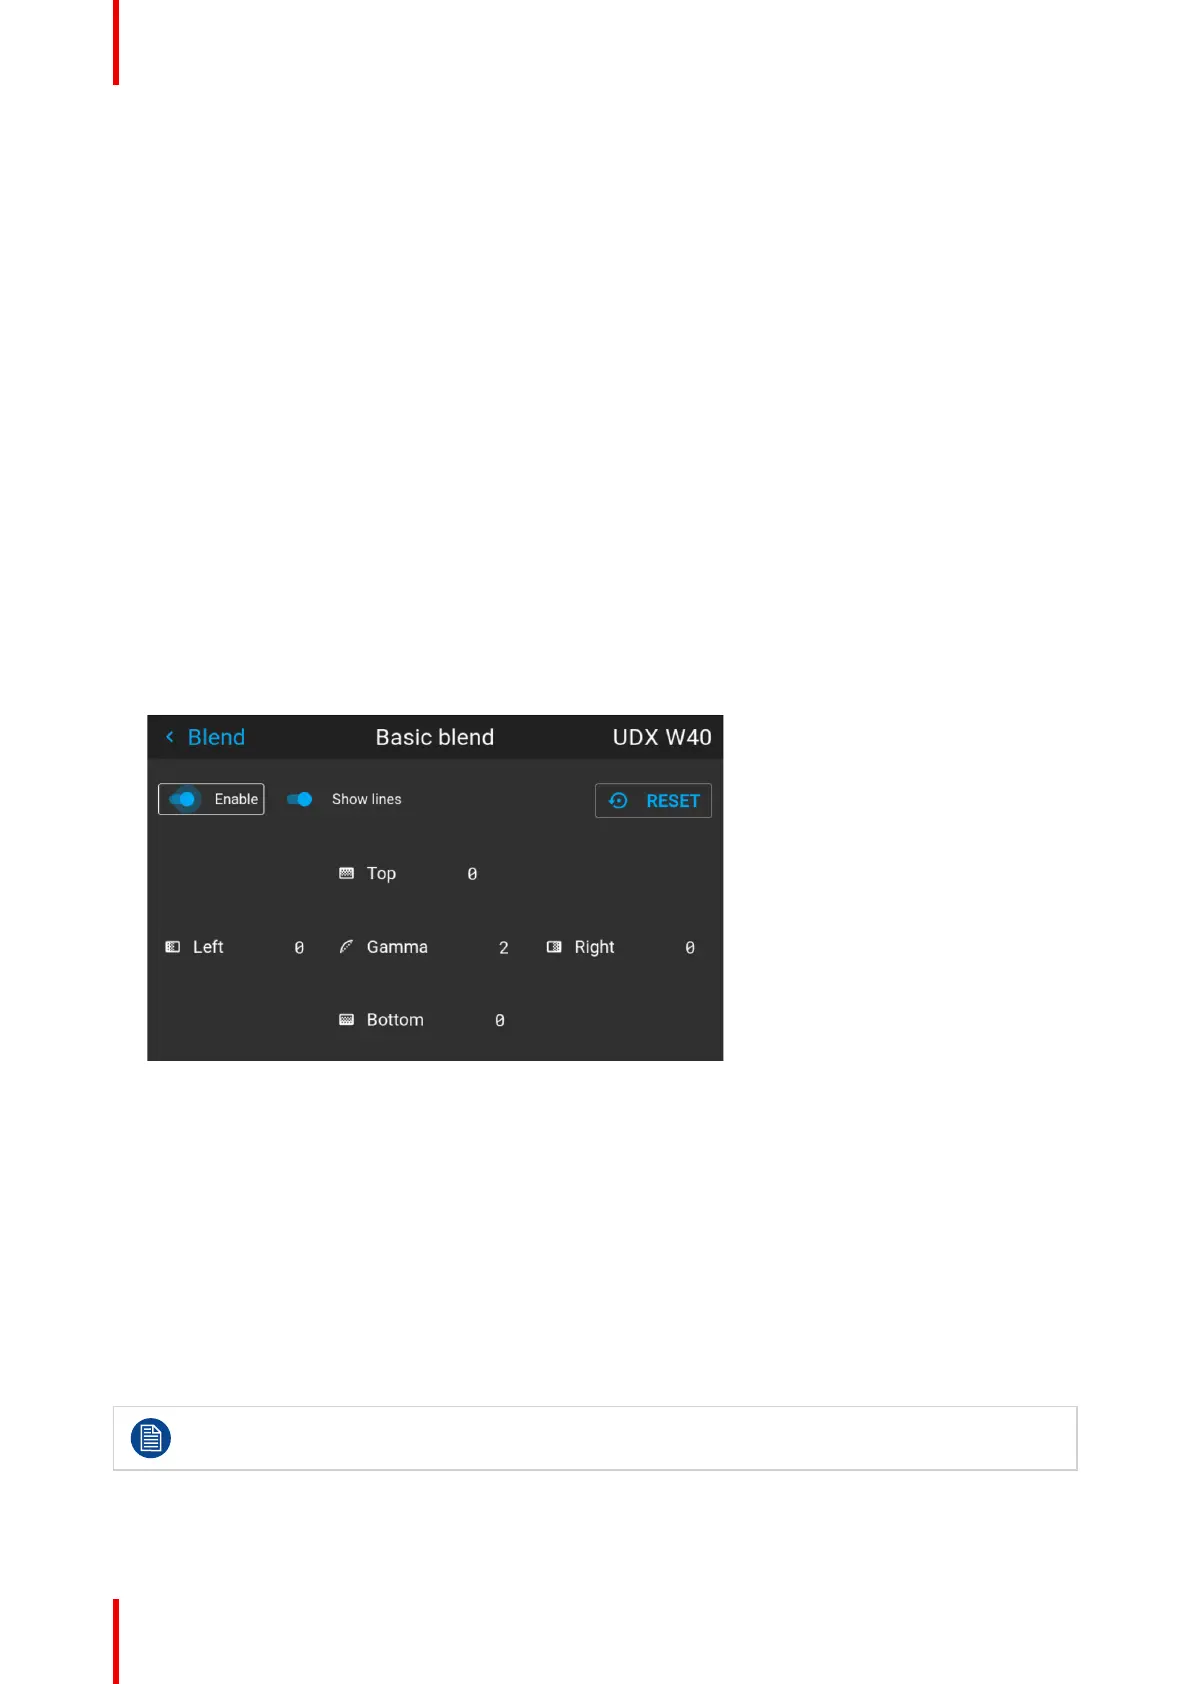
8.5.4 Basic blend setup procedure
Basic blend adjustment procedure
Entering the Basic blend Adjustment from the Menu/Installation//Blend and mask/Basic blend menu, either by
the remote control, or the keypad on the projector.
The “Enable” button enables/disables the blend function. The “Show Lines” enables alignment lines on the
screen, in order to visualize the overlap/blend zone.
Use the up/down/left/right arrow key on the remote control or key pad to navigate in the menu.
Basic blend introduction
The basic blend function introduce an gradual transition of the light intensity between the edge of the picture
and the line defined in the basic blend setup process.
When a blend mask is introduced, the gradient will start from the defined edge of the blend mask.
Basic blend adjustment procedure. Side by side configuration.
1. In the menu select Installation/Blend/Basic blend. The Basic blend menu is displayed.
Image 8–47
2. Starting with the left picture: By the arrow keys, place the display cursor on respectively the “Enable” zone
and the “Show Lines” zone and activate them by pressing enter.
3. Use the arrow keys to move the cursor to the position that must be blended. and press enter.
4. Adjust the width value by using the arrow keys (See note below), one step at a time. By pressing the key
arrow constantly, the blend value will increase rapidly. The numeric value of the width is shown on both the
LCD screen and the OSD. (The number entered represent the blend width expressed in number of pixels).
5. Use the enter key to move the cursor to the next position that has to be blended.
6. Adjust the value by using the arrow keys. (See note below).
7. Repeat step 4 and 5 to adjust the rest of the blending zones.
8. Exit the menu by using the exit button on the remote control.
For horizontal blending, use the left/right arrow keys to adjust.
For vertical blending, use the up/down arrow keys to adjust.
Installation menu