3. Physical installation
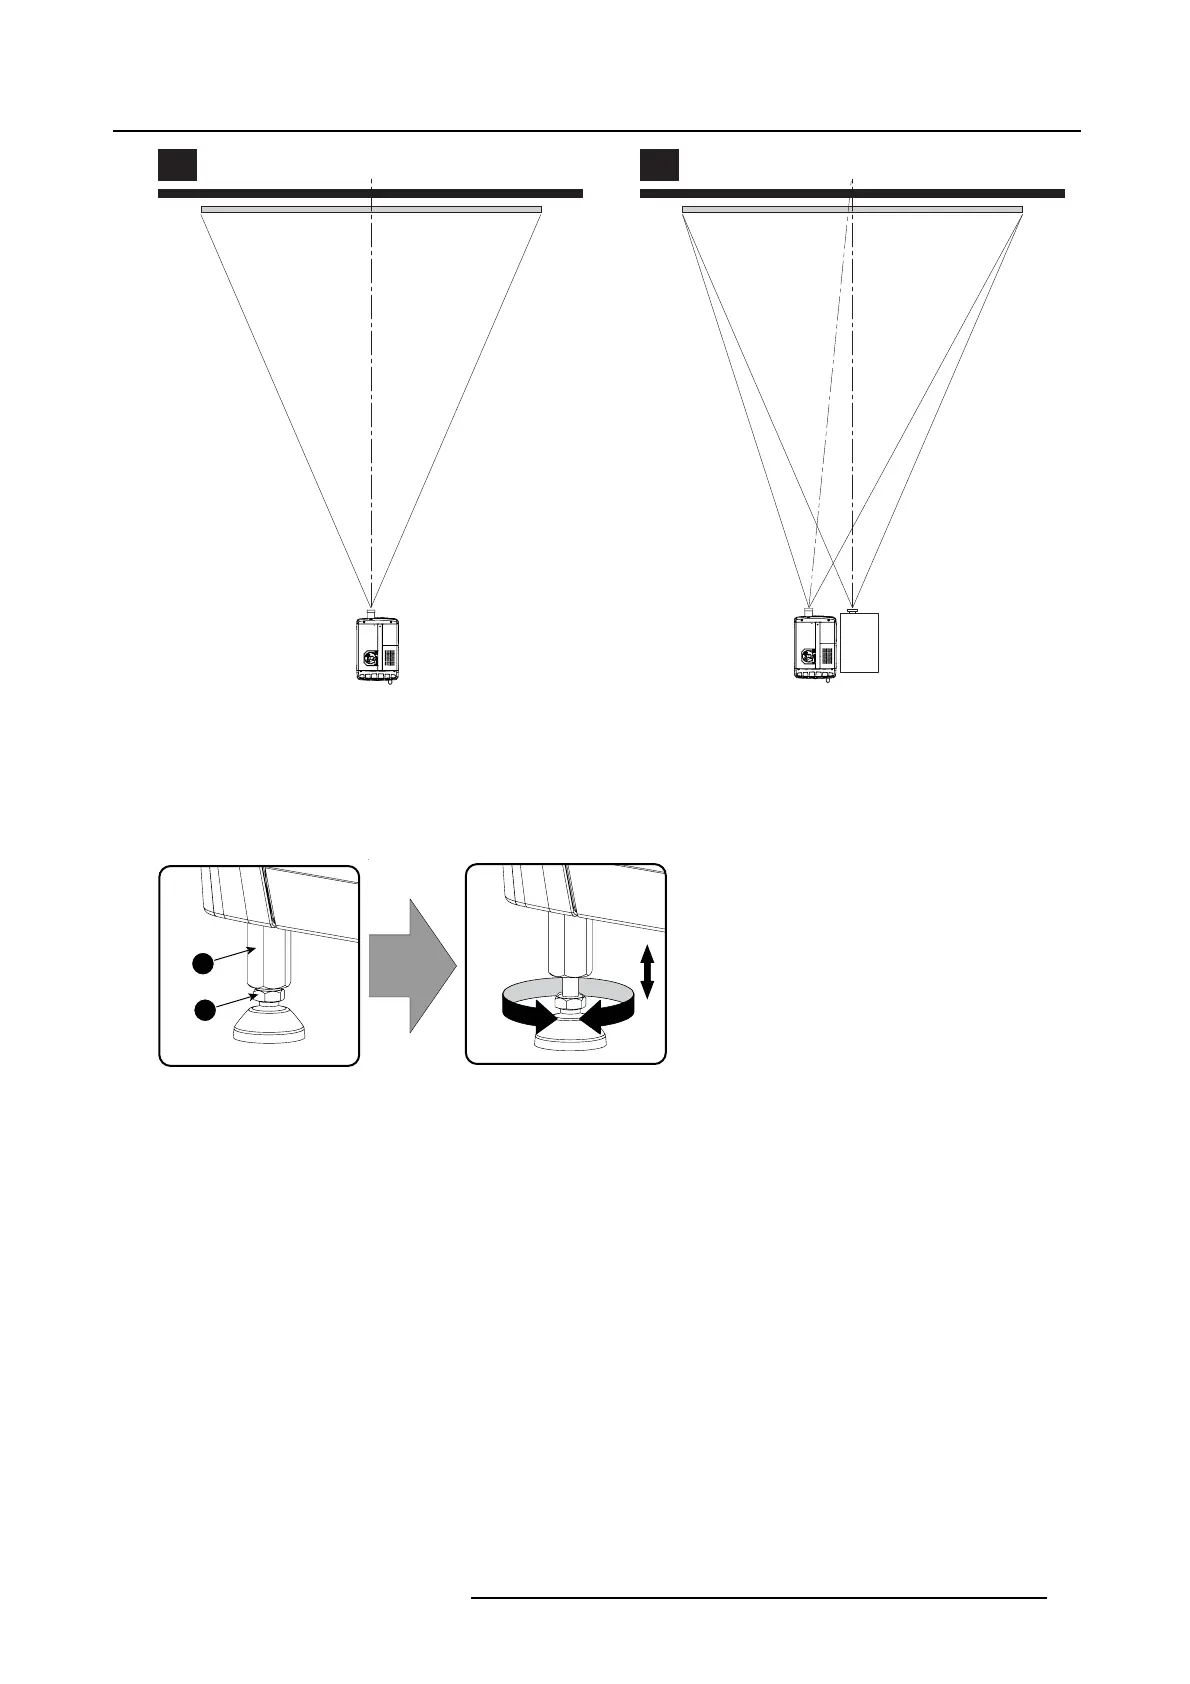
SCREEN CENTER SCREEN CENTER
OFF-CENTER
A B
Image 3-2
Projector centering
3. Proceed to level the projector by adjusting the feet of the projector as follows:
- Loosen the nuts (A), using a w rench of 24 m m, on the threaded rod.
- Adjust the height of the 4 legs (B) to level the projector, u sing a 17 mm wrench.
- Secure the leg height by tightening the nuts (A).
Note: There must be at least 5 c m between the bottom side of the projector and the pedes tal.
A
B
Image 3-3
Projector leveling
4. Later, when the projector is up- and-running, adjust precise im age geometry an d placement.
Projector tilting
In an ideal installation, the Prometheus lens surface is centered w ith and parallel to the screen. T his orientation helps to ensure
optimized lens performances with minimal offset. If this p osition is not possible (such as w hen the projector is significantly higher
than the center of the s creen), it is better to rely on offset rather than extra tilt.
1. Before adjusting tilt, make sure the projector is as well-centered with the theatre s creen as pos sible for your installation area.
2. Check with theatre personnel for th
e degree of screen tilt, or measure this incline with a protractor at the screen.
3. Tilt the projector to closely m atch this screen tilt angle as follows:
- Loosen the nuts (A), using a w rench of 24 m m, on the threaded rod.
- Adjust the h eight of the legs until the projected image m atches the projection port window and the screen tilt.
- Secure the leg height by tightening the nuts (A).
R5905963 PROMETHEUS SERIES 09/03/2015
25
 Loading...