3. Physical installation
3.4 Power input setup (only f or Prometheus II)
About the power input
The projector power input can be configured for a power supply of 230/400V 3W+N+PE 16A 50- 60Hz (Y connection) or 20 8V 3W+PE
27A 50-60Hz (Δ connection). B efore operating the projector, place the links in the correct position depending on the local power
supply.
For a 3W+N+PE system, 400V is measured between the lines, 230V is m easured betwee n the lines an d the neutral.
For a 3W+PE system, 208V is measured between the lines.
A B
Image 3-10
Υ-Δ connection
A Υ connection
B Δ connection
Necessary tools
• Flat screw driver
• Wrench10mm
• Torque wre nch 10 mm
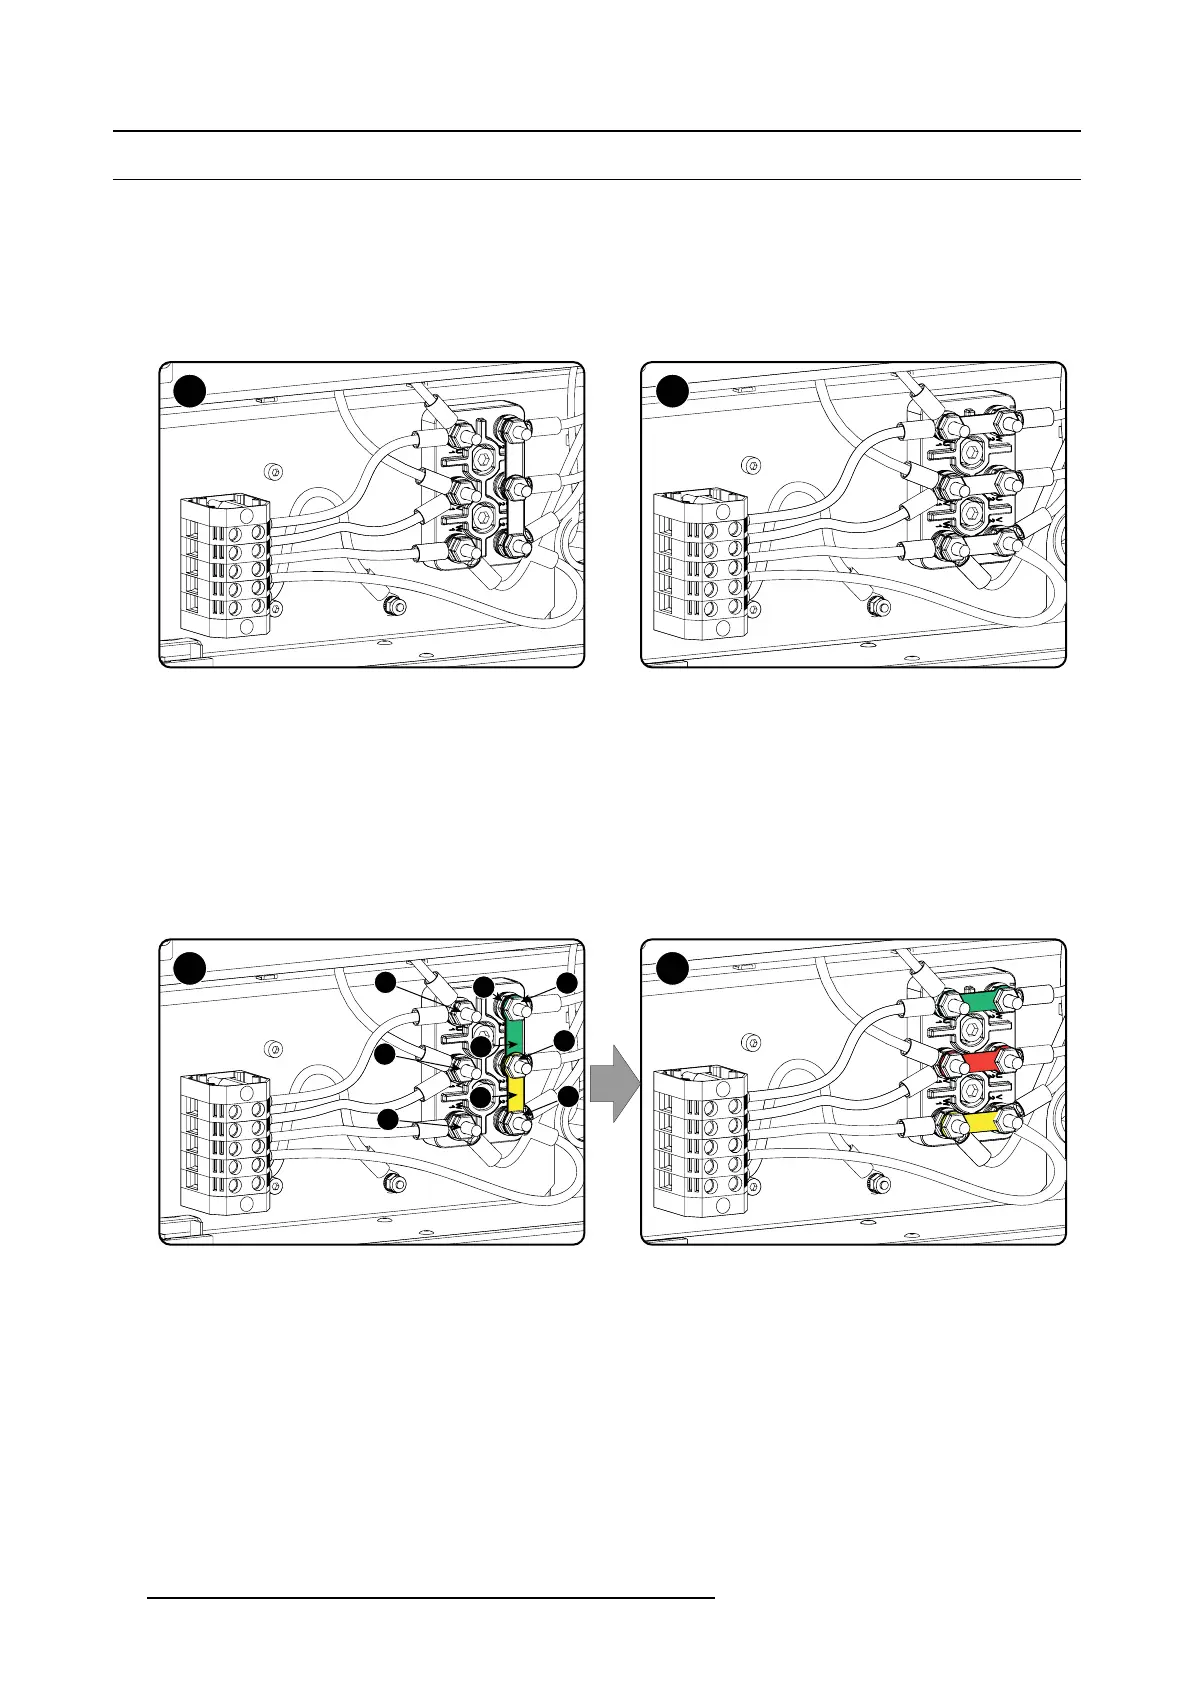
HowtoswitchfromaΥ-connection to Δ-connection
1. Loosen the 6 top nuts on the Υ/Δ configuration block. (1 to 6)
Y Δ
1
2
3
4
5
6
B
A
C
Image 3-11
Υ to Δ connection
2. Take off the mounted lins (A, B and C) . Two links above ea ch other or mounted between the upper and middle pin (A, B) and one
link between the middle pin and lower pin (C).
3. Mount the links horizontally on the pins.
4. Turn a nut on each pin and secure with a torque w rench set to 7.5 Nm.
HowtoswitchfromaΔ-connection to Υ-connection
1. Loosen the top nuts on the Υ/Δ configuration block (1 to 6).
30
R5905963 PROMETHEUS SERIES 09/03/2015
 Loading...