2.1.30 RHB LEXION 480 - 188 678.1
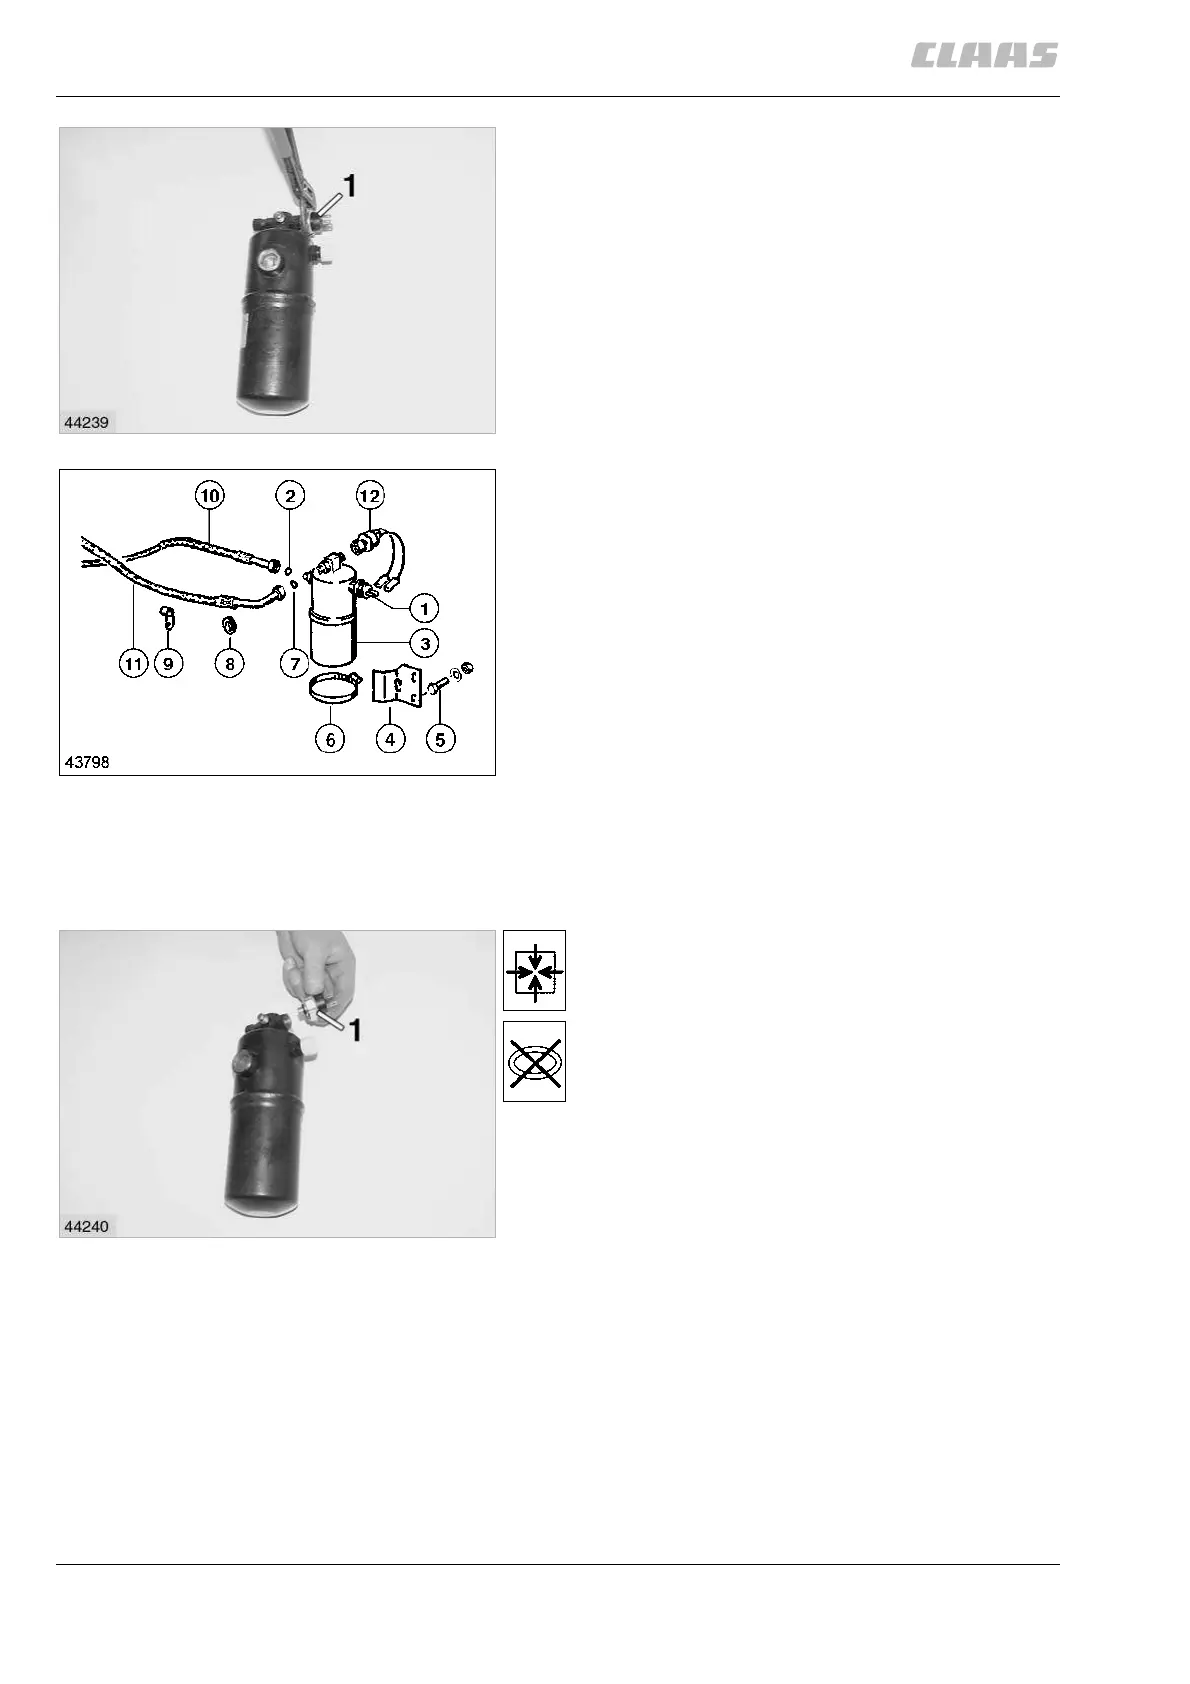
Air conditioner
Unscrew the low-pressure switch (1) from the filter
receiver drier.
(Fig. 83, 84)
Filter receiver drier, disassembled
1 Low-pressure switch
2 O-ring 7.65 x 1.78-n DIN 3771
3 Cylinder
4 Mounting bracket
5 Hex. bolt M 6 x 12 DIN 933-8.8
Hex. nut M 6 DIN 934
Contact washer B 6
6 Hose clamp As 60-80 / 12-c7 DIN 3017
7 O-ring 11.1 x 1.78-n DIN 3771
8 Cable ring
9 Pipe clamp
10 Hose line
11 Discharge line
12 High-pressure switch
(Fig. 84)
Installing the filter receiver drier
1. Bolt down low-pressure switch (1) to the filter
receiver drier with a new O-ring.
(Fig. 84, 85)
83
84
85