Introduction Getting Ready
Taking Pictures
Playback Set Up
EN-125
NEXT
Contents Glossary Index Nomenclature Menus and Settings Troubleshooting
[G] Printing by Connecting the Camera
Directly to a Printer (PictBridge)
«Applicable images: Still images only»
By connecting the camera to a printer that supports PictBridge, you can
print your images quickly and simply direct from the camera. You can also
use this method to print images with DPOF settings (Æ p.120
) on printers
that support DPOF. Refer to the Instruction Manual for your printer when
using this print method.
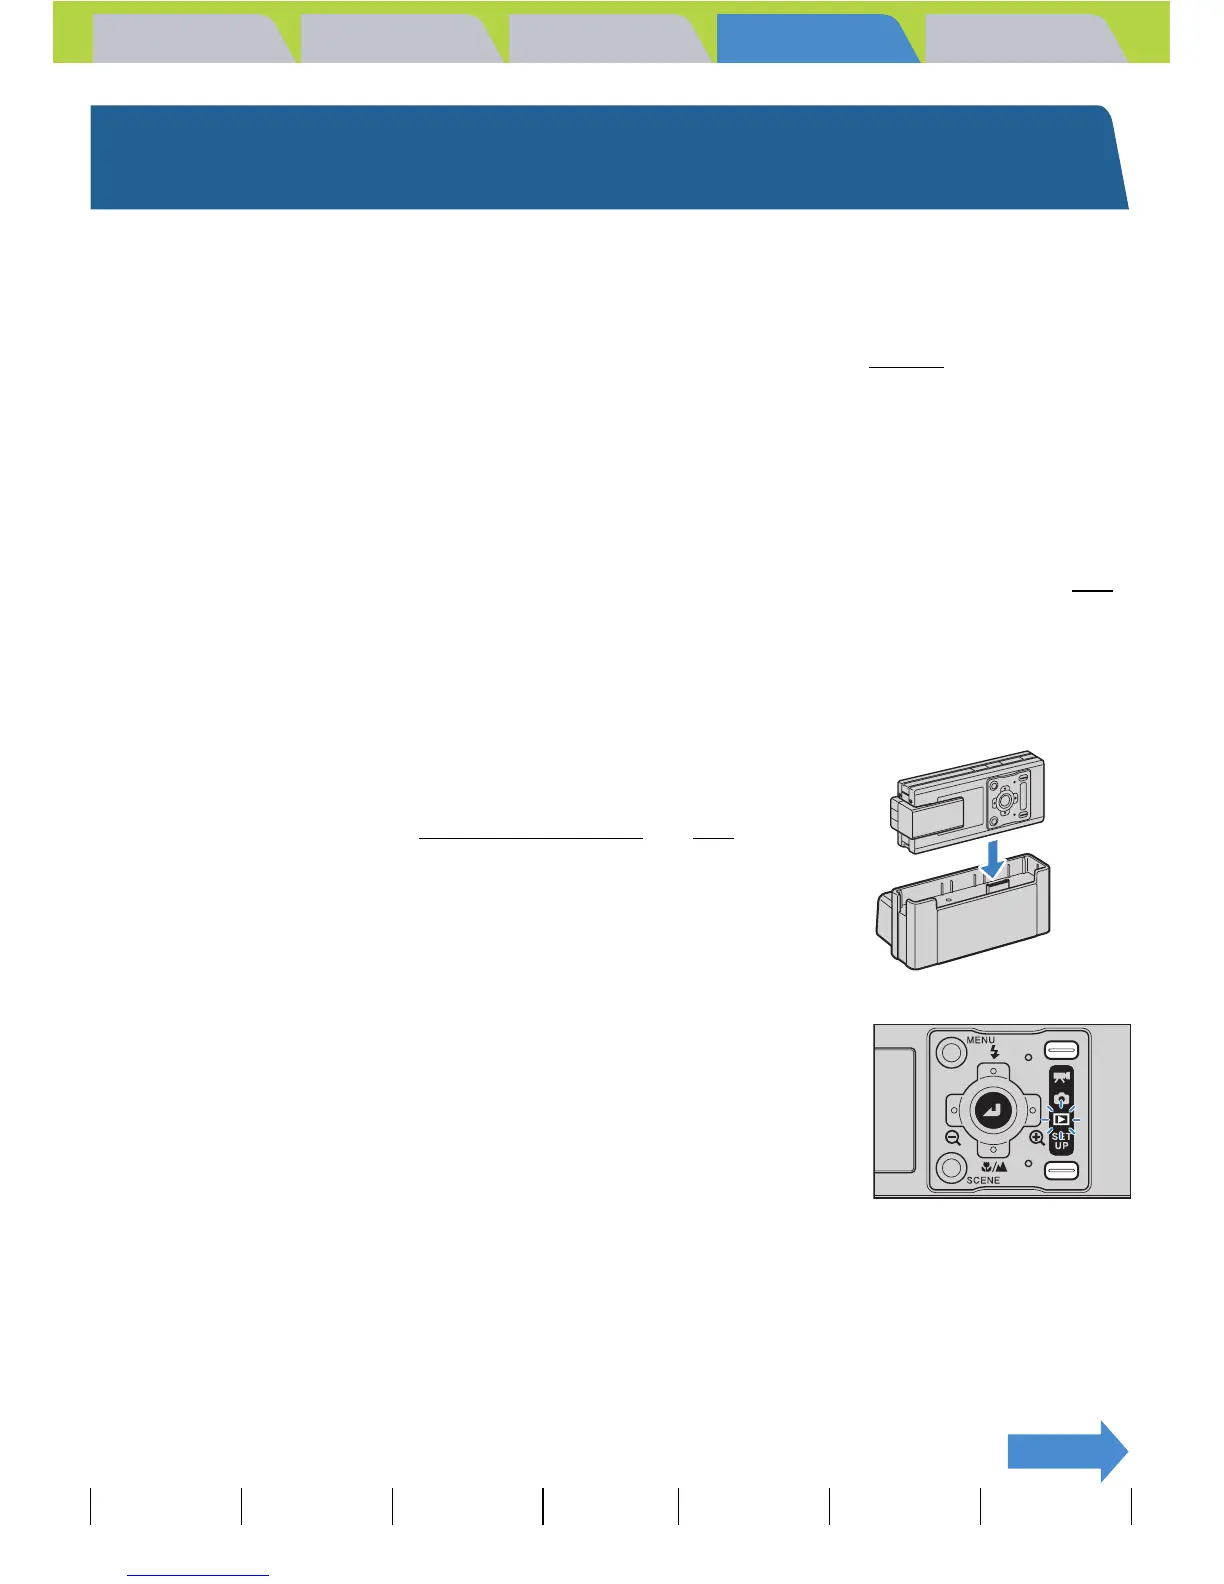
Connecting the camera to the printer
1 Turn the printer on.
2 Place the camera in the USB cradle.
3 Turn the camera on and press the mode
button until "P" lights up on the mode
select LED.
4 Press the MENU button K to display the menu icons.
A Important
• Check that your printer supports PictBridge.
• Set the printer up for printing before starting this procedure. (Refer to the instruction
manual for your printer.)
BNote
These settings can also be used in MULTI playback / GROUP playback modes (Æ p.87).
BNote
Refer to "Using the USB Cradle" (Æ p.36) for
details on attaching the USB cradle.