14
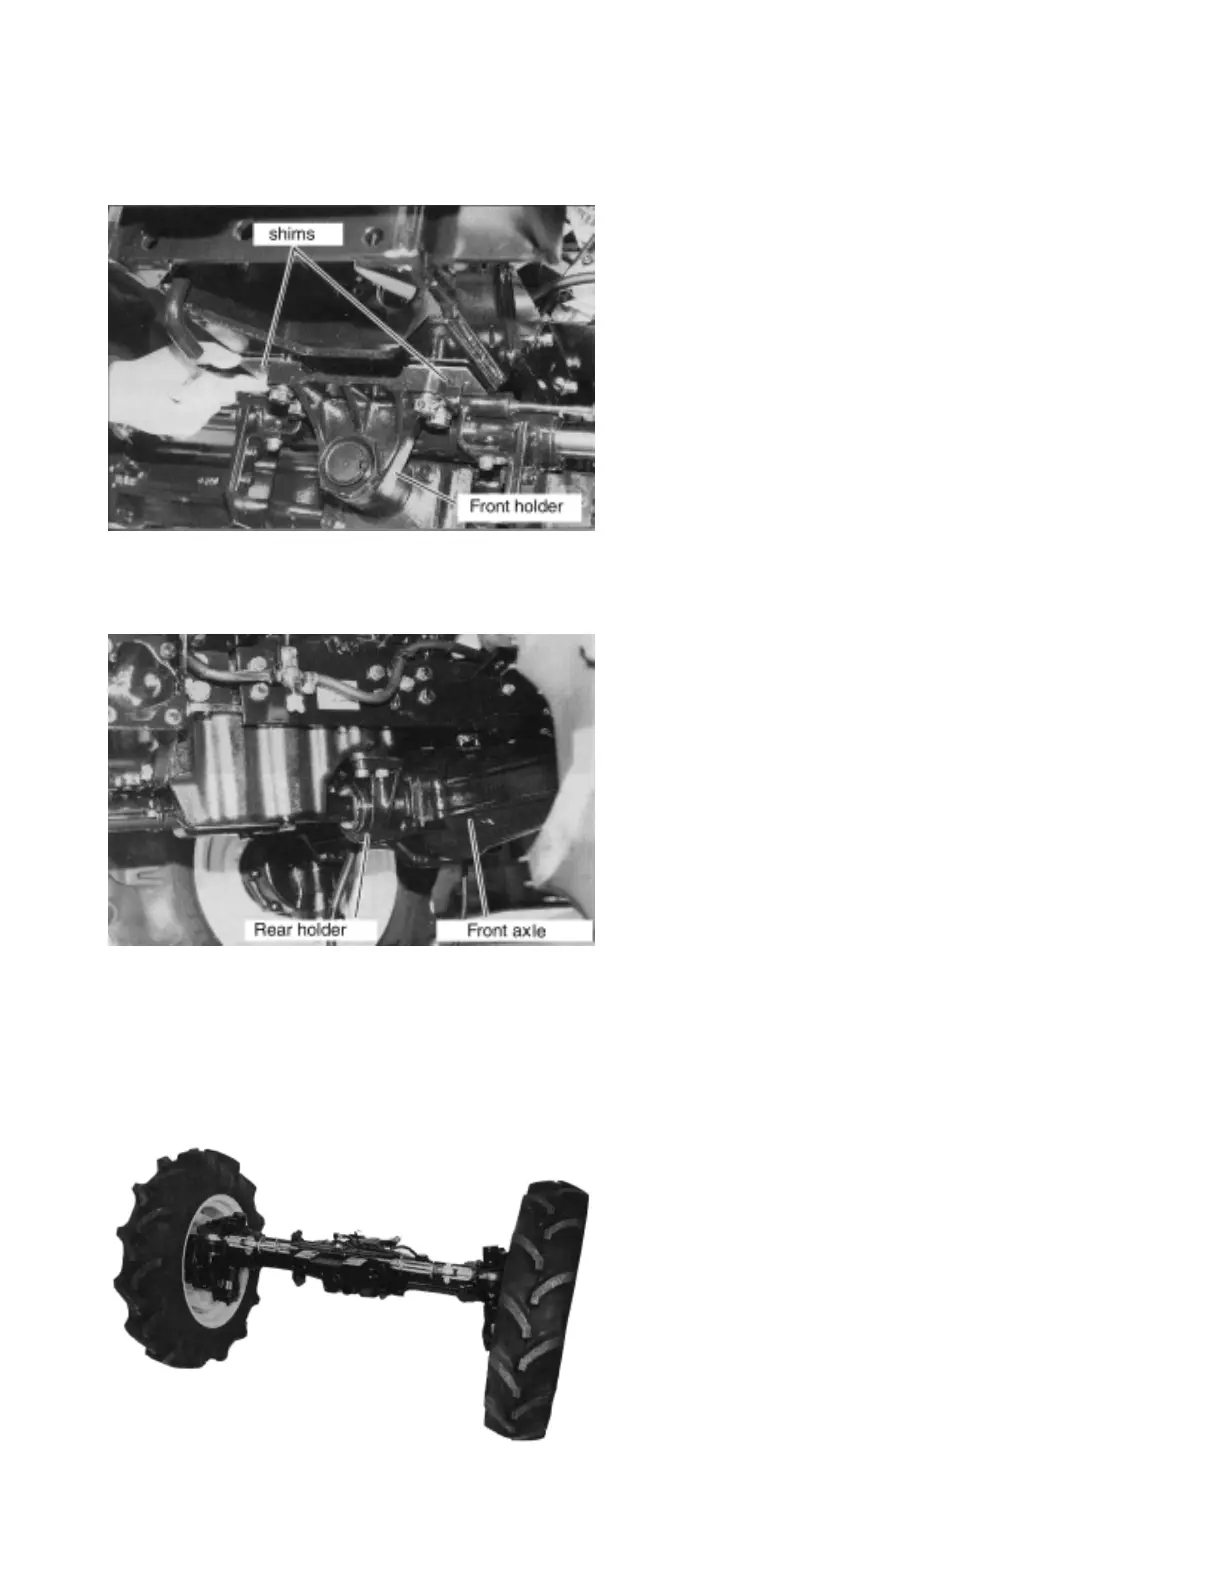
(4) FRONT & REAR HOLDER REMOVAL
1. Remove mounting bolts of front holder.
2. Remove mounting bolts of rear holder.
(5) FRONT AXLE ASSY REMOVAL
1. Lift up the chassis by jack and remove the
front axle assy from chassis.
1-2 FRONT AXLE ASSY
REINSTALLATION
*Install the front axle assy with reversed
procedure of removal.
Use following adjustment and service standards
for the reinstallation.
1. When reinstall the front axle assy to chassis,
tighten the mounting bolts of the rear holder
first.
Tightening Torque : 86.8~97.6lbf.ft
(12 ~13.5 kgf-m)
2. Measure the clearance between front holder
and chassis. Put the shims of which thickness
is half of the measured clearance.
Tighten the mounting bolts of Front Holder.
Tightening Torque : 61.5~68.7lbf.ft
(8.5~9.5 kgf-m)
3. When reinstall the hoses to the cylinder, install
the hose with red tape to lower side of the
port.
4. After install the hoses, turn the steering wheel
to left and make sure the front axle is steered
to left.
5. When reinstall the 4WD shaft, apply the
grease to the spline.
6. Make sure the snap ring is in the groove.
7. After reinstall the front axle assy, check the
toe-in and readjust it if necessary.
 Loading...