148
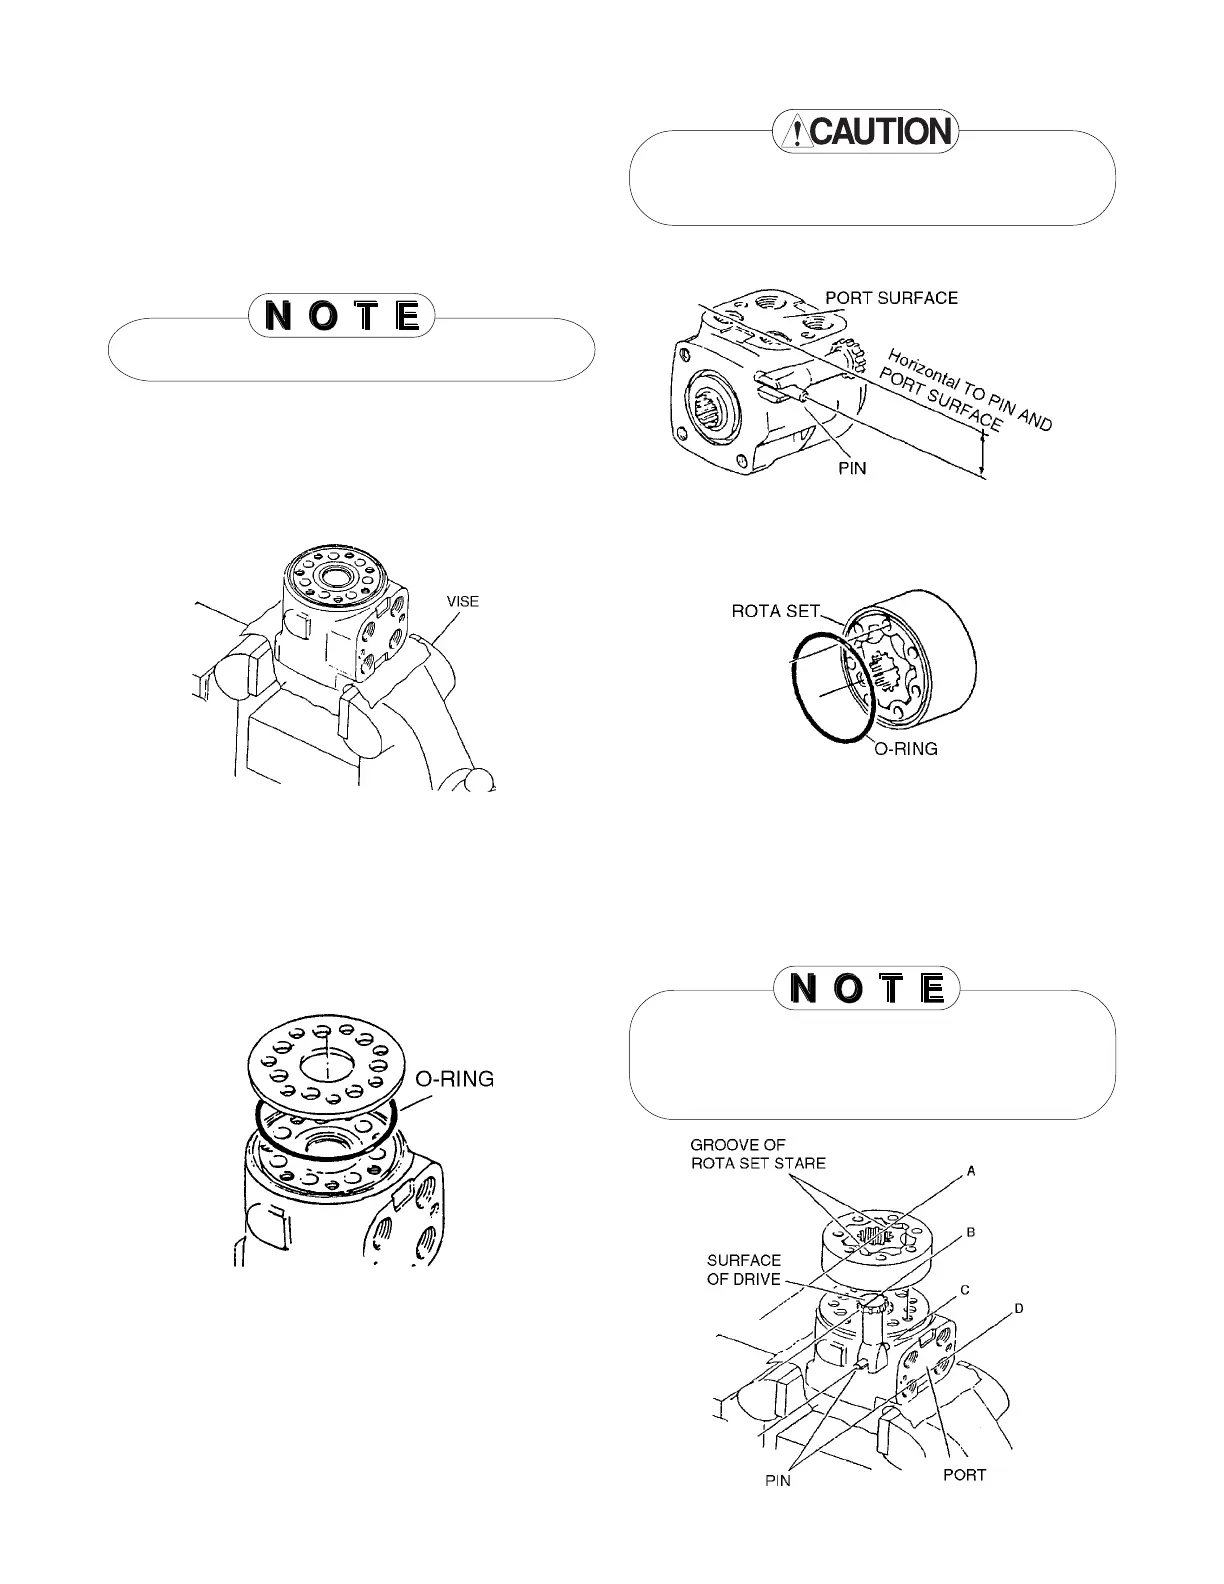
1. Rotary reassembling
1) Install o-ring (21) to end cap (24) and tighten
with screws (28, 29).
2) Tightening torque of screws
[15.19 lbf•ft ]
Make sure of location for installation of screw (29).
3) Apply grease at o-ring.
4) When hold the flange of housing (15) by
vise, do not hold too tight.
5) Install o-ring (21) to housing (15).
Put spacer plate (22) and aline bolt hole of
plate and tapped hole of housing.
Put the mark (line) at spline end surface of
drive (23) to ensure the position.
7) Install o-ring (21) to rota set (24).
8) Face o-ring groove side of rota set (24) to
spacer plate (22) and aline bottom of star
piece and line B. Make sure the line A
(line between bottoms of star piece),
B, C and D as shown below.
Aline the bolt hole of rota set (24) while
keeping the connection of drive and star
piece of rota.
6) Turn spool (17) and sleeve (16) assy to
parallel the pin (20) and port surface of
housing (15).
Insert the drive (23) and engage the yoke of
drive and pin.
 Loading...