VENUE Profile Guide172
To synchronize Settings, Shows, or Presets between the VENUE
system and a portable storage device:
1 Go to the Filing page and click the Transfer tab.
2 Connect a portable storage device such as a USB key disk.
The device appears above the right column.
3 Do one of the following to select the type of data to synchro-
nize:
• To synchronize all data, click the Console icon.
• To synchronize Console Settings, click the Settings icon.
• To synchronize Show Folders, click the Show Folders icon.
• To synchronize individual Shows, click the Show icon.
• To synchronize Preset Folders, click the Preset Folders
icon.
• To synchronize Presets for individual items, click the
Built-In icon or the Plug-In icon and choose a processor or
plug-in from the pop-up menu.
4 From the pop-up menus above each column, choose the
folders containing the elements you want to synchronize.
5 Click the Sync All button. The contents of the left and right
columns are synchronized.
Undoing Changes Using the History
Feature
The VENUE system automatically saves the current state of
the console while you are working, allowing you to quickly re-
turn the console to a previous state.
The History feature uses Show files to capture the console
state, and displays the files in the History tab.
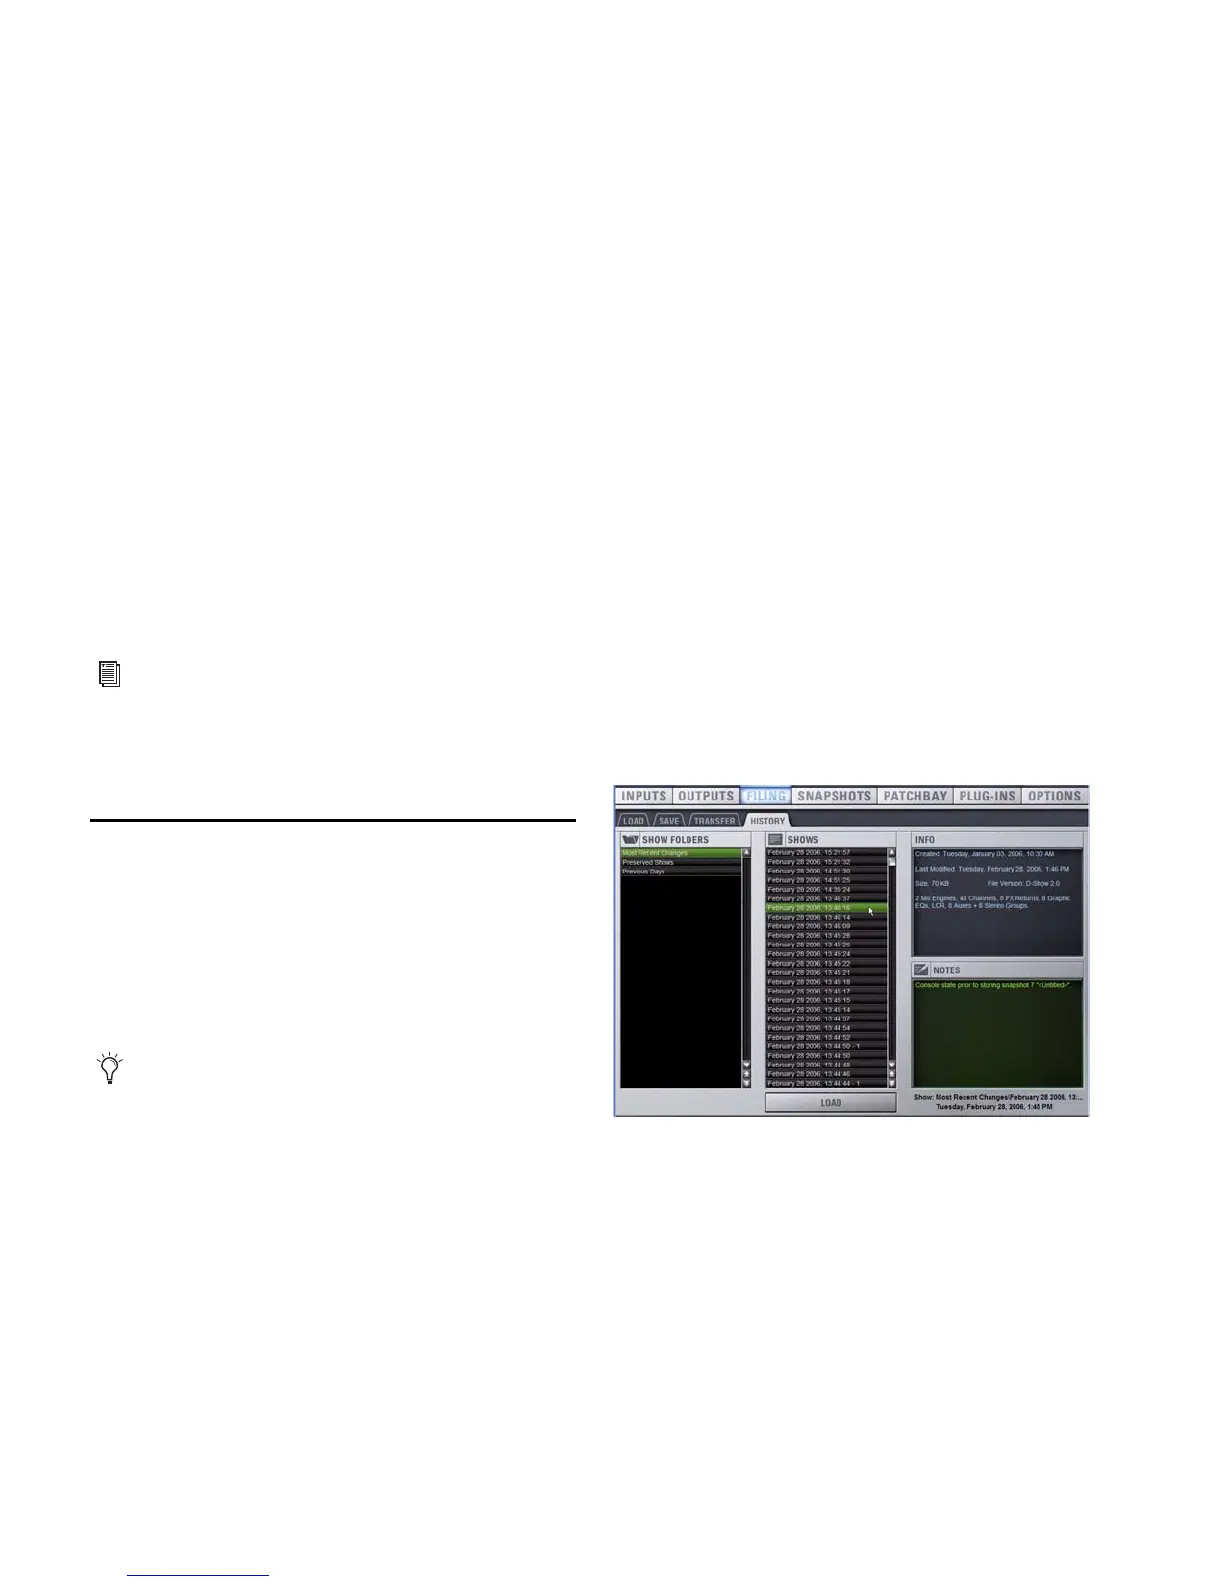
Show Folders in the History Tab
There are two Show Folders in the History tab:
The Most Recent Changes folder includes all auto-saved Show
files for a ten-hour period.
The Previous Days folder includes only the last auto-saved
Show file for each day since the console was last cleared.
Show Files in the History Tab
The auto-saved Show files displayed in the History Tab are
named according to the date and time of their creation, and
cannot be renamed.
The Notes field for each auto-saved Show file includes a de-
scription of the conditions that caused the automatic save.
Several conditions cause the system to automatically save a
new Show file in the History tab, as follows:
In the course of normal work, a new Show file is automati-
cally saved in the History tab approximately every ten min-
utes. Saves are less frequent when the console is idle.
A new Show file is automatically saved just prior to a signif-
icant change in the console setup, including:
• Change of console channel or bus configuration
• Recall, storage, or modification of a Snapshot
• Loading of Console Settings or a Show
Loading an Auto-Saved Show
To return the console to an earlier state at any time, you can
load any of the auto-saved Show files displayed in the History
tab.
To load an auto-saved Show file:
1 Go to the Filing page and click the History tab.
2 In the Show Folders column, click the Show Folder name to
select the folder and display its contents in the Shows column.
3 In the Shows column, click the name for the Show you want
load.
4 Click the Load button.
The VENUE system loads the selected Show file, replacing the
current system configuration, routing, and control settings
with those contained in the selected file.
Using the Standalone software on a laptop computer, you
can configure VENUE system routing, set up mixes, create
Snapshots, and save Shows and Presets. You can then
transfer your data to a USB disk for use on a VENUE sys-
tem. See Chapter 24, “Using the Standalone Software.”
Show Folders and Show files displayed in the History tab
can only be deleted. They cannot be duplicated or renamed.
Loading an auto-saved Show file