Chapter 8: Outputs and Output Routing 83
Mains Bus Delay
A variable delay (from 0 to 500 ms) can be applied to any of
the Mains busses.
To apply delay to a Main bus:
1 Target the Main bus where you want to apply delay by re-
peatedly pressing the Select switch in the Mains section, or by
selecting it on-screen.
2 Adjust the Delay value by turning the on-screen Delay ro-
tary encoder.
Main Bus Center Divergence Options
When the Main busses are set to L–C–R (Left-Center-Right)
mode, the Center Divergence setting determines amount of
center-panned signal sent to the center output.
When Center Divergence is set to 100%, a channel panned
to center is sent to the center output only.
When Center Divergence is set to 0%, a channel panned to
center is sent equally to the left and right outputs only (phan-
tom center).
A Center Divergence setting between 0% and 100% sends a
center-panned channel to the left, center, and right outputs
with the center channel more prominent as the value in-
creases towards 100%.
To set Center Divergence:
1 Go the Options > Busses tab.
2 In the Panning section, click in the Center Divergence field
and drag up/down to increase/decrease the value (or type in a
new value).
3 Press Enter or Return on your keyboard to confirm the set-
ting.
Main Bus Automatic Delay Compensation
VENUE systems automatically compensate for delays incurred
by the use of Groups and insertion of plug-ins in the signal
path to the Main busses. Delays are automatically applied to
signals arriving at the Main busses from multiple destinations
to maintain the proper time alignment.
Monitoring the Main Mix
You can send the Main mix (the signal present on the Main
busses) to the Monitor bus for routing to the monitor bus for
headphones. See “Sending the Main Mix to the Monitor Bus”
on page 121.
Direct Outputs
All input channels and output buses feature Direct Outputs.
Available destinations for Direct Outputs include:
• Stage audio outputs
• FOH audio outputs
• Pro Tools recording inputs
• Plug-ins
Each output destination may be fed by only one Direct Output
signal (multiple Direct Output signals cannot be routed to a
single output).
To route a channel or bus to a Direct Output:
1 Target the channel or bus you want to route to a Direct Out-
put by pressing its Select switch.
2 In the Directs page of the Patchbay, click the tab for the
channel or bus type you are routing.
3 Click in the channel grid to route the channel or bus (listed
on the left) to an available output (listed across the top).
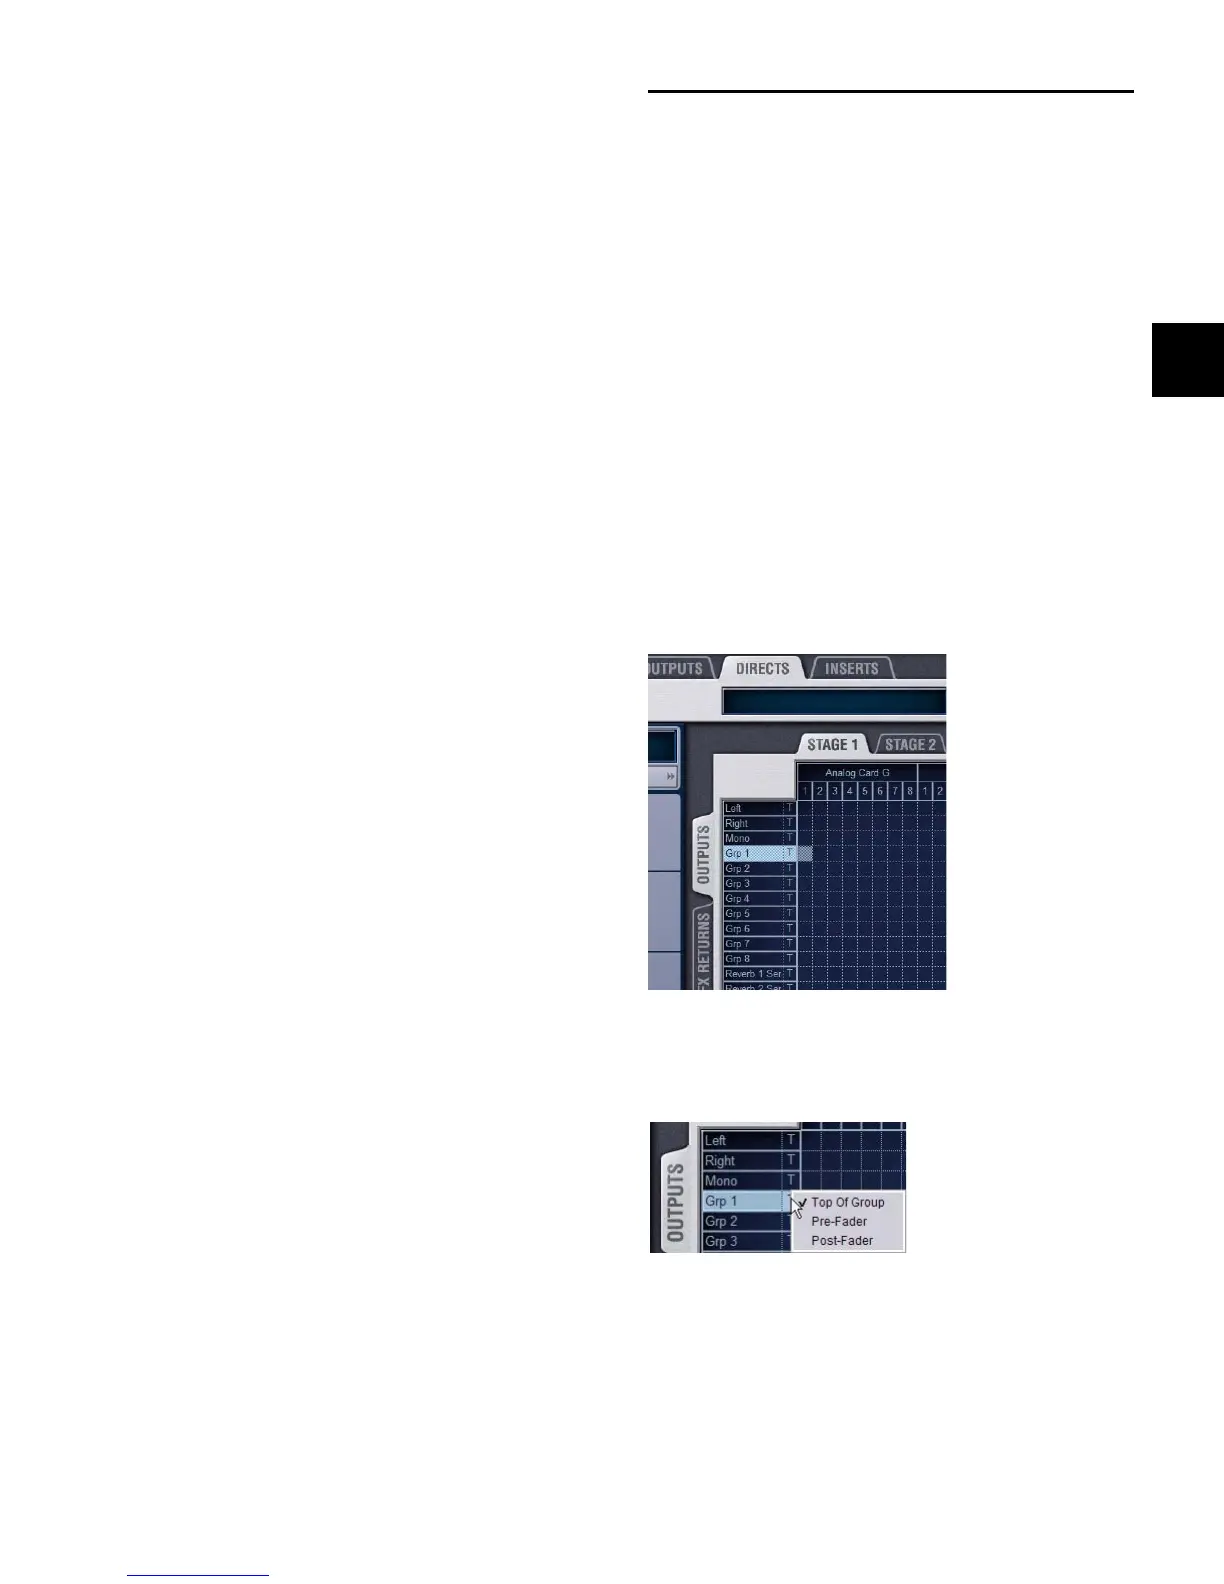
4 Select the pickoff point for the Direct Output by clicking the
letter to the right of the channel or bus name and choosing
from the pop-up menu.
5 In the ACS, press the Direct Output encoder so that its indi-
cator LED stays lit (on).
6 Turn the Direct Out encoder to set the Direct Output level.
Assigning a Direct Output in the Patchbay Directs page
Selecting a Direct Output pickoff point in the Patchbay Directs page