70
○○○○○○○○○○○○○○○○○○○○○○○○○○○○○○○○○
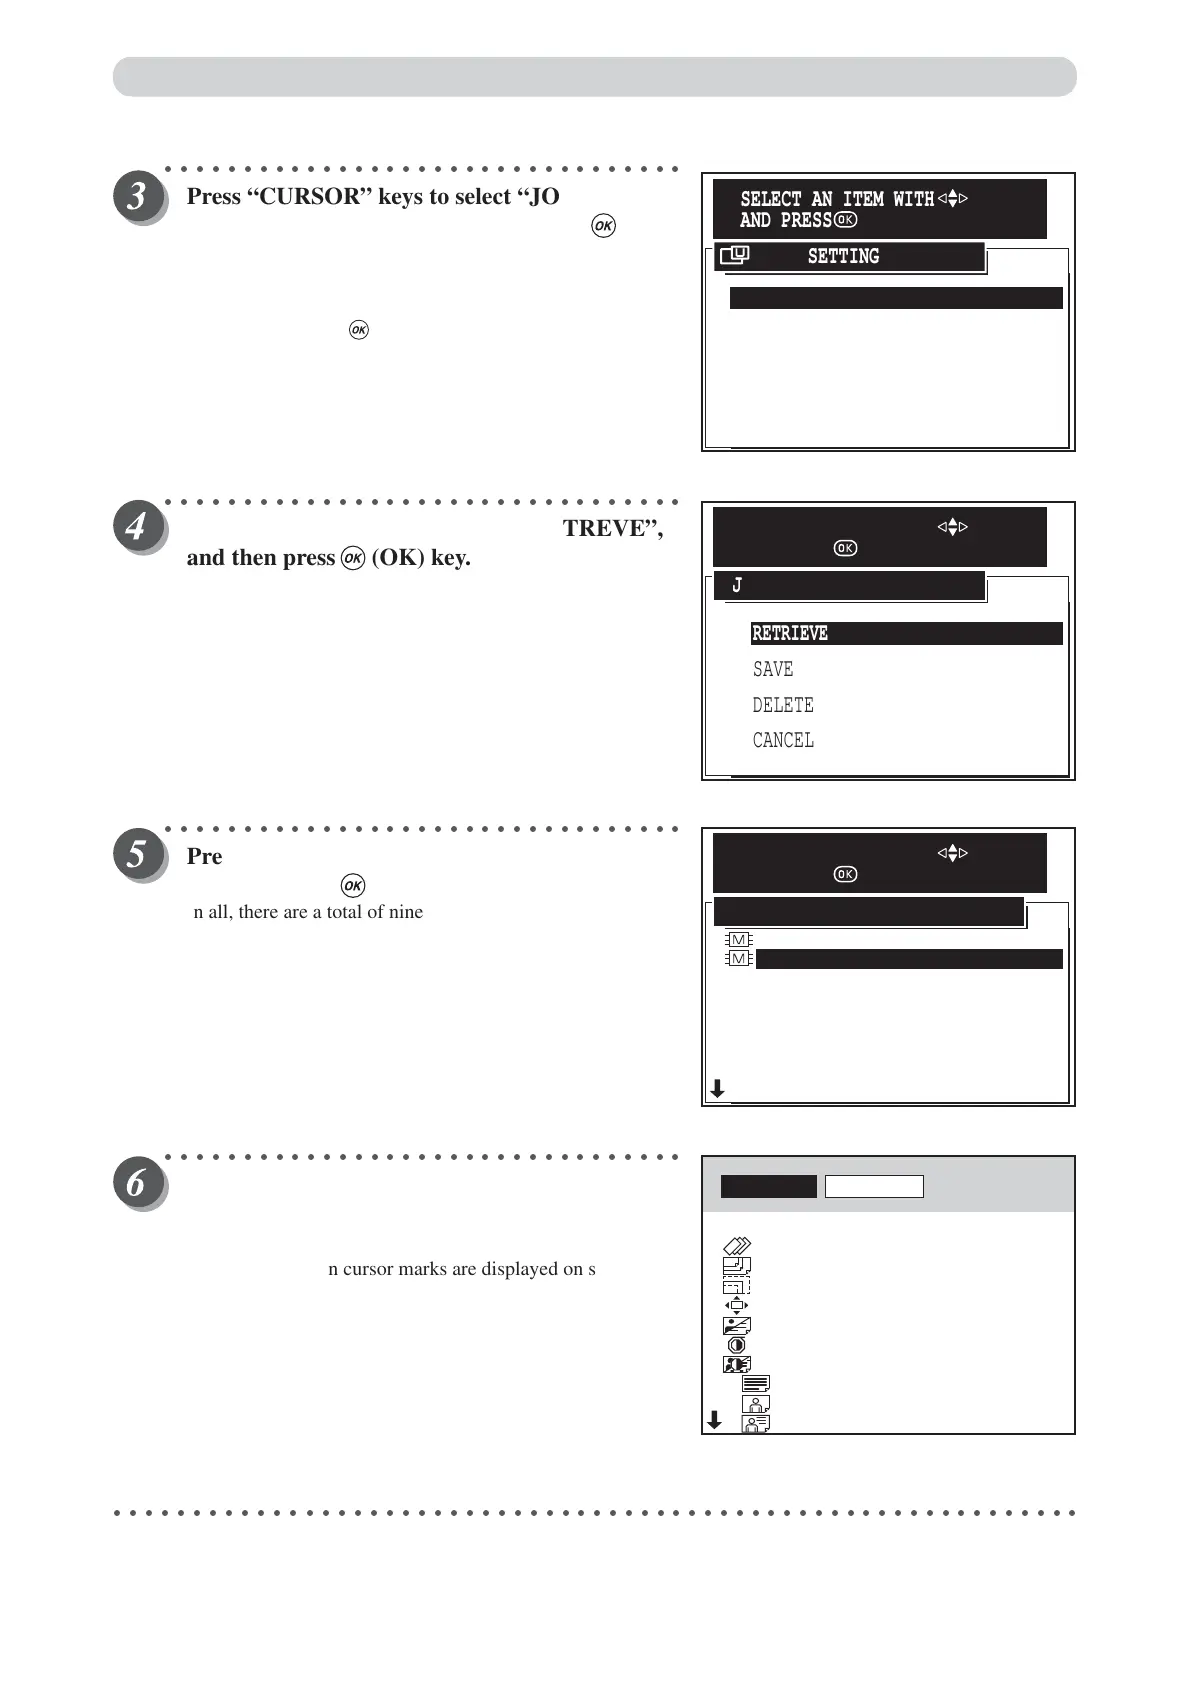
Press “CURSOR” keys to select “JOB
SETTING MEMORY”, and then press (OK)
key.
Each press of “CURSOR” keys moves to a different item that
is displayed highlighted. After moving to the job setting
memory item, press (OK) key to select the job setting
memory. The selected job setting memory is set.
○○○○○○○○○○○○○○○○○○○○○○○○○○○○○○○○○
Press “CURSOR” keys to select “RETREVE”,
and then press (OK) key.
○○○○○○○○○○○○○○○○○○○○○○○○○○○○○○○○○
Press “CURSOR” keys to select memory NO. ,
and then press (OK) key.
In all, there are a total of nine memories. Currently used
memories are prefixed with the “M” memory mark.
Select a memory with the “M” mark.
○○○○○○○○○○○○○○○○○○○○○○○○○○○○○○○○○
The retrieved settings are displayed.
Confirm the settings on screen by “
CURSOR
”
keys.
When the up/down cursor marks are displayed on screen, you
can display the previous or next screen.
○○○○○○○○○○○○○○○○○○○○○○○○○○○○○○○○○○○○○○○○○○○○○○○○○○○○○○○○○○○○○
1.JOB SETTING MEMORY
2.INITIAL SETTING
5.DOCUMENT DENSITY DETECTION
4.DOCUMENT MEMORY
6.FEED HEAVY WEIGHT PAPER
7.END
3.OPTIMIZE PRINT
USER SETTING
SELECT AN ITEM WITH
AND PRESS
RETRIEVE
SAVE
CANCEL
DELETE
JOB SETTING MEMORY
SELECT AN ITEM WITH
AND PRESS
MEMORY1
MEMORY3
MEMORY4
MEMORY5
MEMORY6
MEMORY7
MEMORY8
MEMORY9
MEMORY2
JOB SETTING MEMORY RETRIVE
SELECT AN ITEM WITH
AND PRESS
RETRIVE
CANCEL
BATCH PRINT
PRINTING SPEED
PSPER SIZE
ZOOM
PRINT POSITION
IMAGE MODE
PLATE DARKNESS
PLATE CONTRAST
TEXT
PHOTO
TEXT/PHOTO
5SHT 1SET
3
A3
86%
0.0mm 0.0mm
PHOTO
0
0
0
0
>
>
>
>
>
>
>
>
>
>
Saving / Retrieving Settings