Adjusting the thread tensioning plate
Service Instructions 869-M PREMIUM - 00.0 - 07/2018 65
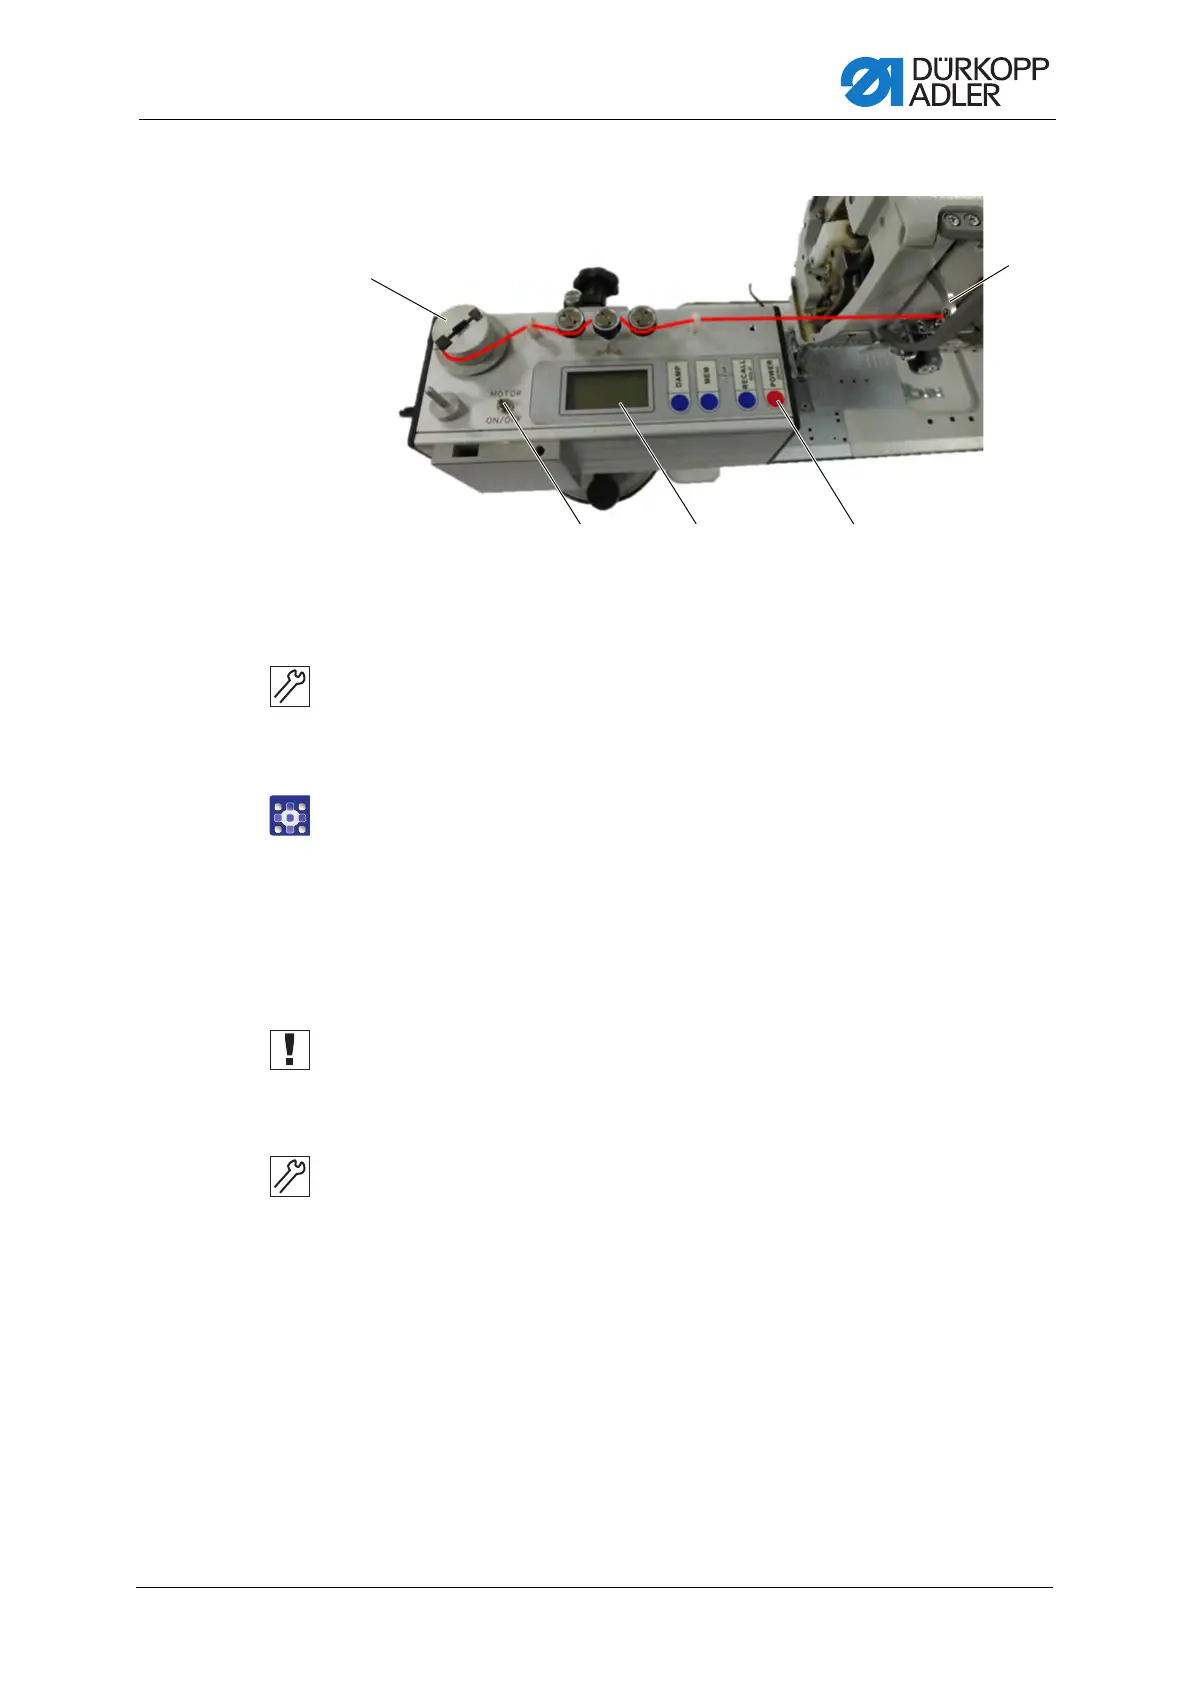
Fig. 51: Checking the adjusted thread tension (2)
2. Feed the needle thread through the thread lever (5) and the thread
guides of the thread scale and clamp it at the winder (1).
3. Press POWER (4) to activate the thread scale and the display (3).
4. Press Motor ON/OFF (2) to activate the motor of the thread scale.
5. Set the thread tension to level 1 (1%) at the control panel.
The thread scale should show a tension of 190±12 cN (average value).
6. Set the thread tension to level 2 (50%) at the control panel.
The thread scale should show a tension of 720±50 cN (average value).
7. Set the thread tension to level 3 (99%) at the control panel.
The thread scale should show a tension of 1600±100 cN (average
value).
Important
After completing the settings, you need to seal the magnets and the 4 nuts
that keep the magnets in place at the thread tensioning plate with sealing
wax (see figure 5).
8. Remove the locking peg from the machine.
9. Remove the needle thread from the thread scale.
10. Remove the thread scale.
11. Set the thread tension spring back to sewing operation (ccw,
Service Instructions, chapter Setting the thread tension spring).
12. Insert the needle thread.
13. Finish the service routine.
The machine is ready for sewing.
(1) - Winder
(2) - Motor ON/OFF
(3) - Display
(4) - POWER
(5) - Thread lever
 Loading...