Setting the safety snap-on coupling
Service Instructions 869-M PREMIUM - 00.0 - 07/2018 81
17.2 Setting the torque
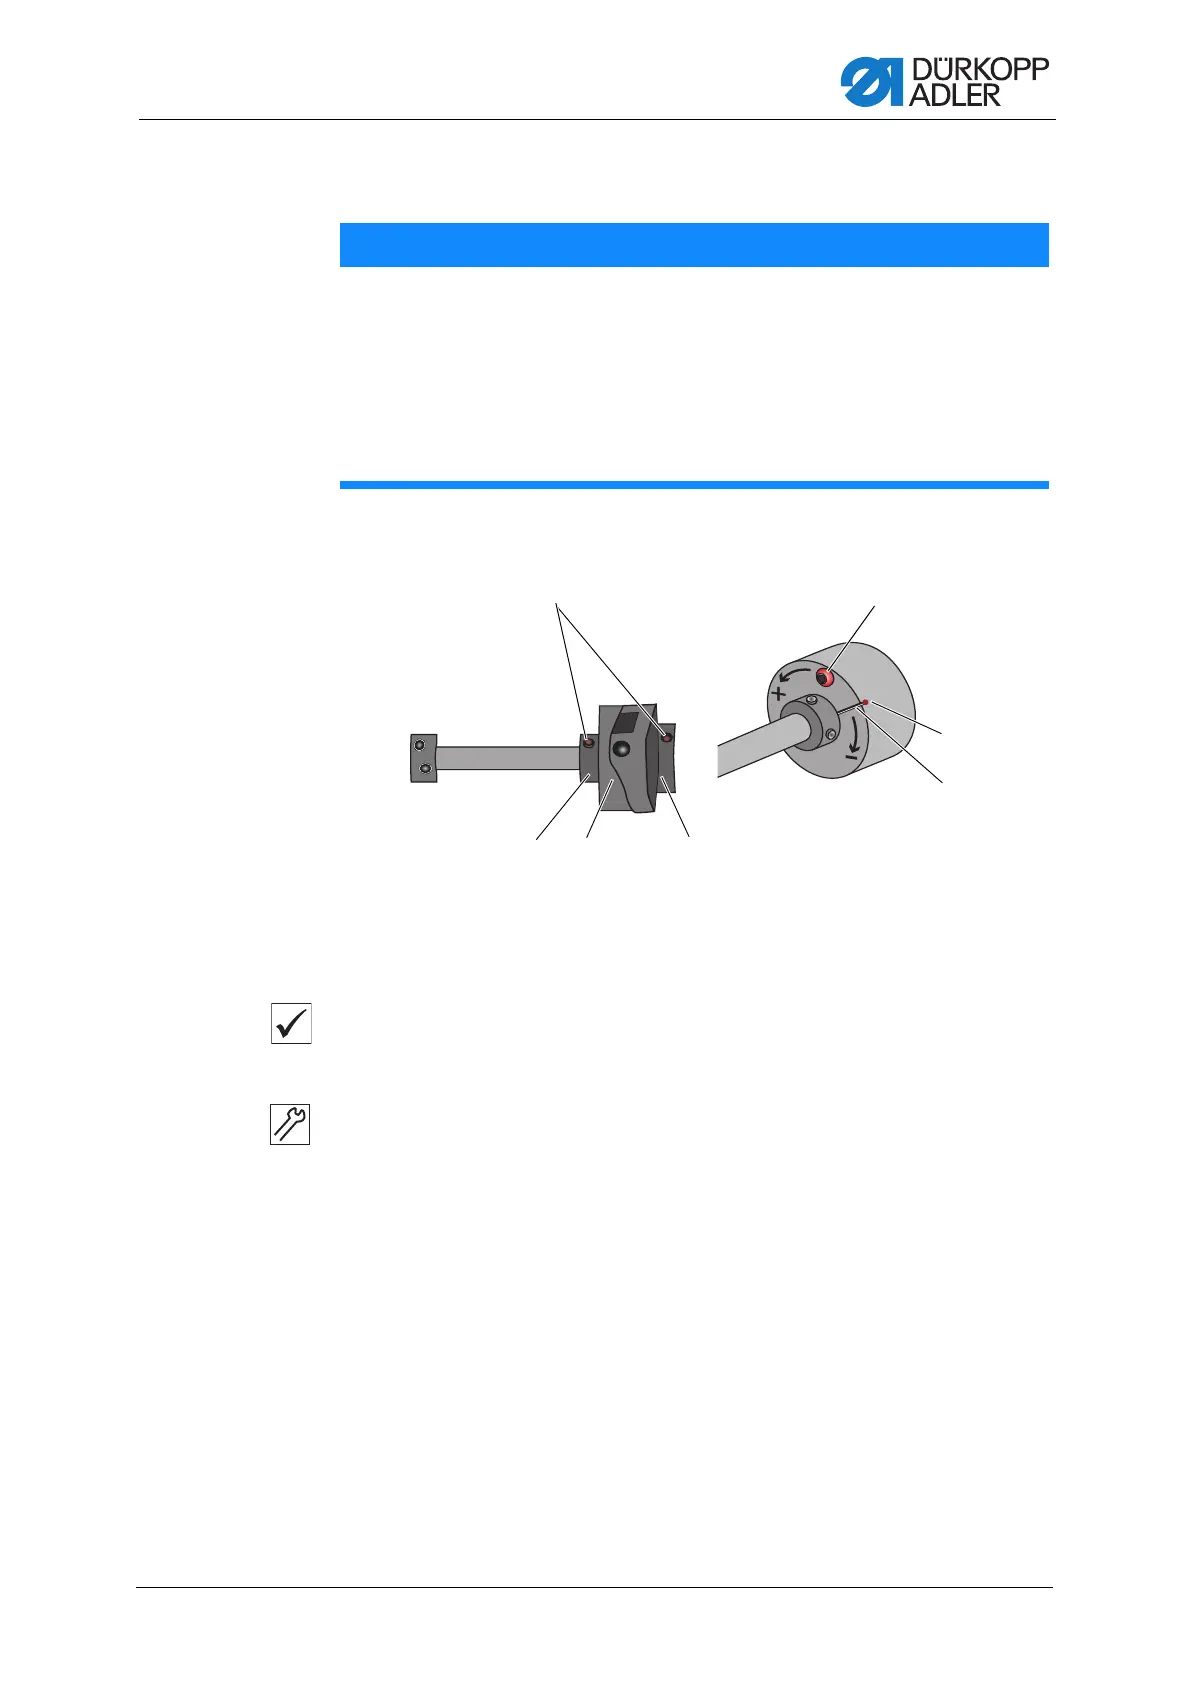
Fig. 67: Setting the torque
Proper setting
The machine is set at the factory so that the torque is 8 Nm when
the marking point (6) is exactly above the setting slot (5) of the disk.
To set the torque:
1. Tilt the machine head ( p. 17).
2. Loosen the screw (7).
3. Using the screwdriver, turn the disk on the setting slot (5) so that 8 Nm
is reached for the torque:
• Increase force: turn in the direction +
• Decrease force: turn in the direction -
4. Tighten the screw (7).
NOTICE
Property damage may occur!
If you change the torque, it could be that the coupling will not
disengage although this would be required.
This could cause machine damage, e.g. in the event of the thread
jamming.
Do NOT change the factory setting.
Make sure that the torque remains at 8 Nm.
(1) - Threaded pins
(2) - Left-hand adjusting ring
(3) - Safety snap-on coupling
(4) - Right-hand adjusting ring
(5) - Setting slot
(6) - Marking point
(7) - Screw
 Loading...