110
Storing Salvo Data to the Remote Control Unit (MFR-39RU/39RUA only)
Use a SALVO (RU STORE) button on the remote control panel as shown in the procedure
below.
(1) Assign a SALVO button on the remote control panel. Set the salvo for RU STORE.
► See section 5-4-3-12 “BTN ASSIGN.”
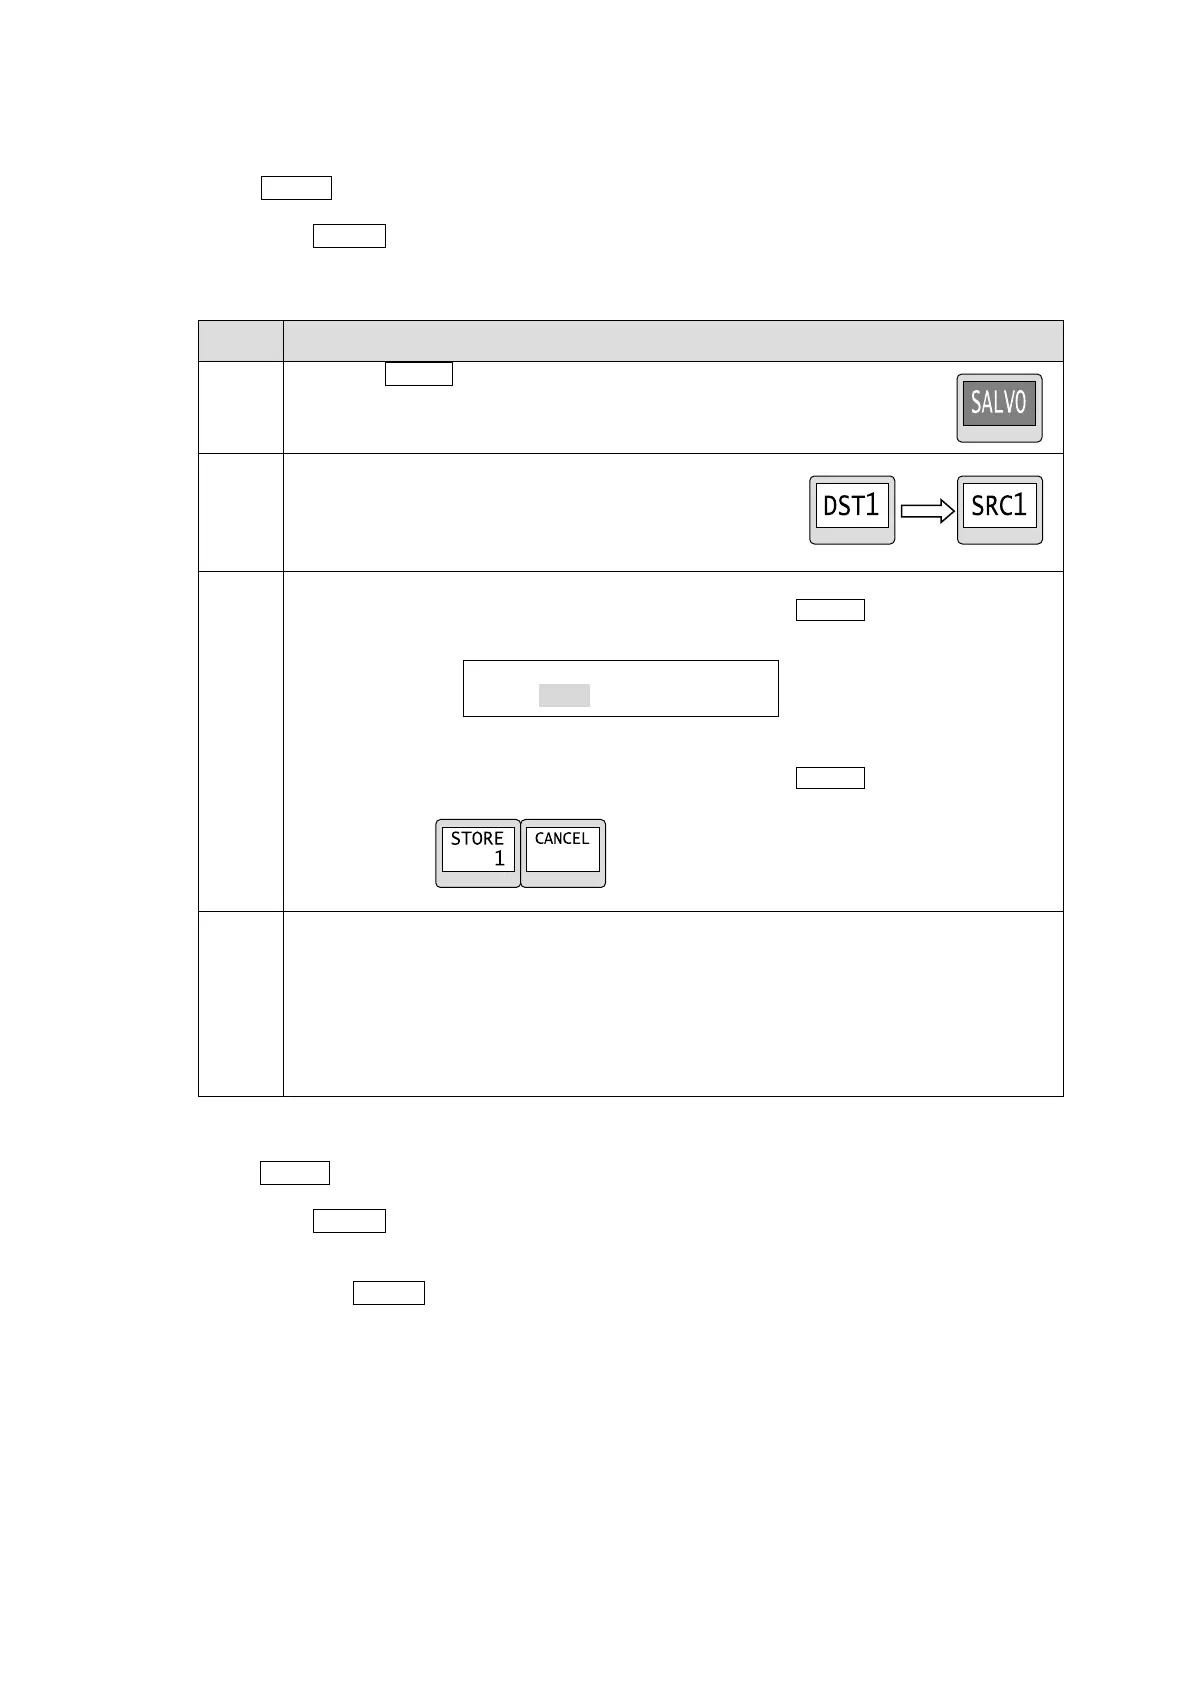
(2) Store salvo data as shown in the table below.
Press the SALVO button as shown below.
The button is highlighted and ready for
crosspoints to be assigned.
To assign crosspoints to a salvo, press
a destination button then a source button.
The selected buttons flash.
Repeat the procedure for all crosspoints.
MFR-39RU:
After completing the crosspoints assignments, press the SALVO button again.
The menu display appears as shown below.
MFR-39RUA:
After completing the crosspoints assignments, press the SALVO button again.
The Current DEST and SRC button displays change as shown below.
MFR-39RU:
To add crosspoints to an existing salvo, select a salvo number by turning the control
knob. Salvo numbers to which no crosspoints are assigned are indicated with (NEW).
Turn the control knob to select a number, and press the knob to confirm the selection.
MFR-39RUA:
Turn the control knob to select a number then press the control knob to confirm the
selection.
Executing Salvos
Use a SALVO (RU RECALL) button on the remote control panel as shown in the procedure
below.
(1) Assign a SALVO button on the remote control panel. Set the salvo for RU RECALL, and
select a Salvo number.
► See section 5-4-3-12 “BTN ASSIGN” and 5-5-2. "Button Assignment Change."
(2) Pressing the SALVO button to executes the salvo. The crosspoints stored to the salvo
number are simultaneously set.
SALVO STORE
NO: 1 (NEW) <ENT>

 Loading...