GE Healthcare Senographe DS
Revision 1 Service Information and Procedures Class A 2385072-16-8EN
Job Card D/R A228 - Rotation Motor
Page no. 1245 Chapter 9
JC-DR-A-228.fm
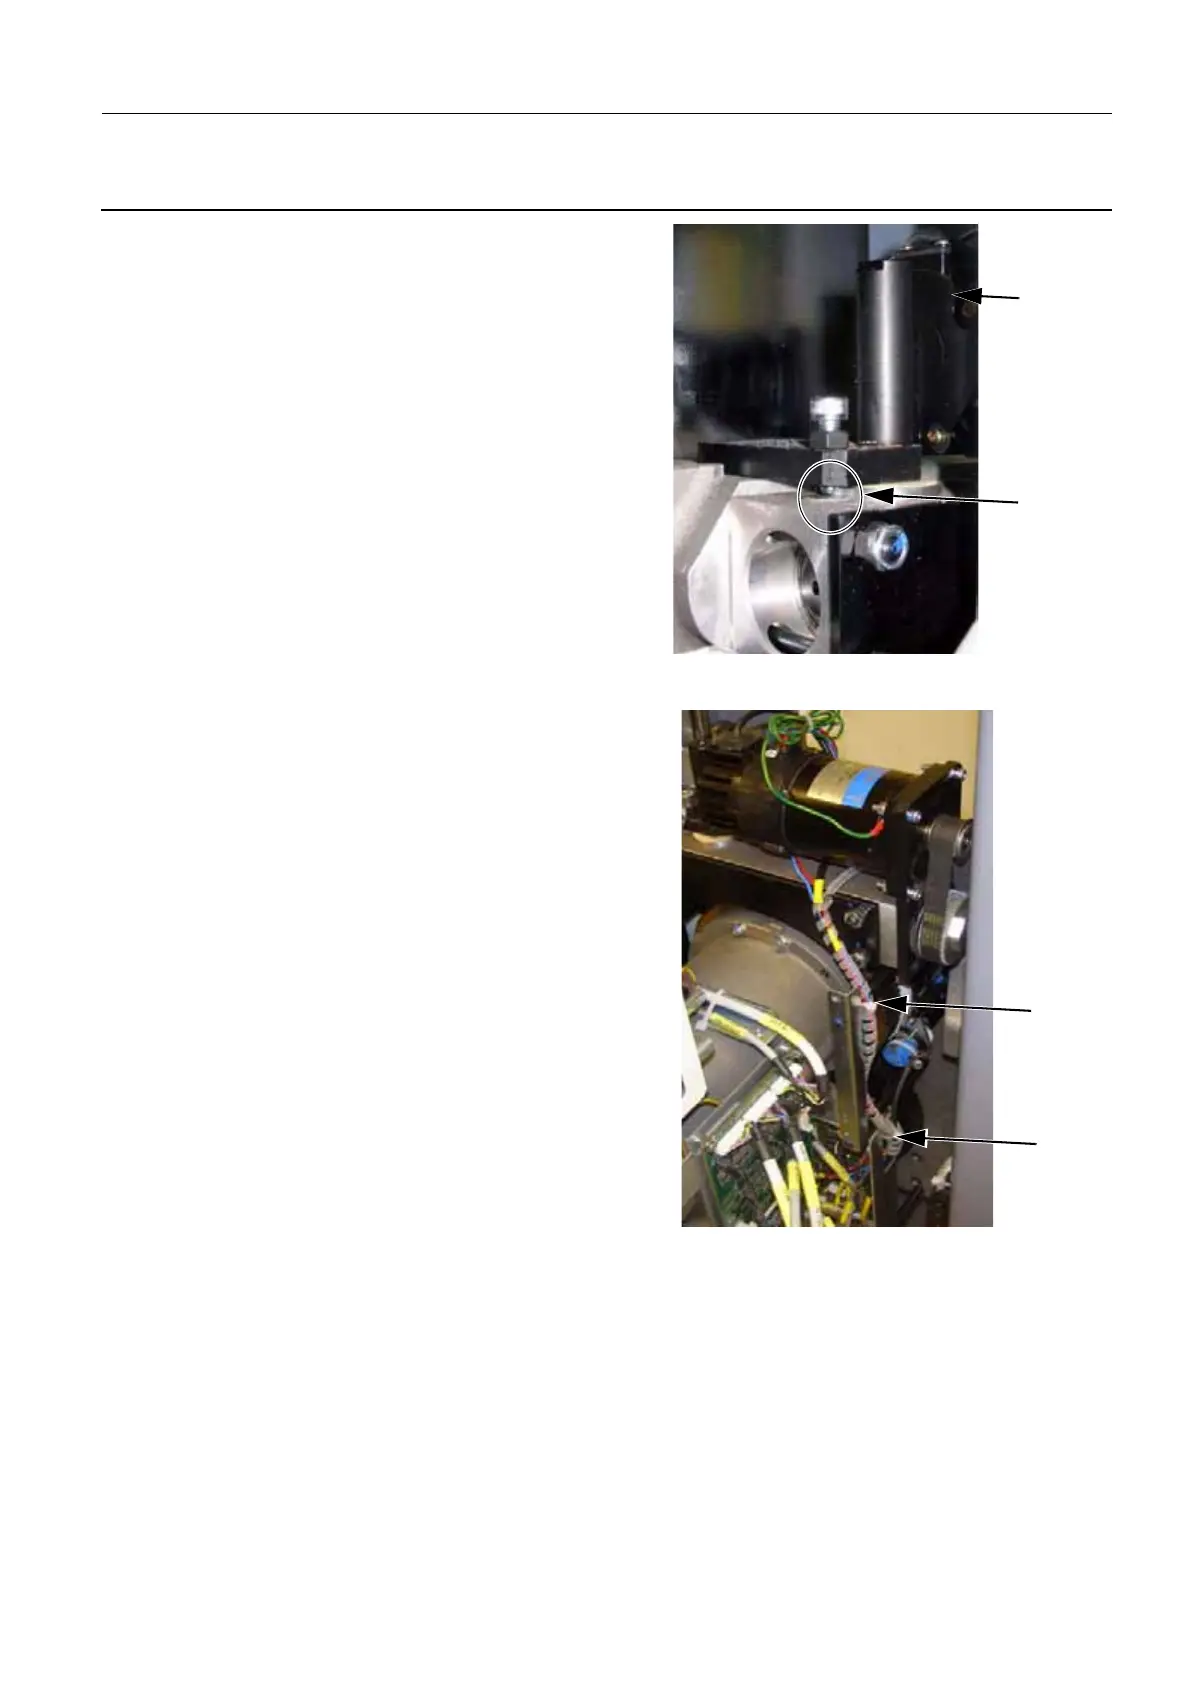
6-2 Reassembly of the Rotation Motor
Reverse the disassembly procedure.
Add the following step to the reassembly procedure:
• Apply blue Loctite to the threads of the motor
securing screws before tightening them.
• Ensure that there is a gap of 0.2 mm - 0.3 mm
as indicated in the illustration.
• The replacement Rotation Motor will have an
earth cable, so ensure you connect and route
the earth cable to the top right corner motor fix-
ing plate as shown above. When routing the
earth cable, make sure all excess cable is
secured using a cable tie so that the excess
cable cannot interact with other moving parts of
the Gantry.
• When routing the Motor cables W206 and
W205 to the Rotation Board (connector J10 and
J9), ensure that they are routed and secured
with cable ties as indicated in the illustration.
6-3 Check the Rotation Movement
1. Move the compression paddle out of compression. Then check that all four sets of arm left/right con-
trol buttons are operational (check each button for arm rotation movement).
2. Rotate the arm to its left and right limits. Software preset limits should stop movement (185° counter-
clockwise, 165° clockwise).
7 COMPLETION
None
Motor
Gap
Cable
Tie
Tie
Cable

 Loading...


