GE Healthcare Senographe DS
Revision 1 Service Information and Procedures Class A 2385072-16-8EN
Job card D/R A258 - Bucky Board
Page no. 1347 Chapter 9
JC-DR-A-258.fm
Job card D/R A258 - Bucky Board Chapter 9
1SUPPLIES
Bucky Board
2TOOLS
Standard Tool Box
3 REQUIRED EFFORT
Personnel: 1 Field Engineer
Time: 20 minutes
4 SAFETY PRECAUTIONS
Not applicable
5 PREREQUISITES
None
6 PROCEDURE
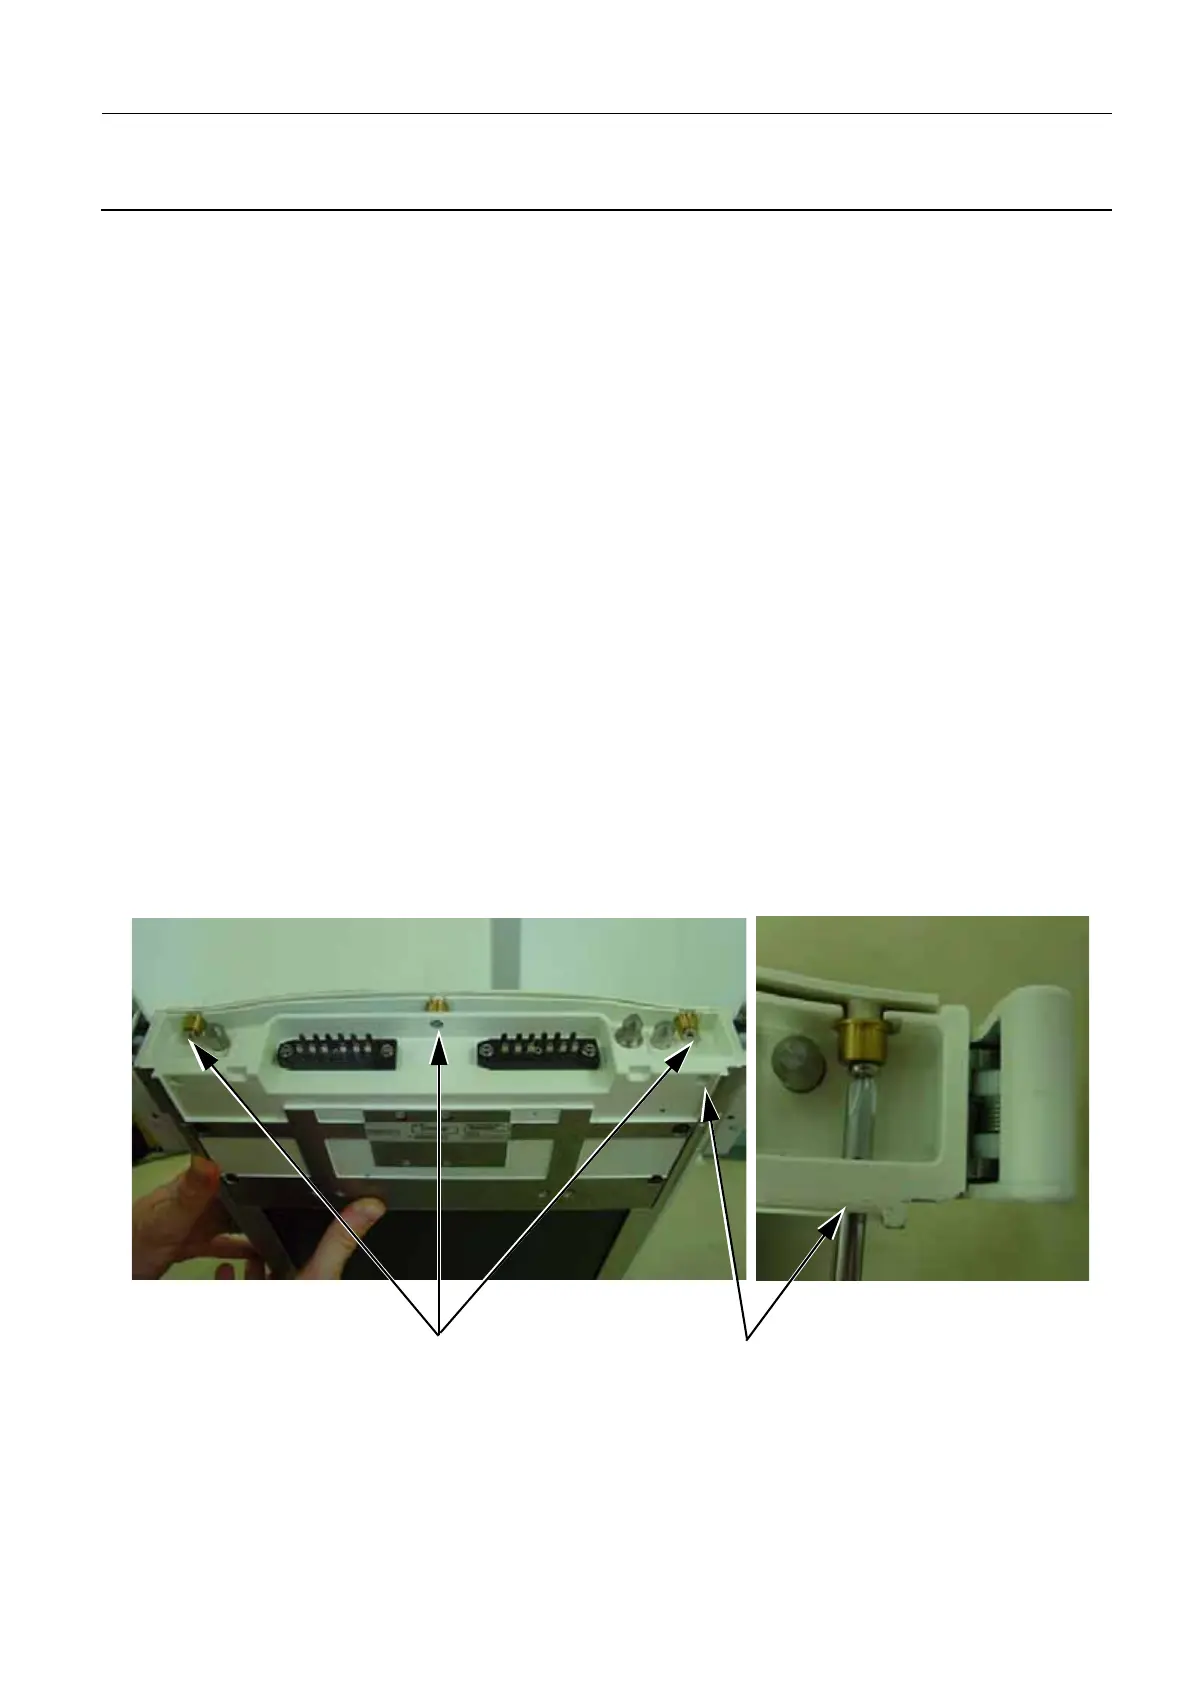
6-1 Disassembly of the Bucky Top Cover
1. Remove the three screws and brass blocks (1) (cross-head screwdriver) which secure the top cover
to the Bucky. Ensure that you access the two side screws by the hole (2) in the Bucky framework.
Note:
The Bucky illustrated has three brass blocks. Earlier versions of the bucky may miss the central
brass block, which is replaced by a brass washer.
1 2

 Loading...


