Chapter 9 Page no. 1550
JC-DR-A-402.fm
GE Healthcare Senographe DS
Revision 1 Service Information and Procedures Class A 2385072-16-8EN
Job Card D/R A402 - Generator CPU Battery
6-1 Removal of Generator CPU Battery and Installation of New Battery
1. Back up the system configuration to the AWS disk. See Job Card ELE A052 - Back-up/Restore Pro-
cedure on page 771.
2. Switch off the electrical power supply from the Mains Distribution Panel in the room. Apply an appro-
priate LOTO padlock and label. Wait 10 minutes for the components within the Generator to dis-
charge.
3. Remove the generator front panel (CPU side) Job
Card PHY A042 - Remove/Reinstall Generator Cov-
ers on page 513.
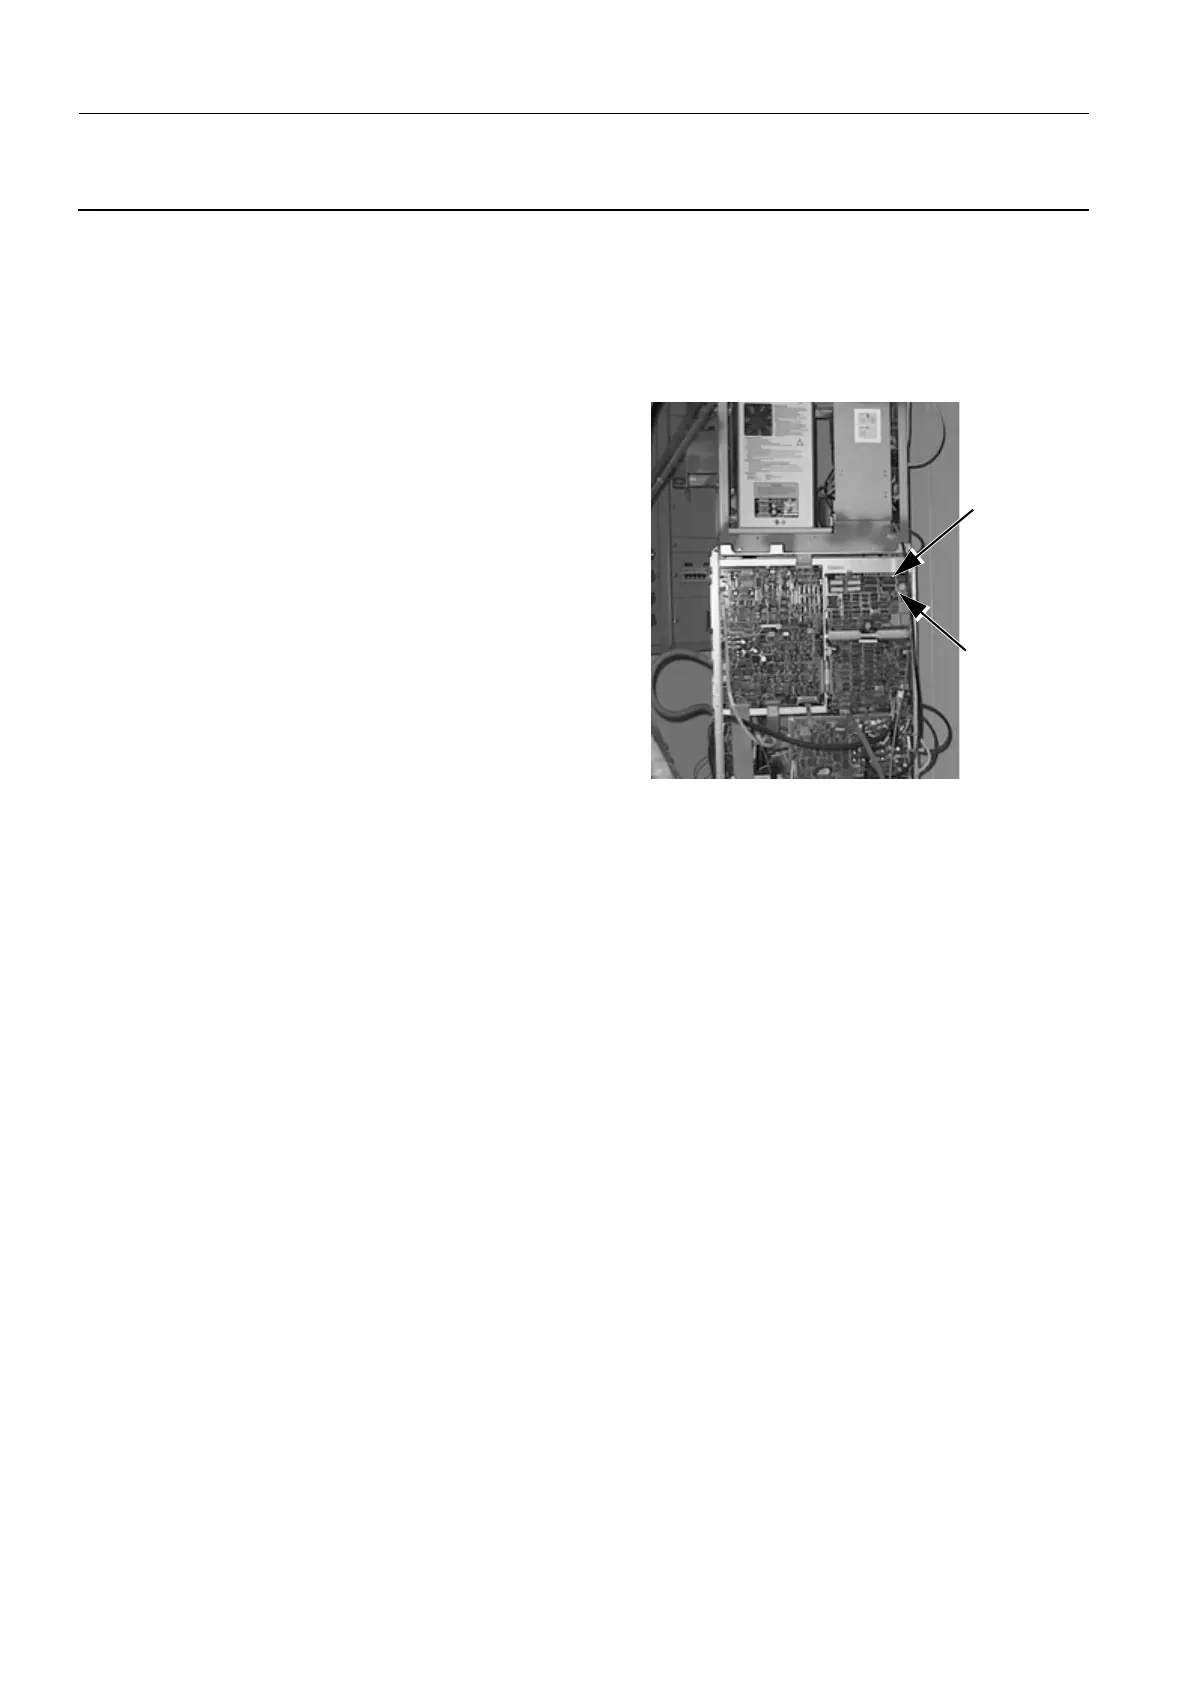
4. Pull generator CPU board 400PL3 gently forward and
remove it.
5. Solder the new lithium battery in the free position
(BT1 or BT2), respecting the polarities.
6. Unsolder the old battery.
7. Reinstall generator CPU board 400PL3 in its position
in the generator.
8. Reinstall the generator front panel (CPU side).
6-2 Functional Check
1. Switch on the Senographe electrical power.
2. Check that the message: SAVED MEMORY ERROR 071/08 is not displayed after initialization.
3. If the above message appears, restore the Generator parameters from the system backup located on
the AWS disk (see Job Card ELE A052 - Back-up/Restore Procedure on page 771).
400-PL3
Generator
CPU
board
Generator
Lithium
CPU
Battery

 Loading...


