Chapter 11 Page no. 1792
JC-PM-A-255.fm
GE Healthcare Senographe DS
Revision 1 Service Information and Procedures Class A 2385072-16-8EN
Job Card PM A255 - Collimator and Tube Head Cleaning
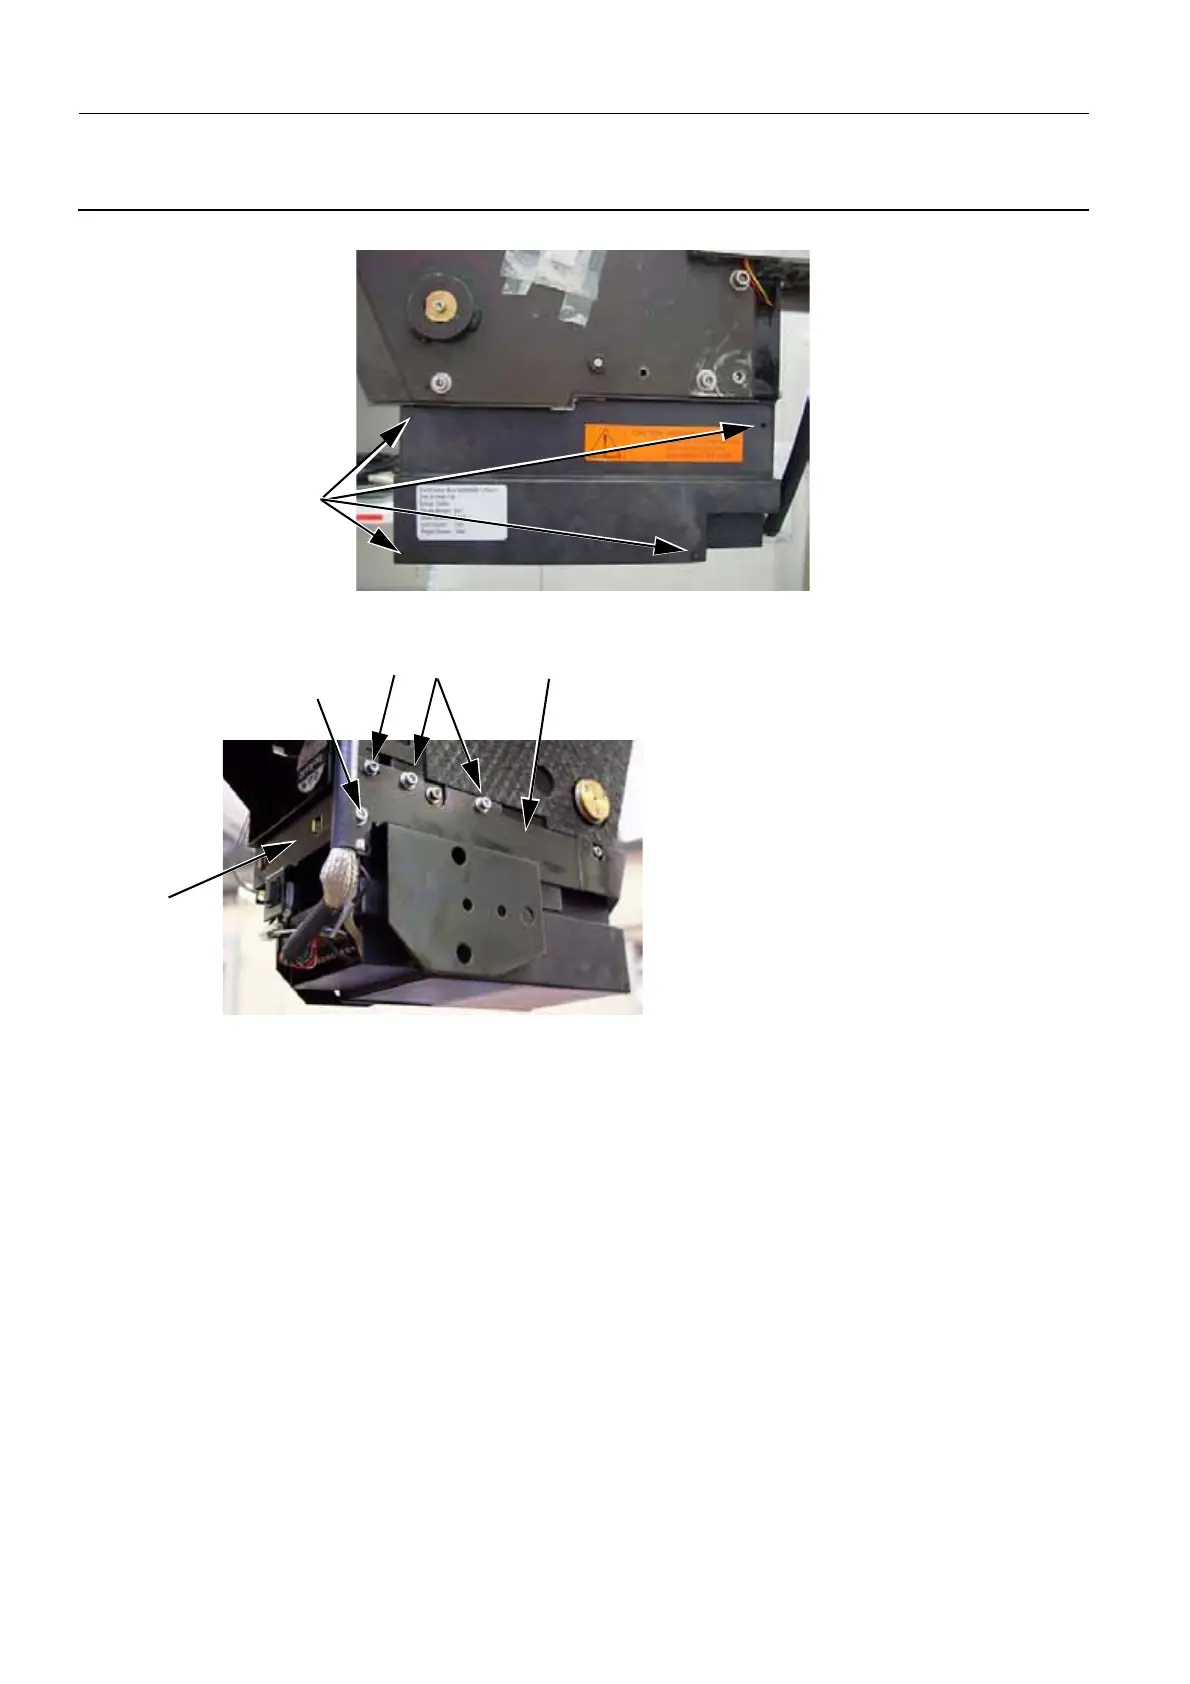
12. Reinstall the cleaned left collimator cover with the small screws (10) (small Pozi screwdriver).
13. Reinstall the X-ray containment box. If necessary, first put back the two screws (11) to secure the fan
protection box.
14. Reinstall the X-ray containment box (12) with the four screws (13, two each side).
15. Reinstall the plate and FOV button (14) on the X-ray head support arm with the two screws (15, one
each side) (4 mm allen wrench).
16. Check visually that all screws securing the Collimator are well mounted.
7 COMPLETION
1. Power up the Senographe system.
2. Perform a Flat Field test using a Flat Field Phantom.
3. Determine your next step:
• If the Flat Field test passes, switch off the Gantry power and replace the tube covers (refer to Job
Card PHY A044 - Remove/Reinstall Gantry Covers on page 523).
• If the Flat Field test fails and there are artifacts in the ROI, switch off the Gantry power and return
to section 6-2, Clean Collimator on page 1789.
Note:
If the Collimator and or Interface Plate moved while cleaning the Collimator, then perform a com-
plete set of calibrations according to Completion on page 1373 in Job Card D/R A280 - Collimator
Set.
9
11
13
12
15
14

 Loading...


