Chapter 6 Page no. 424
JC-PHY-A-009.fm
GE Healthcare Senographe DS
Revision 1 Service Information and Procedures Class A 2385072-16-8EN
Job Card PHY A009 - Opposite Side Rotative Arm Installation
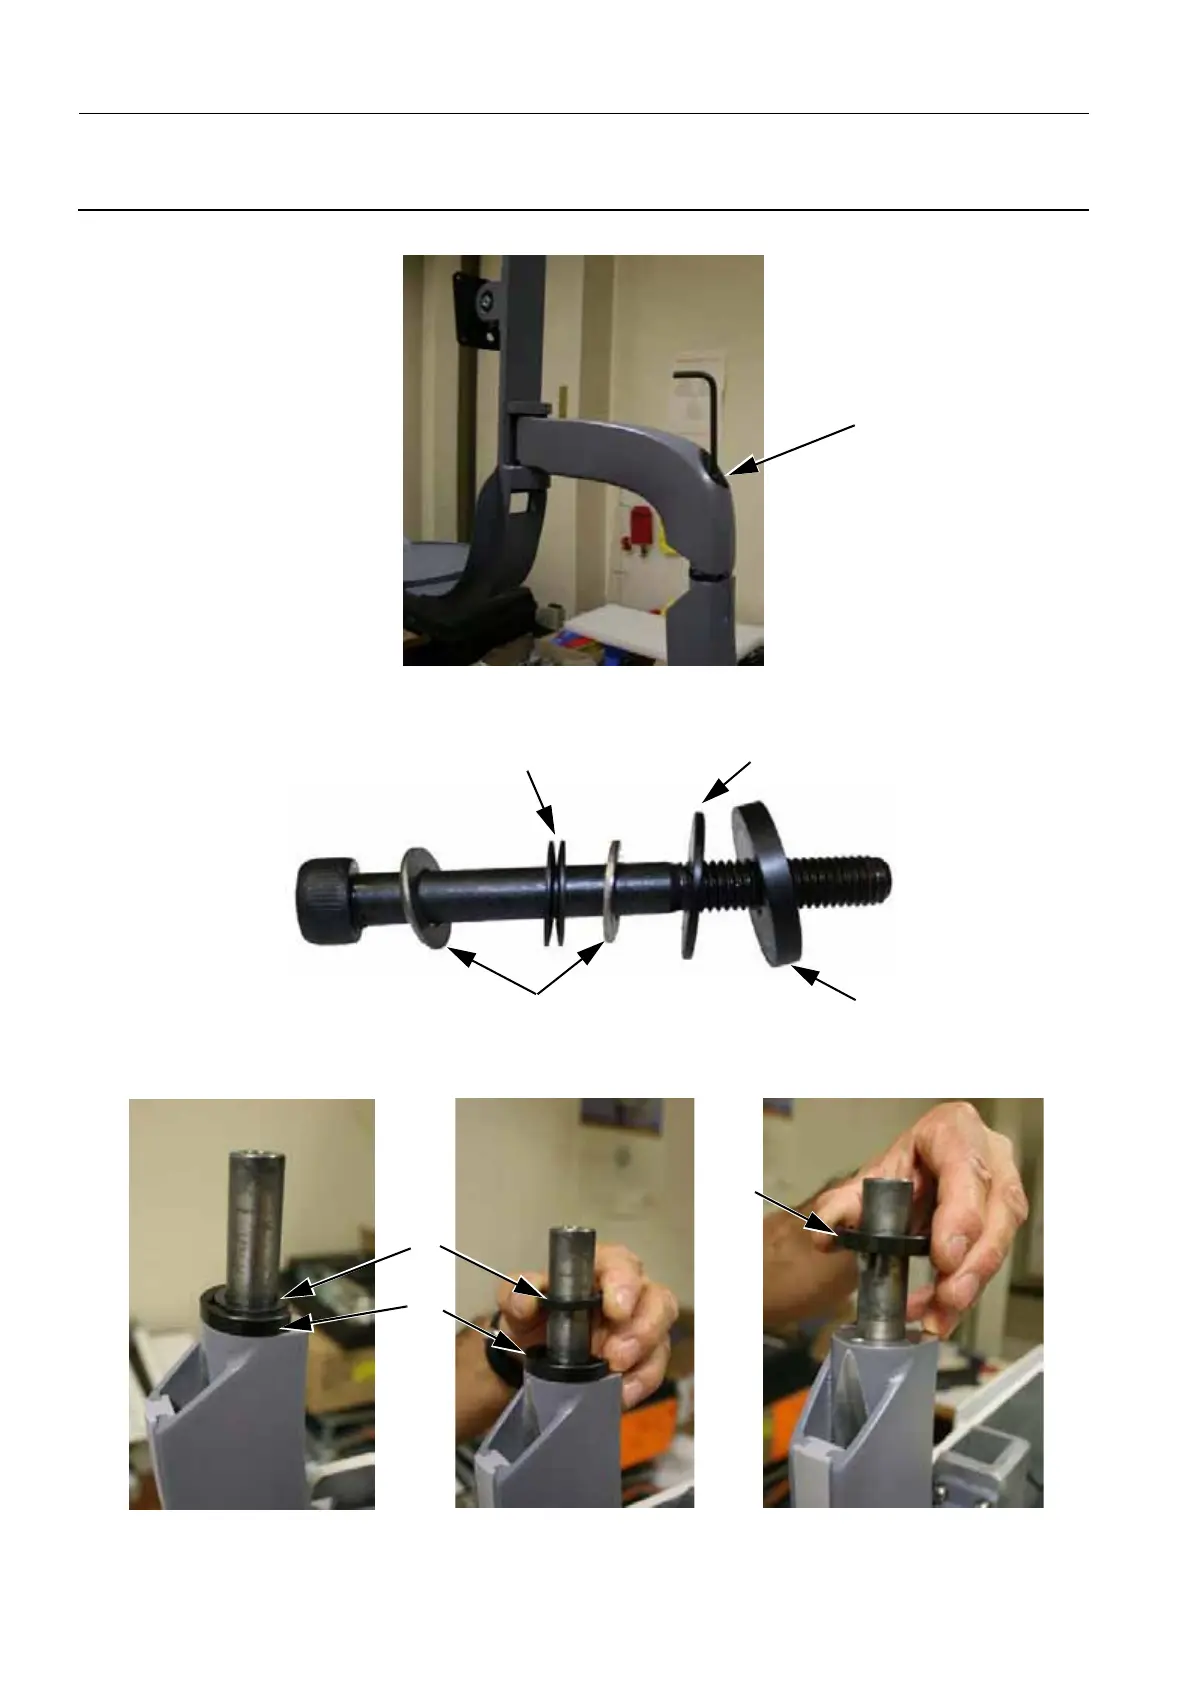
15. Remove the large allen screw (20) from the joint of the rotative arm (6 mm allen wrench).
16. Place the large allen screw and its washers in a clean place. Ensure that the washers on the large
allen screw are positioned as indicated below.
17. Remove the black plastic washer (21) and keep it close by as you will reinstall it with the left stop
bracket.
20
Large Black Washer
Medium Black Washer
Small Silver Washers
Small Black Washers Bending Away From Each Other
21
22
22

 Loading...


