GE Healthcare Senographe DS
Revision 1 Service Information and Procedures Class A 2385072-16-8EN
Job Card PHY A011 - Trackball Option Installation
Page no. 447 Chapter 6
JC-PHY-A-011.fm
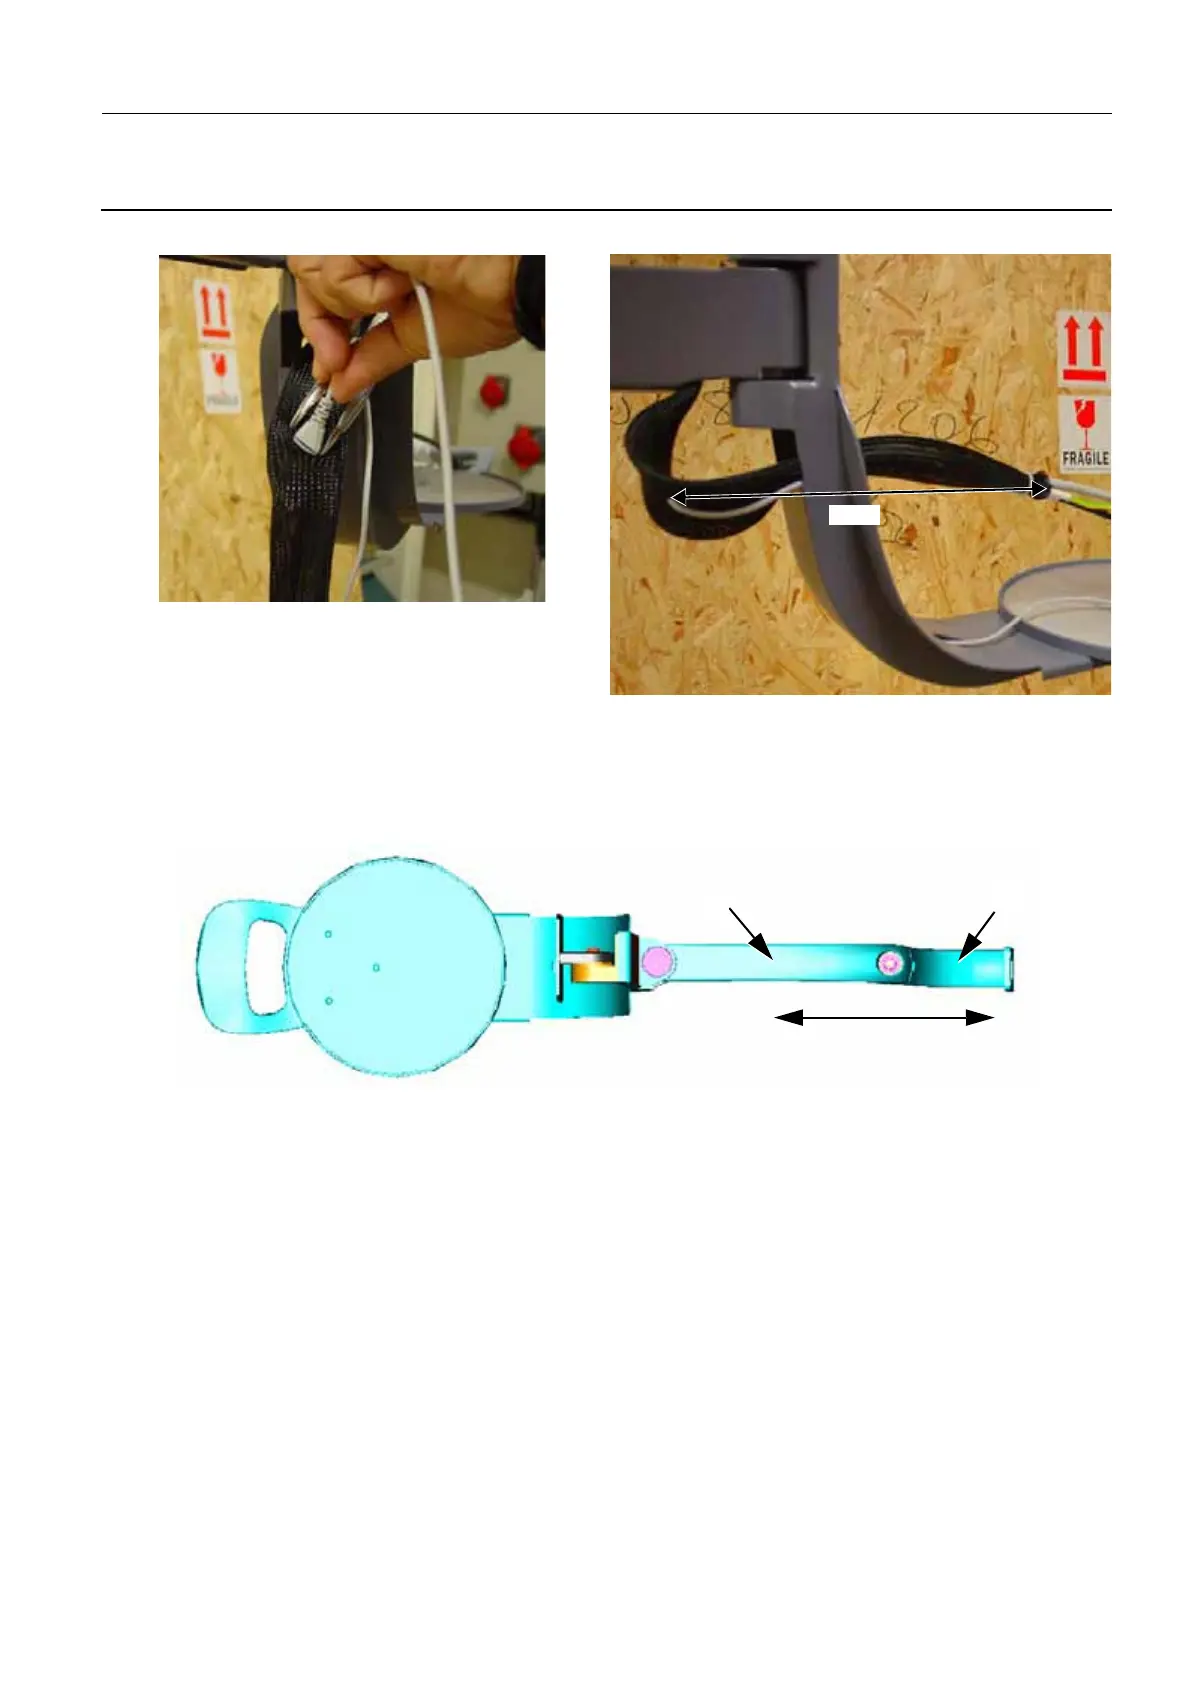
14. Use pointed nose pliers to create an opening in the harness at 27 cm from the end of the harness.
15. Route the trackball cable through the opening in the harness, so that it leaves the other end of the
harness. Then route the track cable through the rotative arm support entrance into the Control Sta-
tion.
16. Ensure that the rotative arm (15) and rotative arm support (16) are aligned in the same plane. Care-
fully put the harness inside the rotative arm and rotative arm support.
17. Insert the upper silicone mask (shorter of the two) (17) into the rotative arm. The rounded edge of the
27 cm
16
15
Aligned in the same plane.

 Loading...


