GE Healthcare Senographe DS
Revision 1 Service Information and Procedures Class A 2385072-16-8EN
Job Card ELE A060 - Image Receptor Installation
Page no. 783 Chapter 7
JC-ELE-A-060.fm
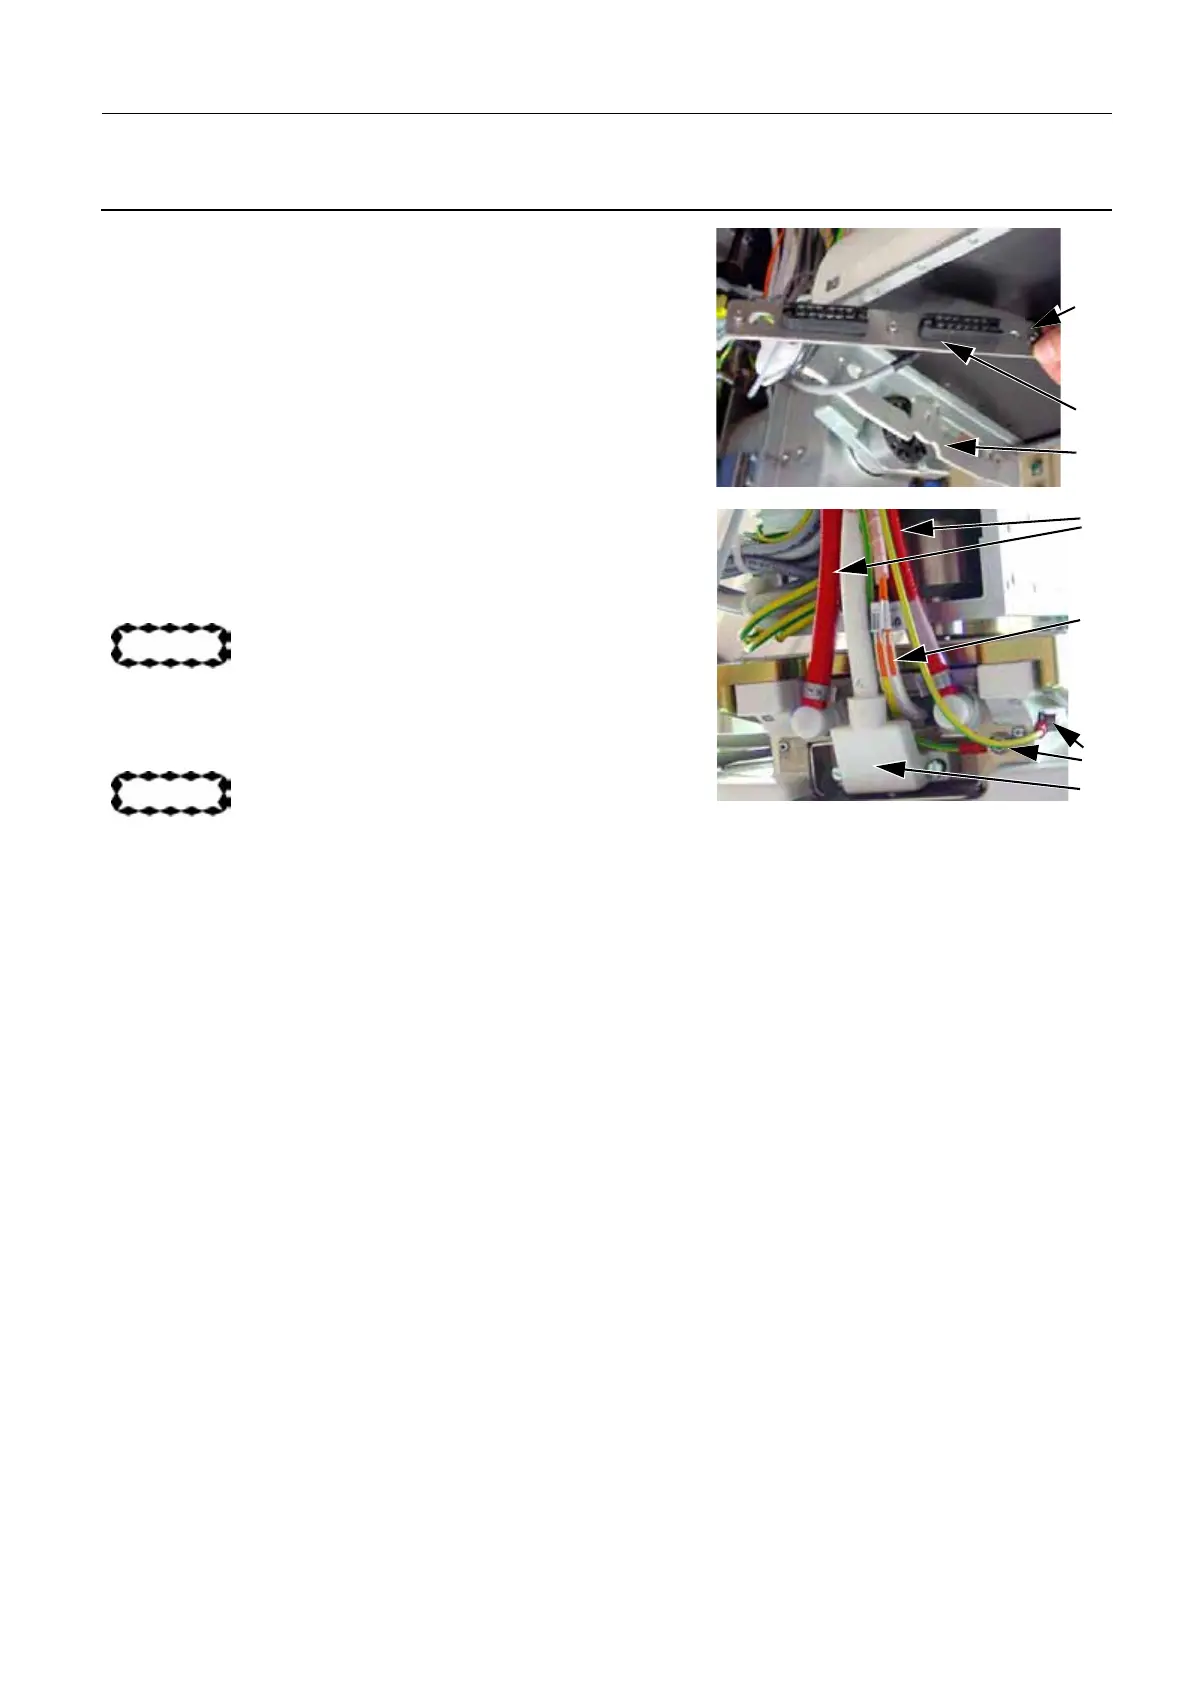
5. Fit, but do not tighten, the three screws (2) which secure
the Bucky interconnection plate (3) to the rear wall plate
(4) of the Digital Detector support (3 mm allen wrench).
6. Install temporarily, one after the other, the Bucky, Mag
Stand (1,5 and 1,8) and the Stereotactic positioner (if
present), to check that they fit. Make any necessary
adjustments and tighten the three screws (2).
7. Connect the front connector (5) and secure it using its two
screws (flat screwdriver).
8. Connect the fiber-optic cables to their connectors (6) on
the Digital Detector connector panel.
CAUTION
Do not apply force to fiber cables; take care not to
bend them excessively.
9. Connect the coolant supply pipes (7).
CAUTION
Be careful to avoid spillage of coolant, especially
onto or near electrical connections. If any coolant
is spilled, it must be cleaned up immediately.
10. Tighten the nuts (8) securing the ground cables (7 mm
open ended wrench).
11. Insert the two white caps.
6-3 Installation of Bucky
• Insert the Bucky.
• Close the two latches, one each side of the Bucky.
2
3
4
6
7
5
8

 Loading...


