6.3 Measurement examples
88
Enclosure - Line measurement*
*
only when selecting a network other than B1 or B2
1. Connect the instrument and the equipment under test.
See "3.3 Connecting equipment under test to the instrument" (p. 36)
2. Connect a test lead to terminal T2.
3. Position the tip of the test lead on the enclosure of the equipment under test.
4. During manual measurement, is available upon return to the measurement screen. Press
to start touch current (enclosure - line) measurement.
Press to terminate output of high voltage.
During automatic measurements, becomes available upon return to the measurement
screen. Press to start touch current (enclosure - line) measurement.
Only is available during automatic measurements.
• Note that when is pressed in automatic measurement mode, the
instrument generates high voltage without displayed on the screen.
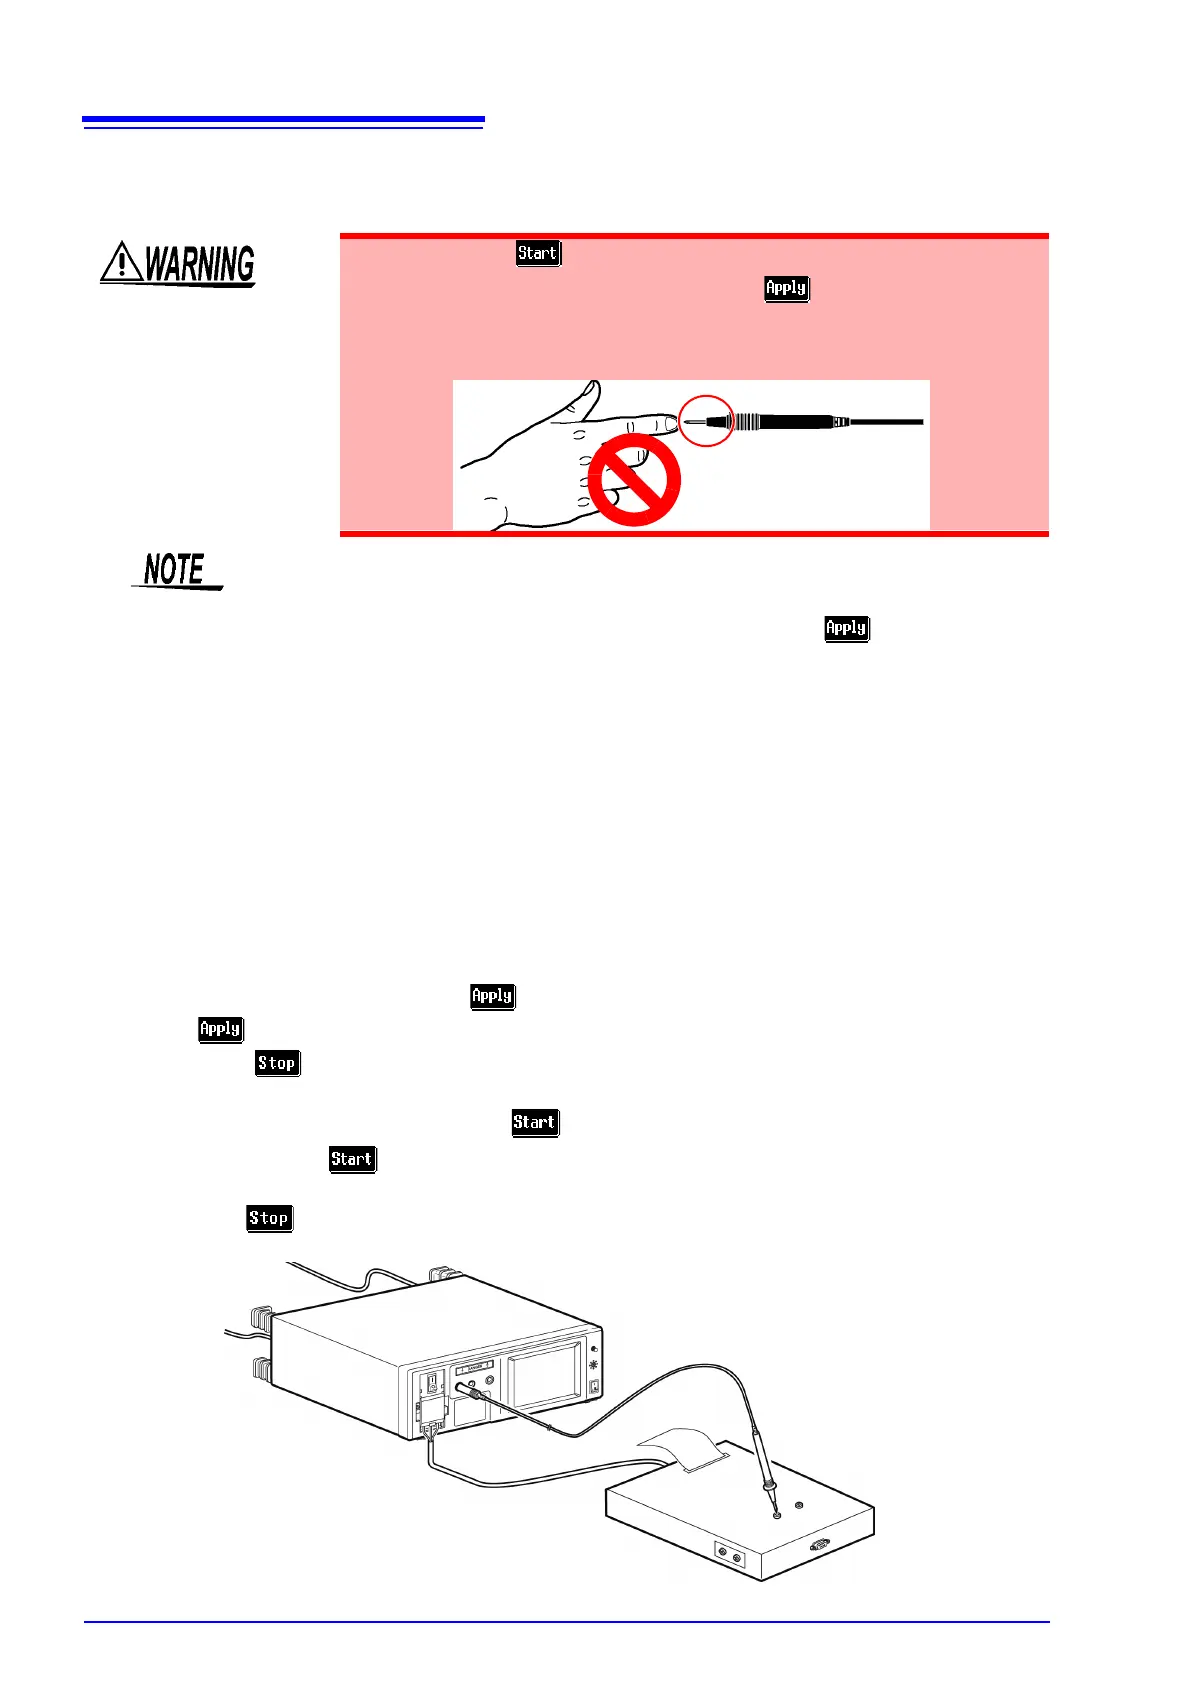
• To avoid the risk of electric shock when a test lead is connected to the T2
terminal, do not touch the part of the test lead that is beyond the finger
barrier. The T2 terminal outputs high voltages.
Do not touch any part of
the test lead beyond the
finger barrier
• Conduct leakage current measurement between enclosure and enclosure
using two ungrounded locations on the enclosure.
• A pre-check is made to prevent a ground fault when is pressed.
Measurement ends if the check determines a ground fault has occurred.
• If the probe is brought into contact with protective ground after the pre-check,
a ground fault will occur and the measurement fuse is blown.
• When the protective grounding wire is disconnected (single fault), a protec-
tively earthed enclosure is handled as a non-protectively earthed enclosure.
1
2
3
4
Terminal T2 and enclosure