4–4 Replacing drives
Hitachi Unified Storage Hardware Service Guide
Drive-replacement instructions
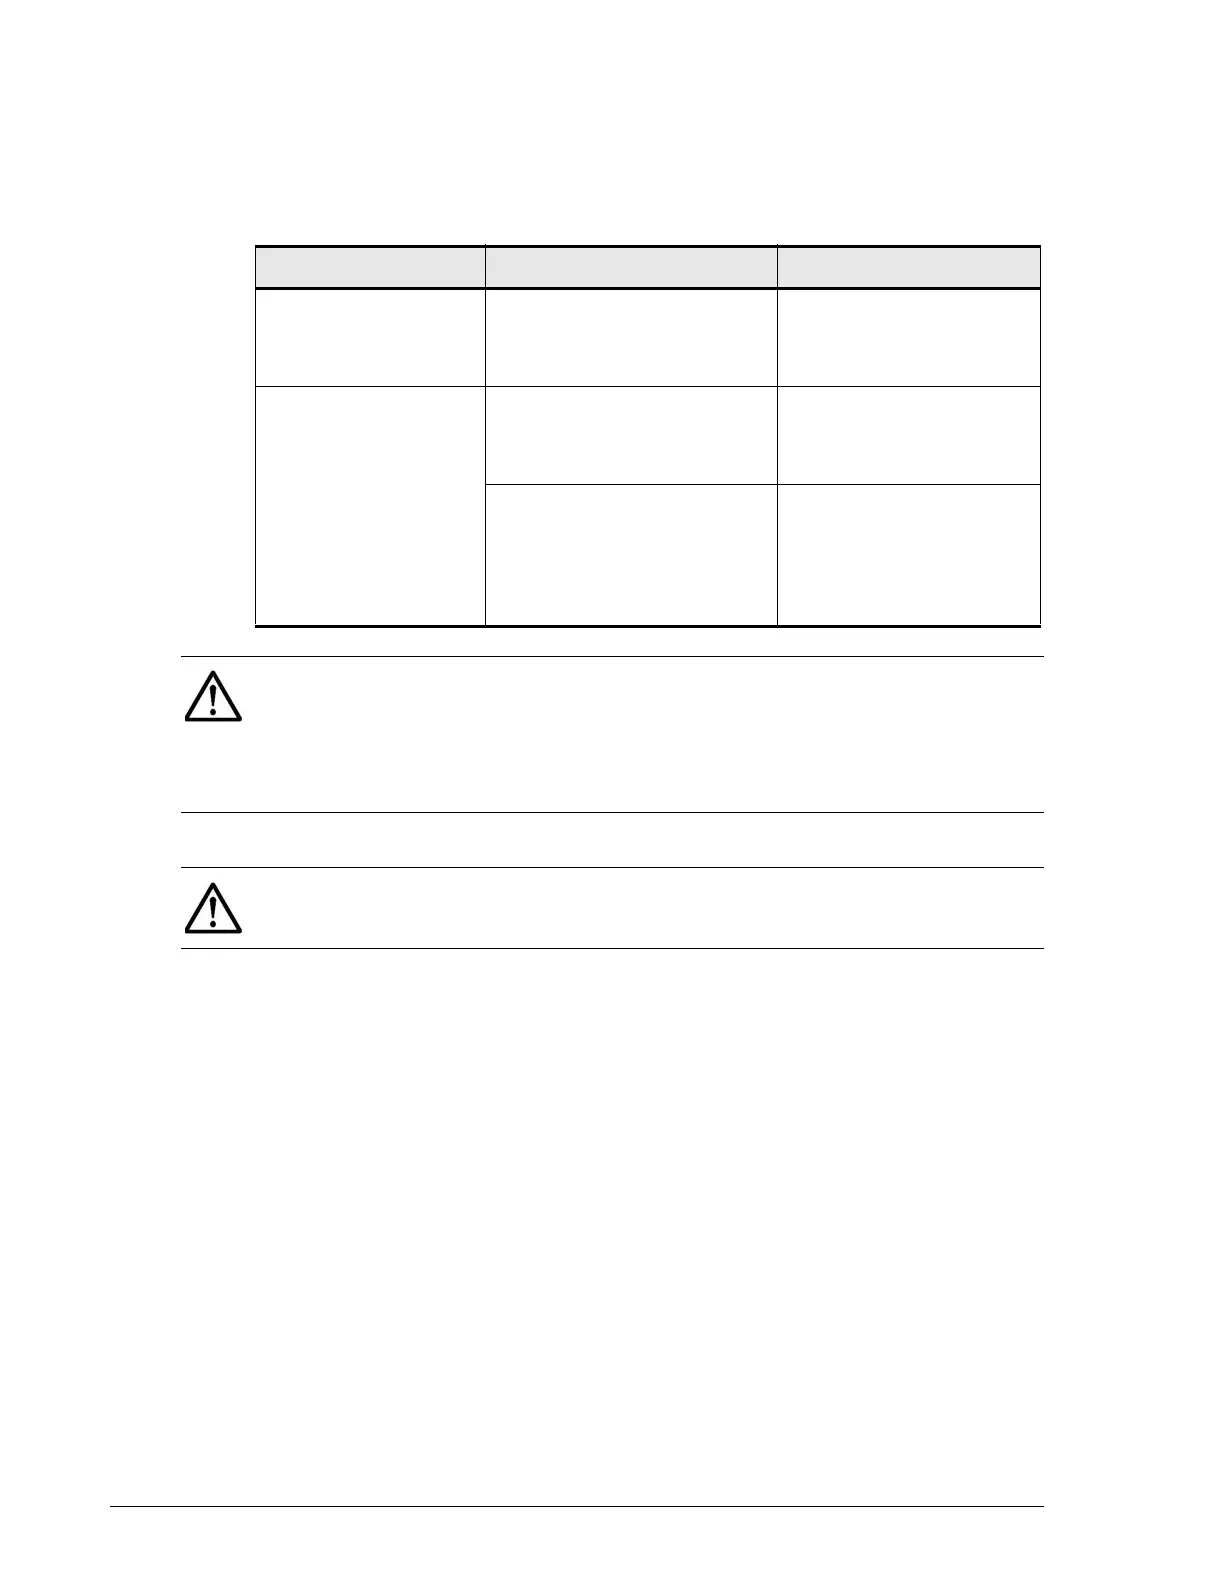
See Table 4-1 to find the appropriate instructions for replacing drives:
Table 4-1: Drive-replacement instructions
If the Spare Drive... And the RAID Level is... Perform This Step...
Is set RAID 0 (see Note 1 below),
RAID 1, RAID 5, RAID 6, and
RAID 1+0
If the red ALM LED on the
drive to be replaced is
ON, see Spare drive is set
on page 4-5.
Is not set or there is
no spare drive that
can be used
RAID 0 (see Note 2 below) Replacement of drive
under Replacing a drive in
a RAID 0 configuration on
page 4-8.
RAID 1, RAID 5, RAID 6, and
RAID 1+0
If the red
ALM LED on the
drive to be replaced is
ON, see Spare drive is not
set or there is no spare
drive that can be used on
page 4-6.
NOTE 1: You can replace the drive using the procedure under Spare drive
is set on page 4-5 for RAID 0 configurations that use a spare drive only
when data migration to the spare drive completes successfully using
dynamic sparing. If data migration to the spare drive fails, replace the drive
using the procedure described in Spare drive is not set or there is no spare
drive that can be used on page 4-6.
NOTE 2: Back up user data before replacing a drive in a RAID 0
configuration. When the RAID group and volume are deleted or formatted,
user data will be deleted.