Replacing drives 4–5
Hitachi Unified Storage Hardware Service Guide
Spare drive is set
If the red ALM LED on the drive to be replaced is ON, perform the procedure
in Figure 4-4. If two or more drives need to be replaced, including data
spare drive, replace from the data drives. If two or more data and/or spare
drives need to be replaced, replace the data drives first.
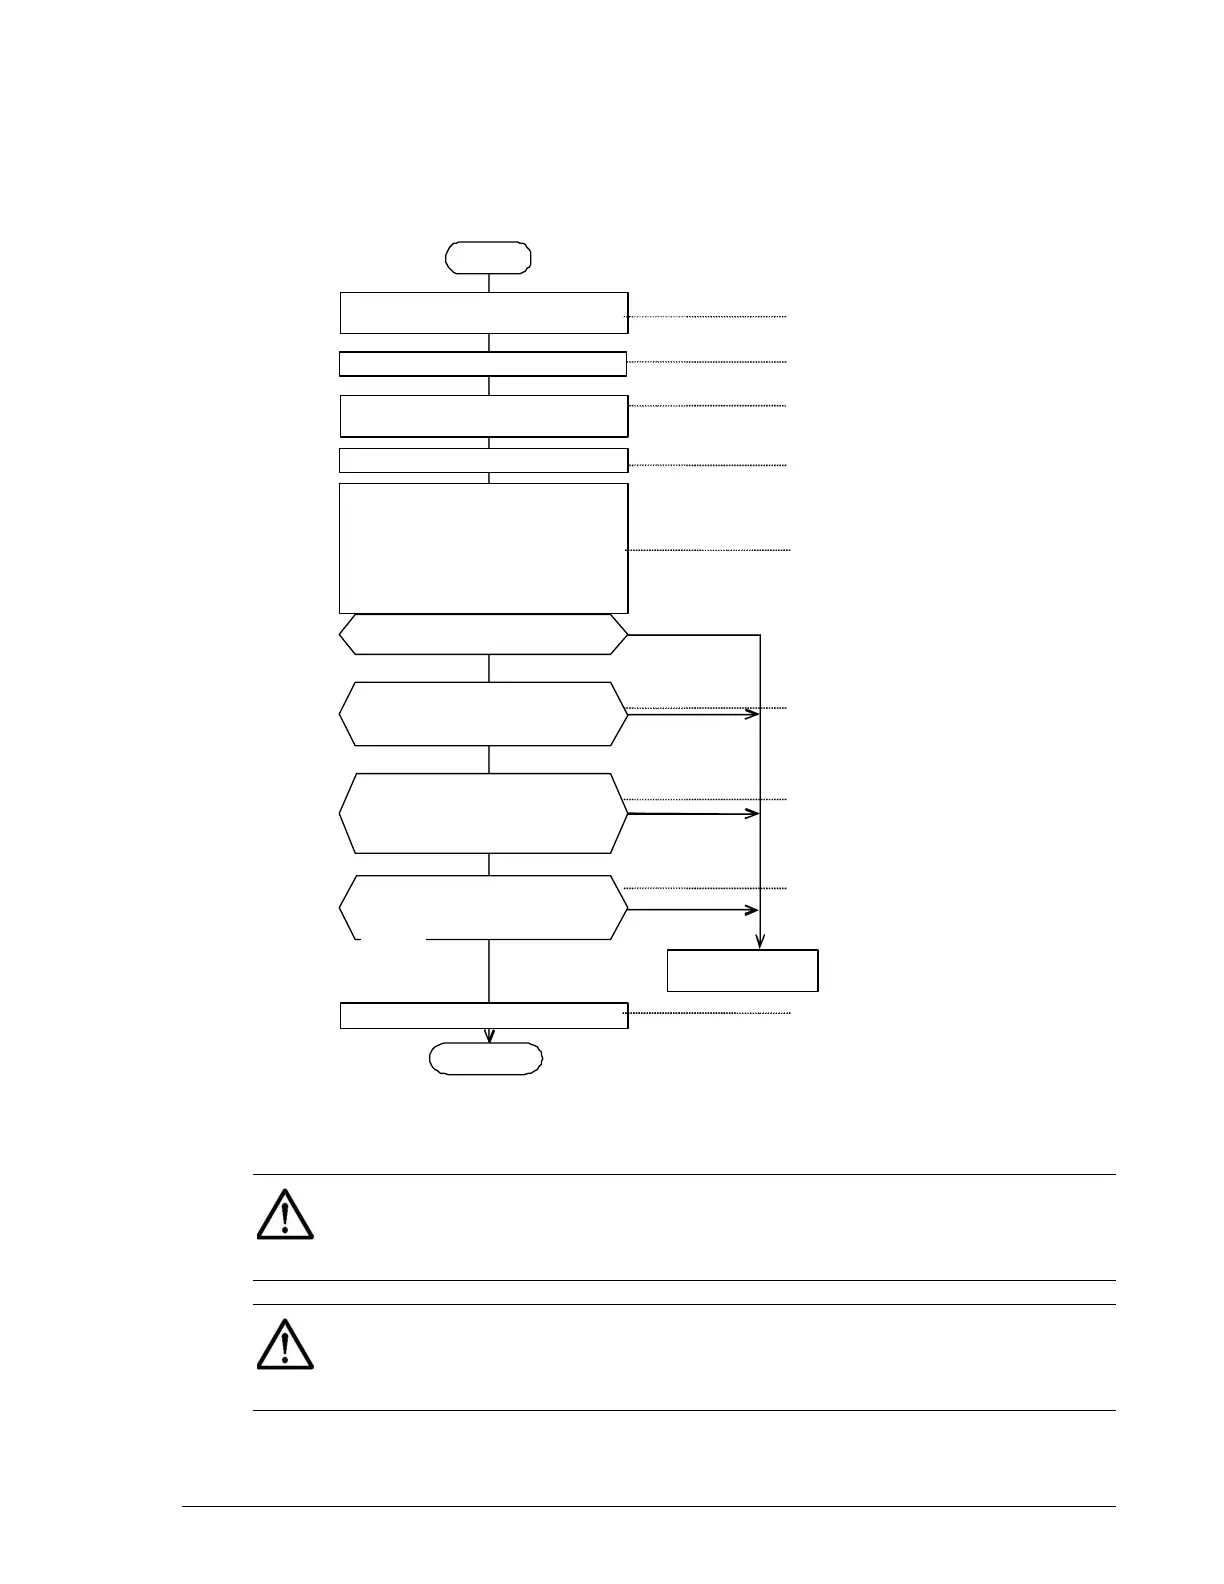
Figure 4-4: Drive replacement flowchart
START
Remo
e the front bezel.
Note 1
Install the new drive
Wait more than 20 seconds, and then
insert the replacement drive. If the
drive is inserted without waiting for 20
seconds, it is possible that the drive is
not recovered from the failure
normall
.
Removin
the Drive.
No
center.
Confirm the HSNM2 screen.
Have pertinent parts recovered?
Does the red ALM LED of the
replaced drive go OFF?
Yes
Attac
the front bezel.
END
Does the WARNING LED (orange)
on the front of the Controller box
li
ht out? Note 1
Does the orange READY LED on
the front of the Controller Box
go ON? Note 2
Be sure the red ALM LED on the drive
to install is ON.
Collect the trace. Store the trace
information on the CD-R.
No
No
No
Yes
Yes
Yes
See Collecting trace
information on page 3-13
See Removing and
replacing the front bezel on
See Locating drives on page
4-3
See Drive-replacement
instructions on page 4-4
See Drive-replacement
instructions on page 4-4
See Checking recovery after
replacing components on
page 3-14
See LED descriptions in
Chapter 2
See LED descriptions in Chap-
ter 2
See Removing and replacing
the front bezel on page 3-10
go OFF?
NOTE 1: The red ALM LED on the drive goes OFF within about five
minutes after the drive is inserted into the drive slot on the storage system.
If the red ALM LED does not go OFF, remove the inserted drive from the
storage system, wait at least 30 seconds, and then insert it again.
NOTE 2: If the green READY LED on the front of the Controller Box is
blinking quickly for 30-to-50 minutes, 40-to-60 minutes for the CBL
Controller Box, or 80-to-180 minutes when the DBW is connected to the
CBL, wait for the LED to stop blinking before replacing drives.