8–12 Adding and replacing controllers
Hitachi Unified Storage Hardware Service Guide
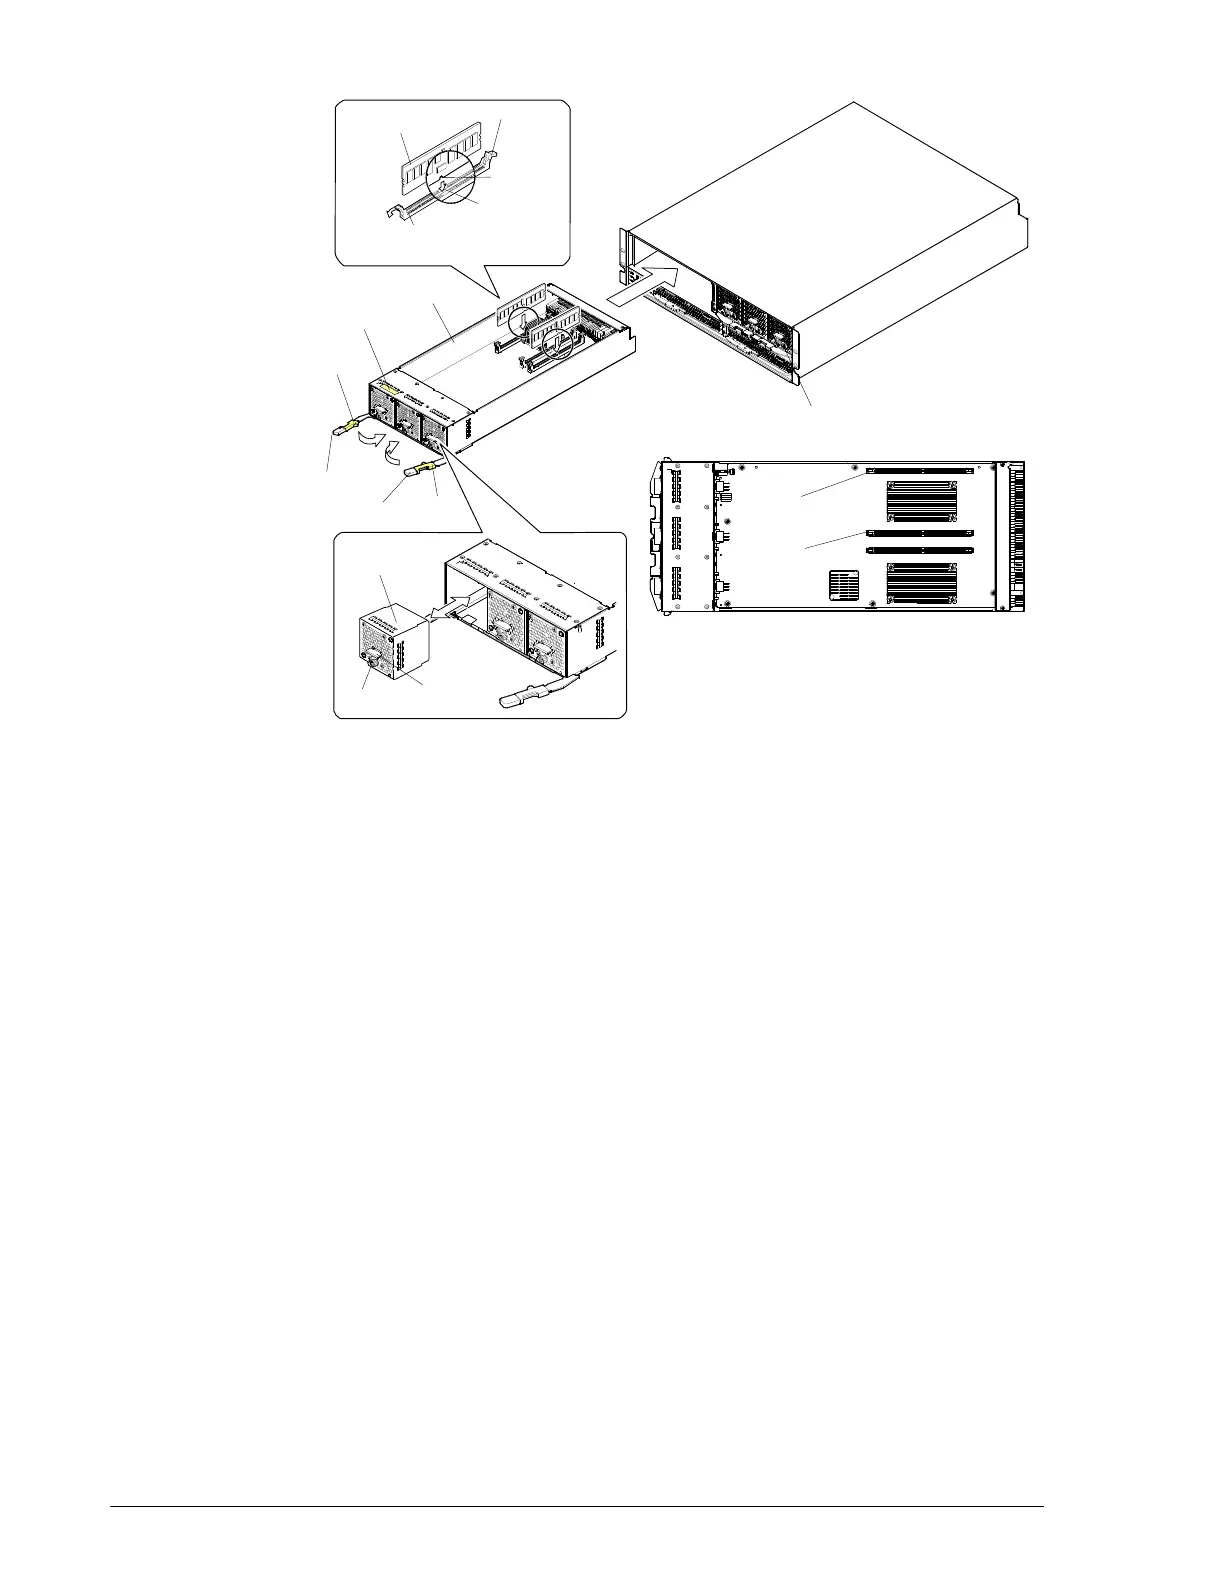
Figure 8-5: Installing cache memory on a CBL
Installing the new controller
Confirm that at least 30 seconds have elapsed since you removed the old
controller. Then install the new controller into the storage system;
otherwise, the new controller might not recover. Ignore the red ALM LED if
it is ON after you insert the new controller; it will go OFF after the controller
recovers.
1. Push the controller all the way into the slot, with its right and left levers
open completely.
2. Push the levers at the same time in the direction shown by the arrows
(
←⎯) at the same time. Otherwise, the controller might not recover and
you will have to repeat the replacement procedure.
3. Close the levers and slide the right and left blue latches to secure the
controller.
4. Be sure the orange WARNING LED on the front bezel is OFF. The
controller usually recovers in about three minutes; however, if I/O from
the host computer is high, it might take about 30 minutes to recover. If
this LED blinks slowly, visit the HDS Support Portal at portal.hds.com.
5. Confirm that the green READY LED on the front of the controller is ON.
This LED might blink quickly for 40-to-60 minutes or 80-to-180 minutes
when the DBW is connected to the CBL before the LED goes ON.
leve
Slot
Projections
inside the
slot
Cut
Slot #0
(CMM0)
Slot #1
(CMM1)
Cache
Memory
Controller #1
Lever
Latch
(blue)
Controller #0
Fan
Latch
Screw
(blue)
Module Revision Label