15–32 Upgrading a Hitachi Unified Storage 130 system
Hitachi Unified Storage Hardware Service Guide
Installing firmware on the Hitachi Unified Storage 150
After powering on the Hitachi Unified Storage 150, use WEB to install the
same firmware version you installed on the Hitachi Unified Storage 130 prior
to performing the upgrade.
1. On the maintenance PC:
- Disable DNS in the PC’s TCP/IP settings; otherwise, connections to
the storage system can take a long time.
- Configure the browser to not use a proxy server.
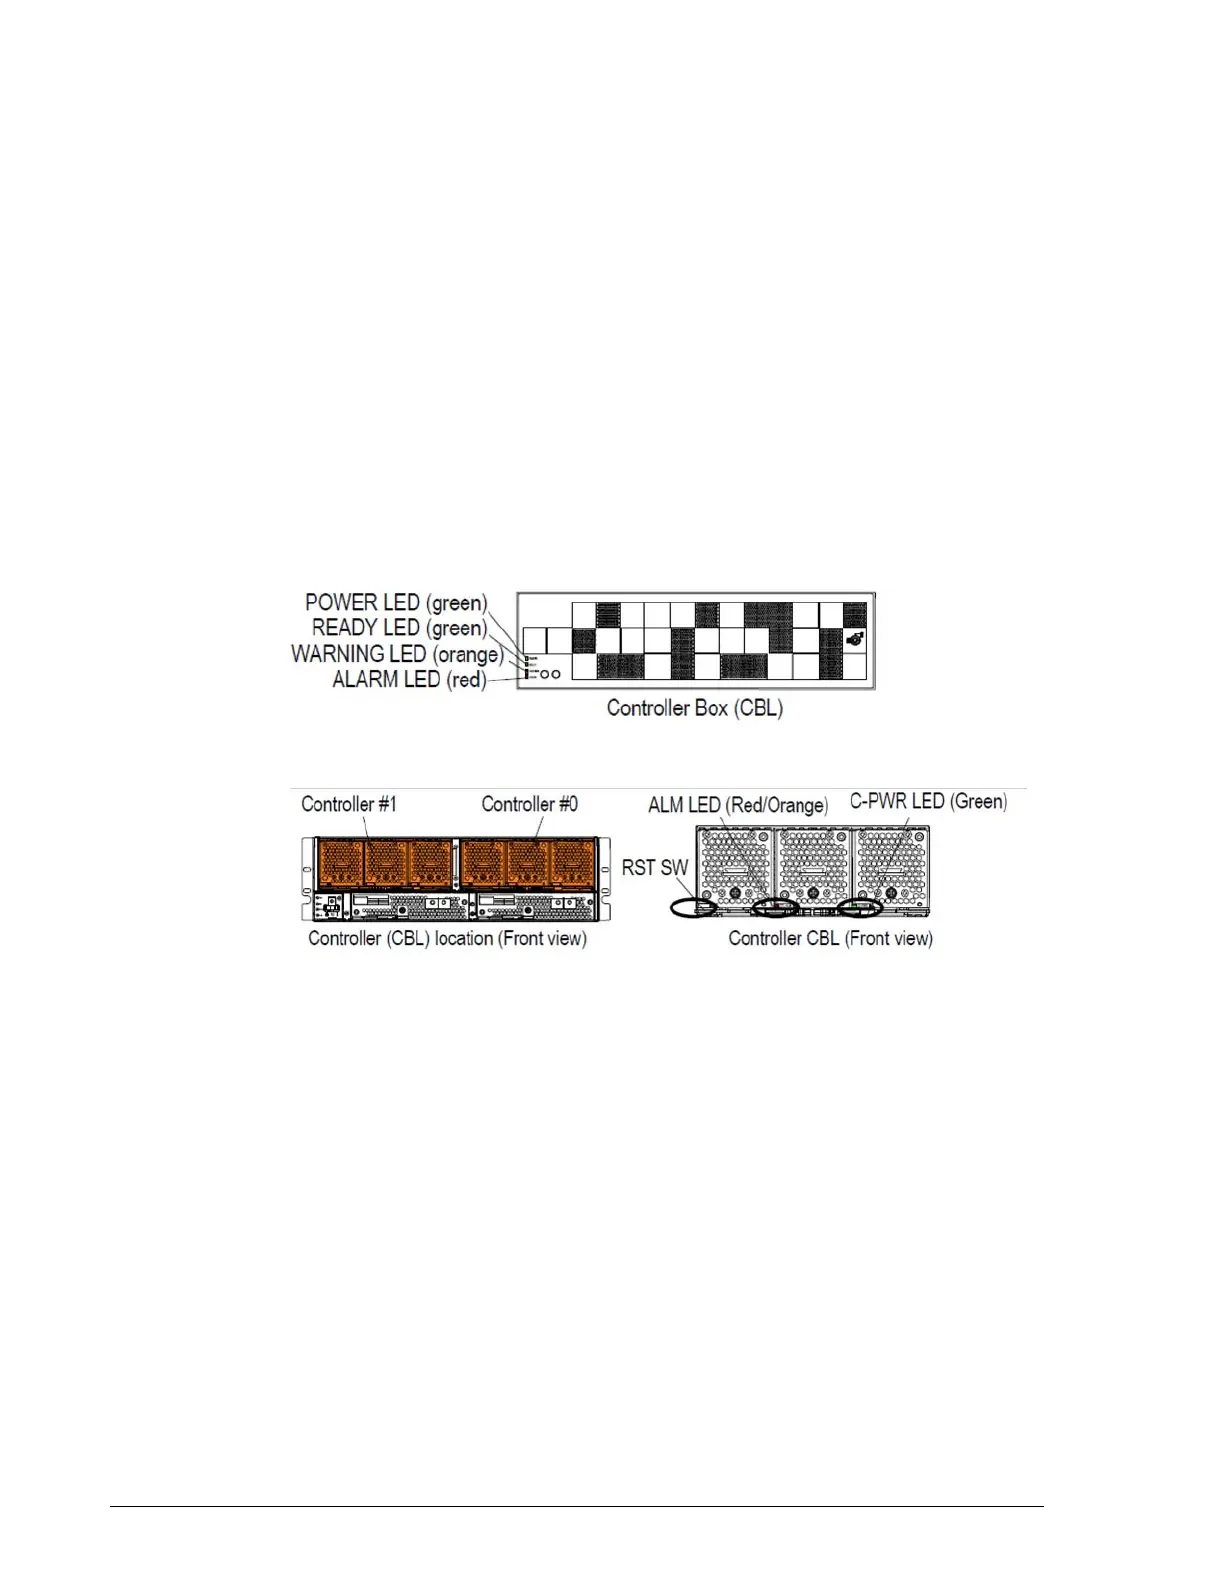
1. Use a tool with a thin tip, such as a narrow screwdriver, to press the RST
SW on Controller #0. The orange RST LED goes ON.
2. Wait for the controller’s red ALM LED to go ON (typically 10 seconds
after you press the RST switch). Then press the RST SW of the other
controller. Be sure the red ALARM LED on the front of the storage
system goes OFF. If it does not go OFF, repeat step 1. When the green
READY LED on the front bezel goes OFF, the system is in Maintenance
Mode.
3. Connect a Ethernet cross-over cable to the CBL maintenance port and
connect the array to the Web.
4. Start a browser on the maintenance PC and enter the IP address of the
controller.
5. If a Enter Network Password screen prompts you for a user name and
password, enter them and click OK.
6. At the following page, in the left pane, under Setup, click
Microprogram.