17–10 Troubleshooting
Hitachi Unified Storage Hardware Service Guide
Using LEDs to diagnose problems
Table 17-2 describes how to troubleshoot problems using the LEDs on
Hitachi Unified Storage systems.
If the storage system used in a remote TrueCopy Remote Replication/
TrueCopy Extended Distance configuration restarts with the TrueCopy
Remote Replication/TrueCopy Extended Distance status of enabled, the
following occur.
• The path used by TrueCopy Remote Replication/TrueCopy Extended
Distance becomes blocked. Notifications from the Storage Navigator
Modular 2 e-mail alert function, SNMP Agent Support function, and
TRAP occur when the path is blocked. Follow the instructions in the
notification. The blocked path recovers automatically after restarting
the storage system.
• If the TrueCopy Remote Replication/TrueCopy Extended Distance pair
status is PAIR or COPY, the pair changes to PSUE. In this case, suspend
the pairs before restarting the storage system.
• If using Power Saving/Power Saving Plus and the power saving setting
I/O interlock disabled is executed, starting the storage system with
the power saving status set to Normal (Command Monitoring)
changes the status to Normal (Spindown Failed: PS OFF/ON). After
performing the I/O interlock disabled operation, check that there is
no RAID group whose power saving status is Normal (Command
Monitoring) and then restart the storage system.
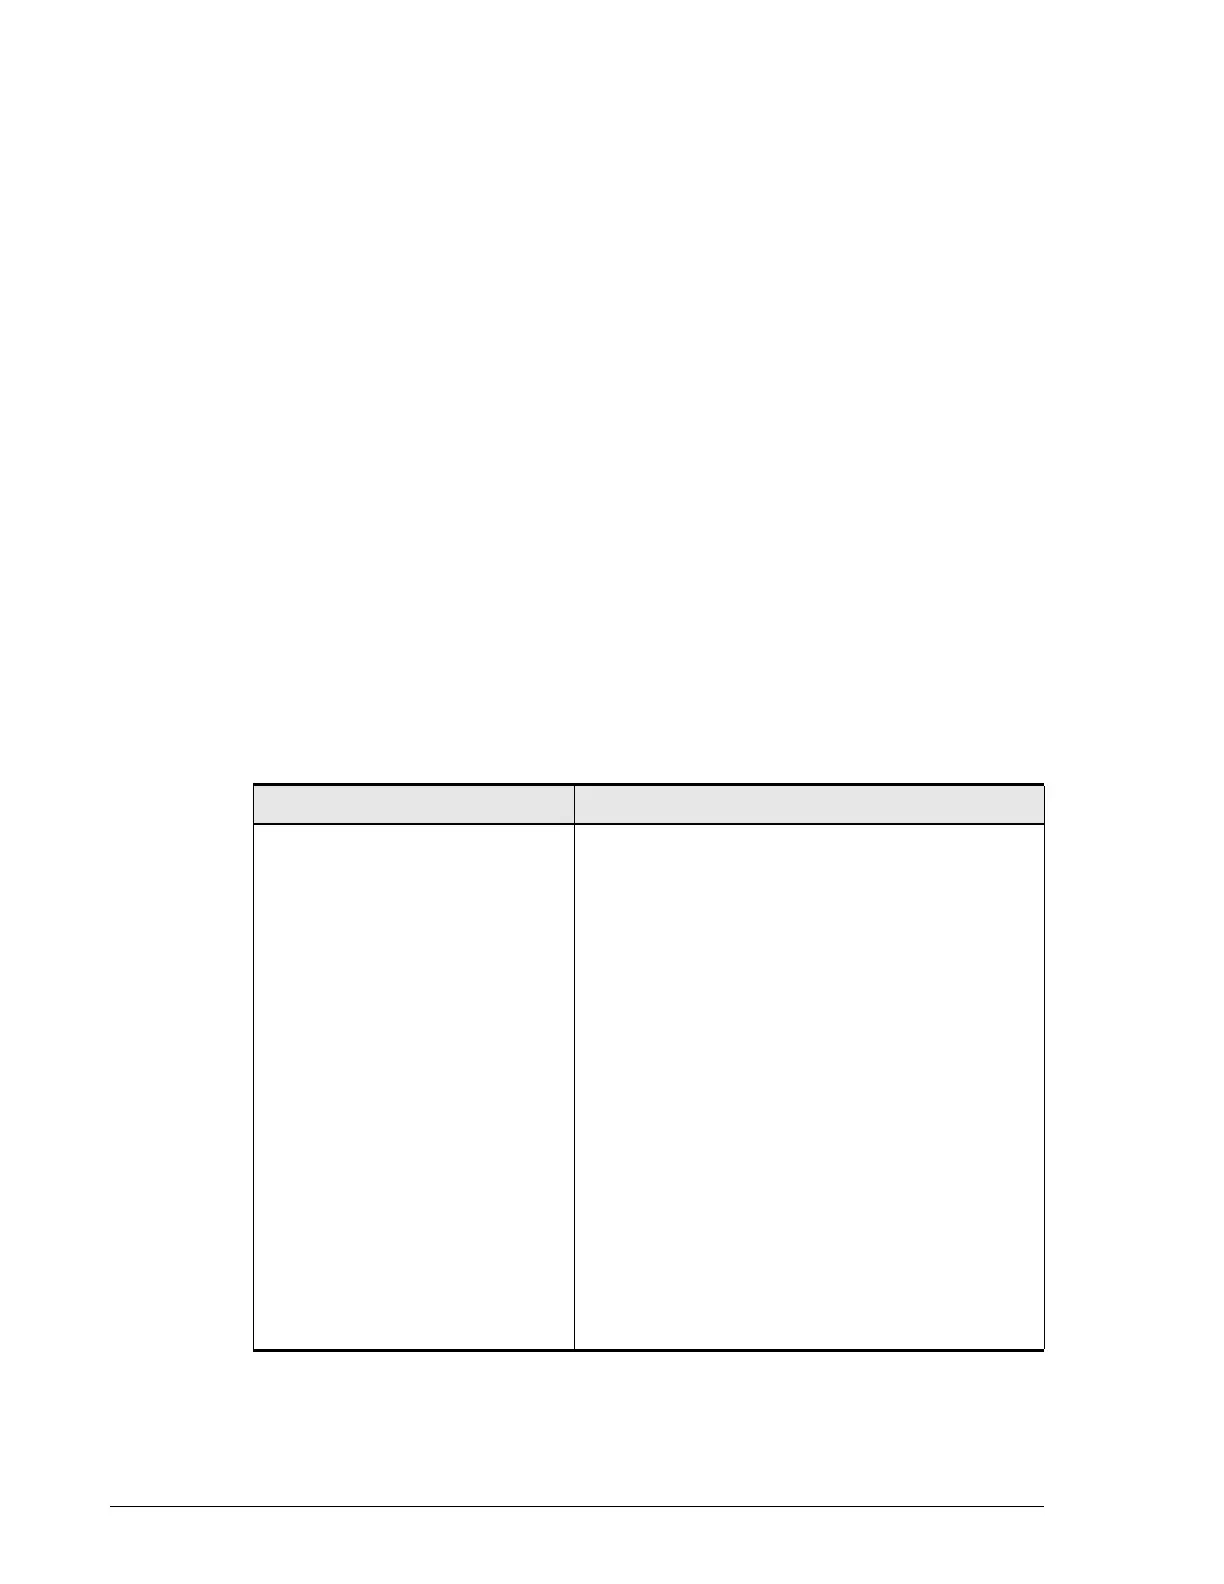
Table 17-2: Using LEDs to diagnose problems
Problem Corrective action
POWER LED does not go ON 1. Set the main switch to on.
2. Is the
POWER LED on the Controller Box ON?
• Yes: Go to step 10.
• No: Power on the host computer.
3. Is the
POWER LED on the Controller Box ON?
• Yes: Go to step 10.
• No: Set the main switch to off.
4. Check that the storage system is receiving
power.
5. Verify that the AC cable is correctly connected
to the plug socket and the equipment.
6. Set the main switch to on.
7. Is the
POWER LED on the Controller Box ON?
• Yes: Go to step 10.
• No: Set the main switch to off.
8. Contact your administrator. Go to step 10.
9. Is the READY LED ON?
• Yes: Continue to use the equipment, even if
the green
READY LED blinks fast.
•No: See READY LED does not go ON or READY
LED went ON and then OFF on page 17-12.
10. End of procedure.
 Loading...