3-50
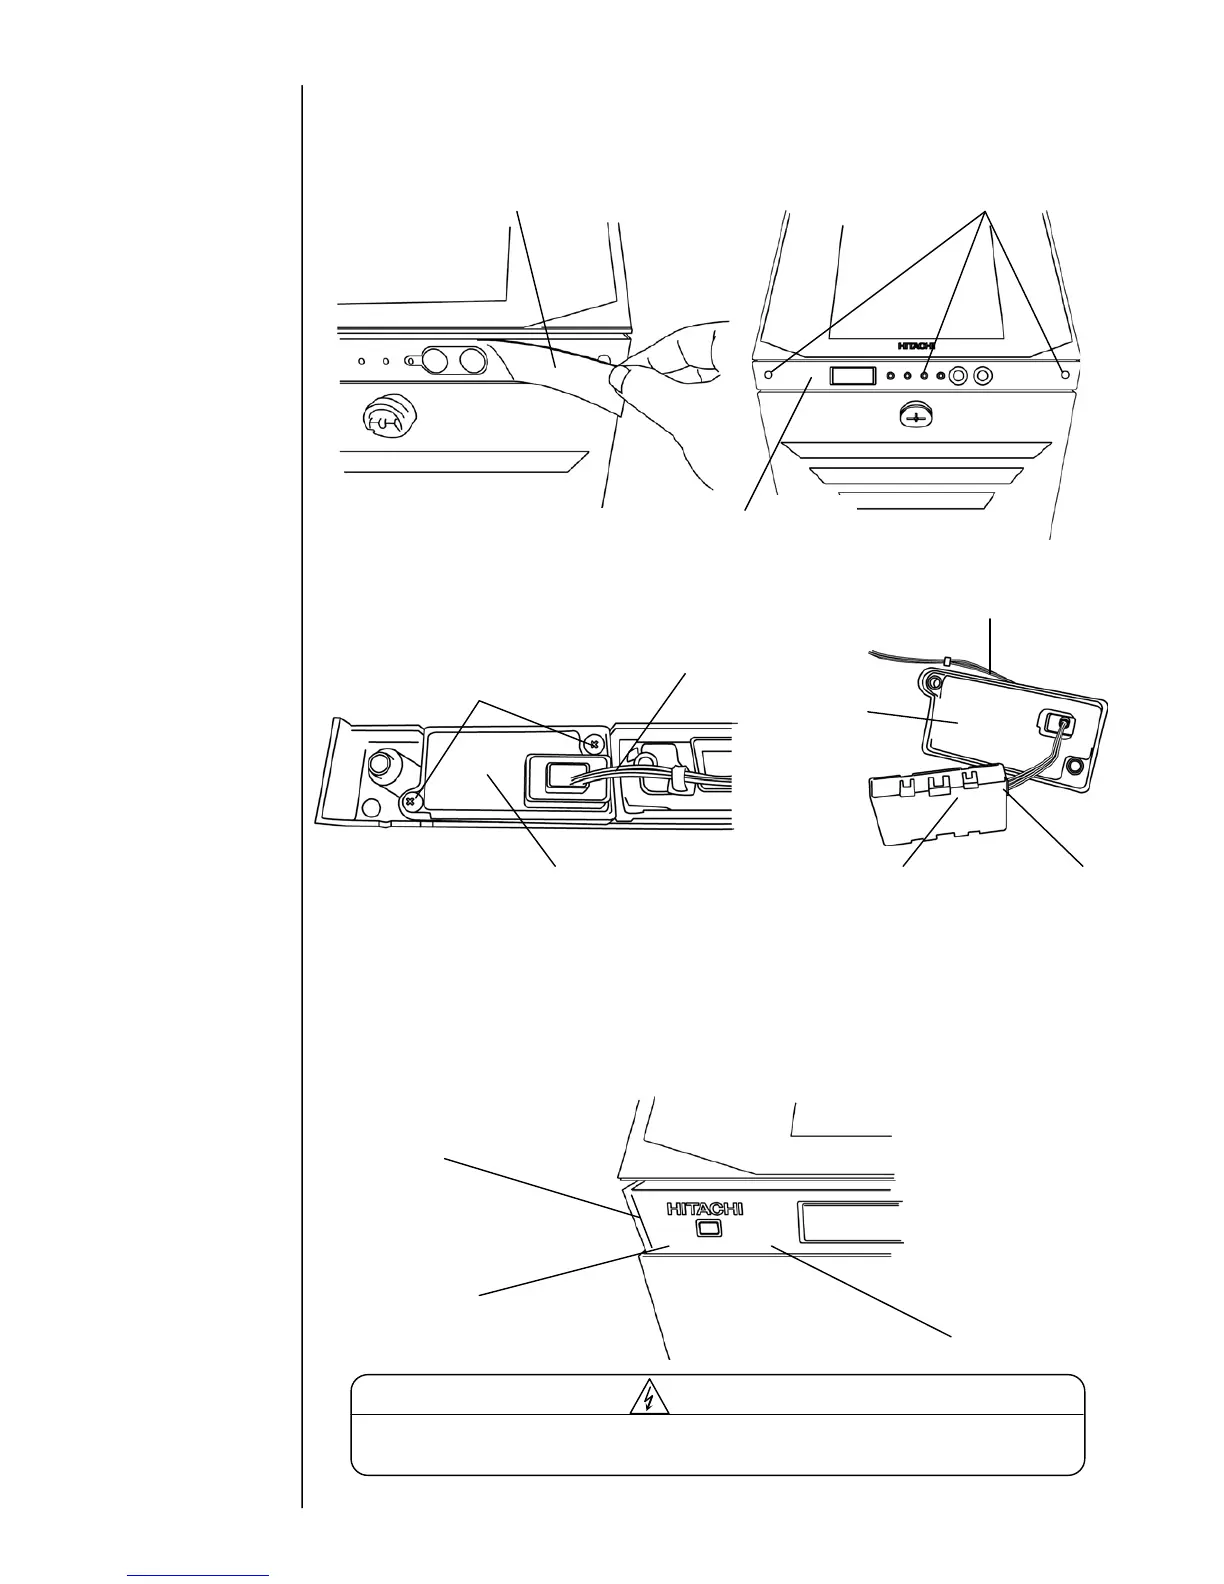
(5) Peel off FB sheet.
(6) Unscrew three (3) fixing screws for Front beam, and then remove Front beam.
[Caution] When you remove Front beam, DO NOT pull RFID reader harness by force.
(7) Unscrew two (2) fixing screws for RFID reader cover, and then remove
RFID reader cover.
(8) Pull out RFID-reader harness from connector.
(9) Replace RFID reader with a new one. Then attach the removed parts in reverse
order of the procedures above.
[Caution] When you attach Front-beam sheet, be sure to the following
(3) points below.
• Replace Front-beam sheet to a new one.
• Confirm that there is NO adhesive remaining on the Front beam.
• Attach the new Front-beam sheet by pushing the Front-beam sheet to
the left side of the convexed frame.
When you attach Front beam, be sure that the electrical wires or cables are
NOT to be pinched between any parts.

 Loading...


