5-12
5.8 Nozzle replacement
1 Depressurize the printer.
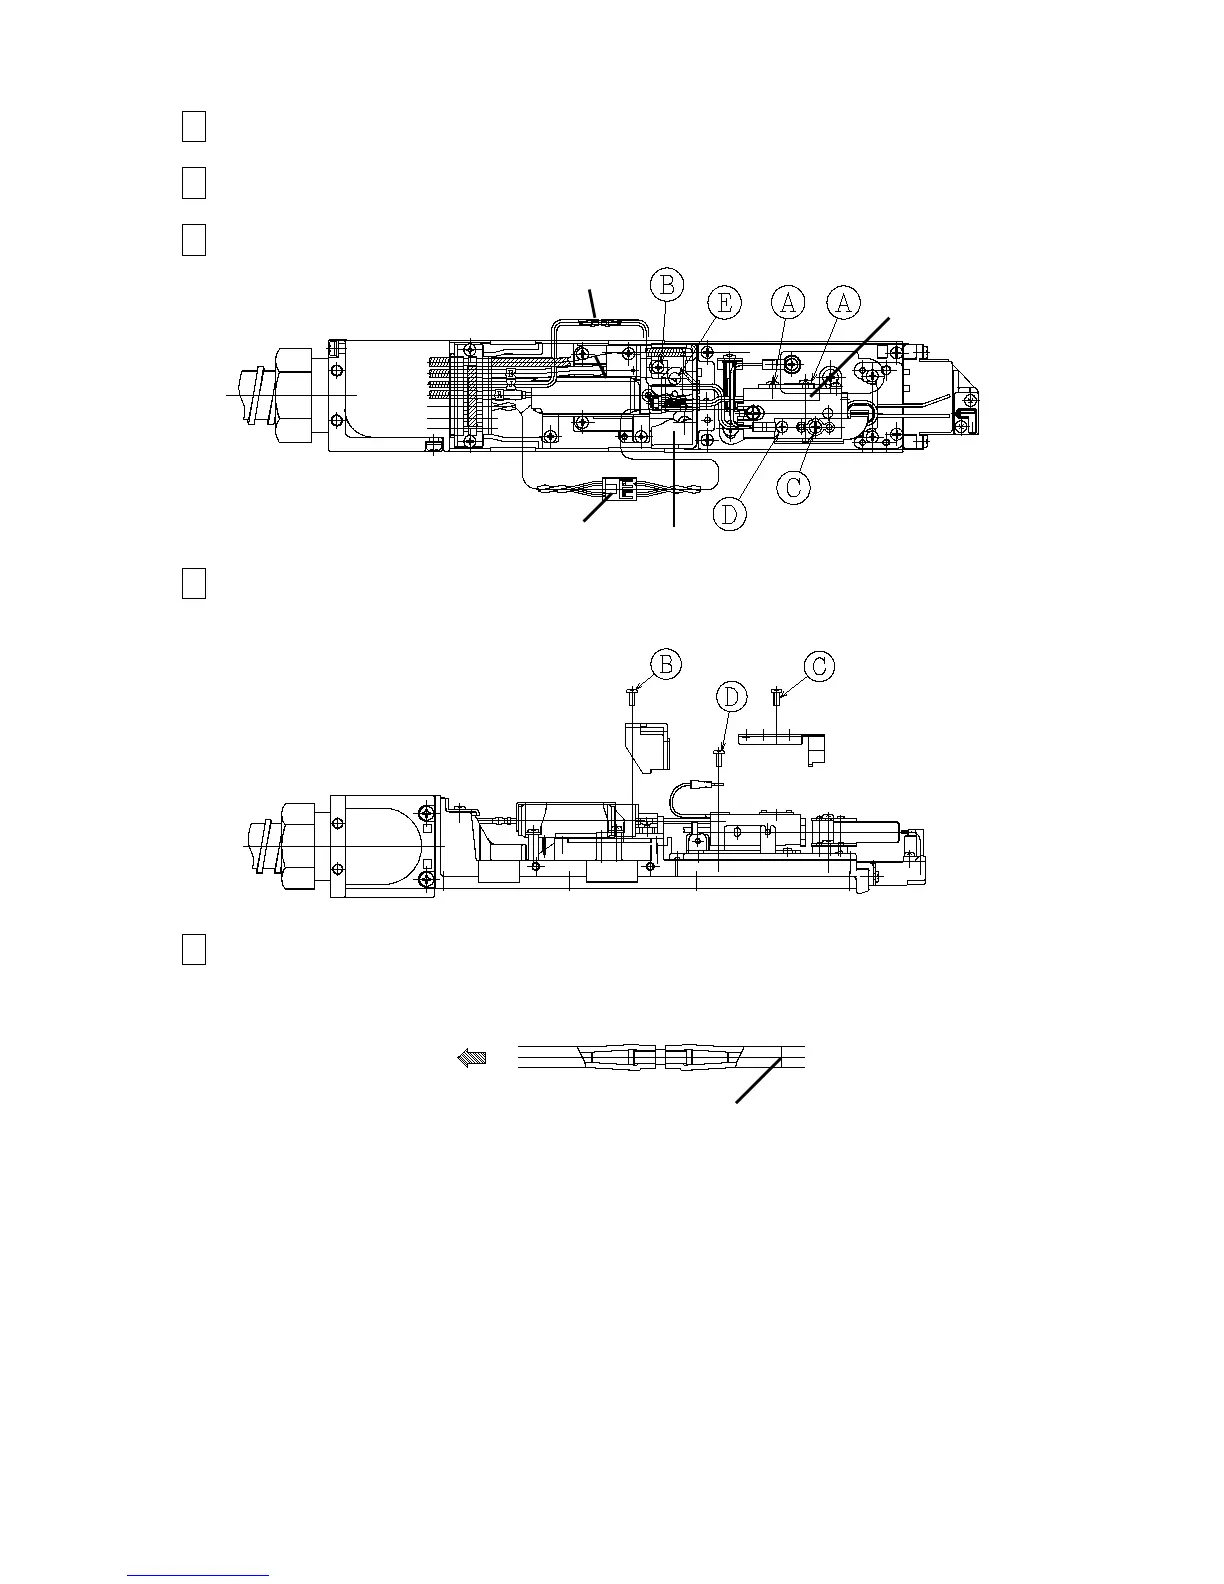
2 Remove the head cover and the heater cover.
3 Remove the excitation line from the 3P coupling cover and disconnect
the connector.
4 Remove the coupling cover fastening screw (B), the ground wire fastening
screw (D) and charge electrode fastening screw (C).
5 Cut the nozzle-side of Nozzle-out joint with cutter knife, etc.
“Caution” when removing the nozzle OUT joint, remove it so as not to pull the main
body side tube.
“Caution”
(1) If you scratch the coupling with a cutter or the knife, it may cause an ink leaking
and so on.
(2) When removing a cut piece of the tube, cut the tube piece and pull it off
the coupling.
Nozzle excitation connector
Coupling cover

 Loading...


