4-17
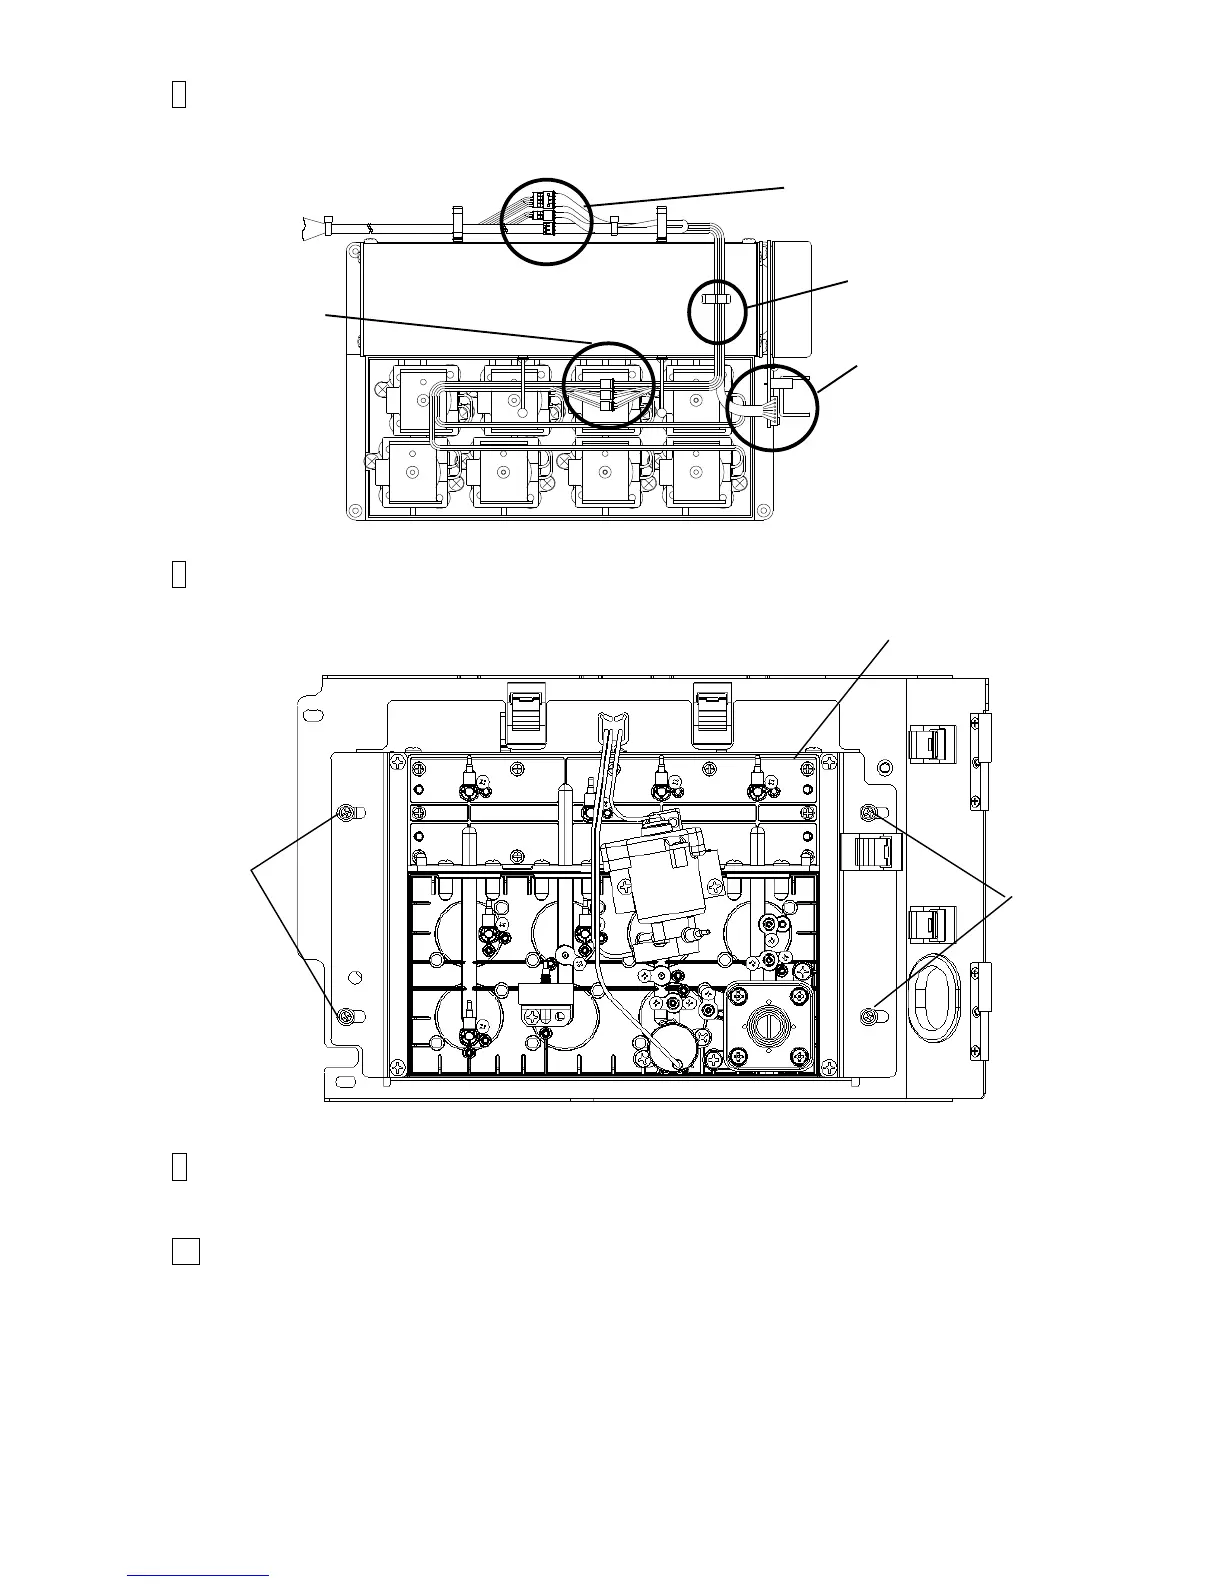
7 Disengage the connectors of the electrical parts (15 positions) (motor,
solenoid valves (8 positions), pressure sensor, viscometer (3 positions),
level sensor and float sensor).
8 Remove the fixing screws at that fix the circulation unit (4 positions).
The circulation unit can be removed.
9 Clean the portion stained with ink and then install the new Circulation unit in reverse order
of the procedures above.
10 Perform “Makeup refill” and then “Ink refill”.
Make sure that any ink leak or makeup leak is not occuring at any places.
5 positions
1 position
8 positions
1 position
Fixing screws

 Loading...


