4-40
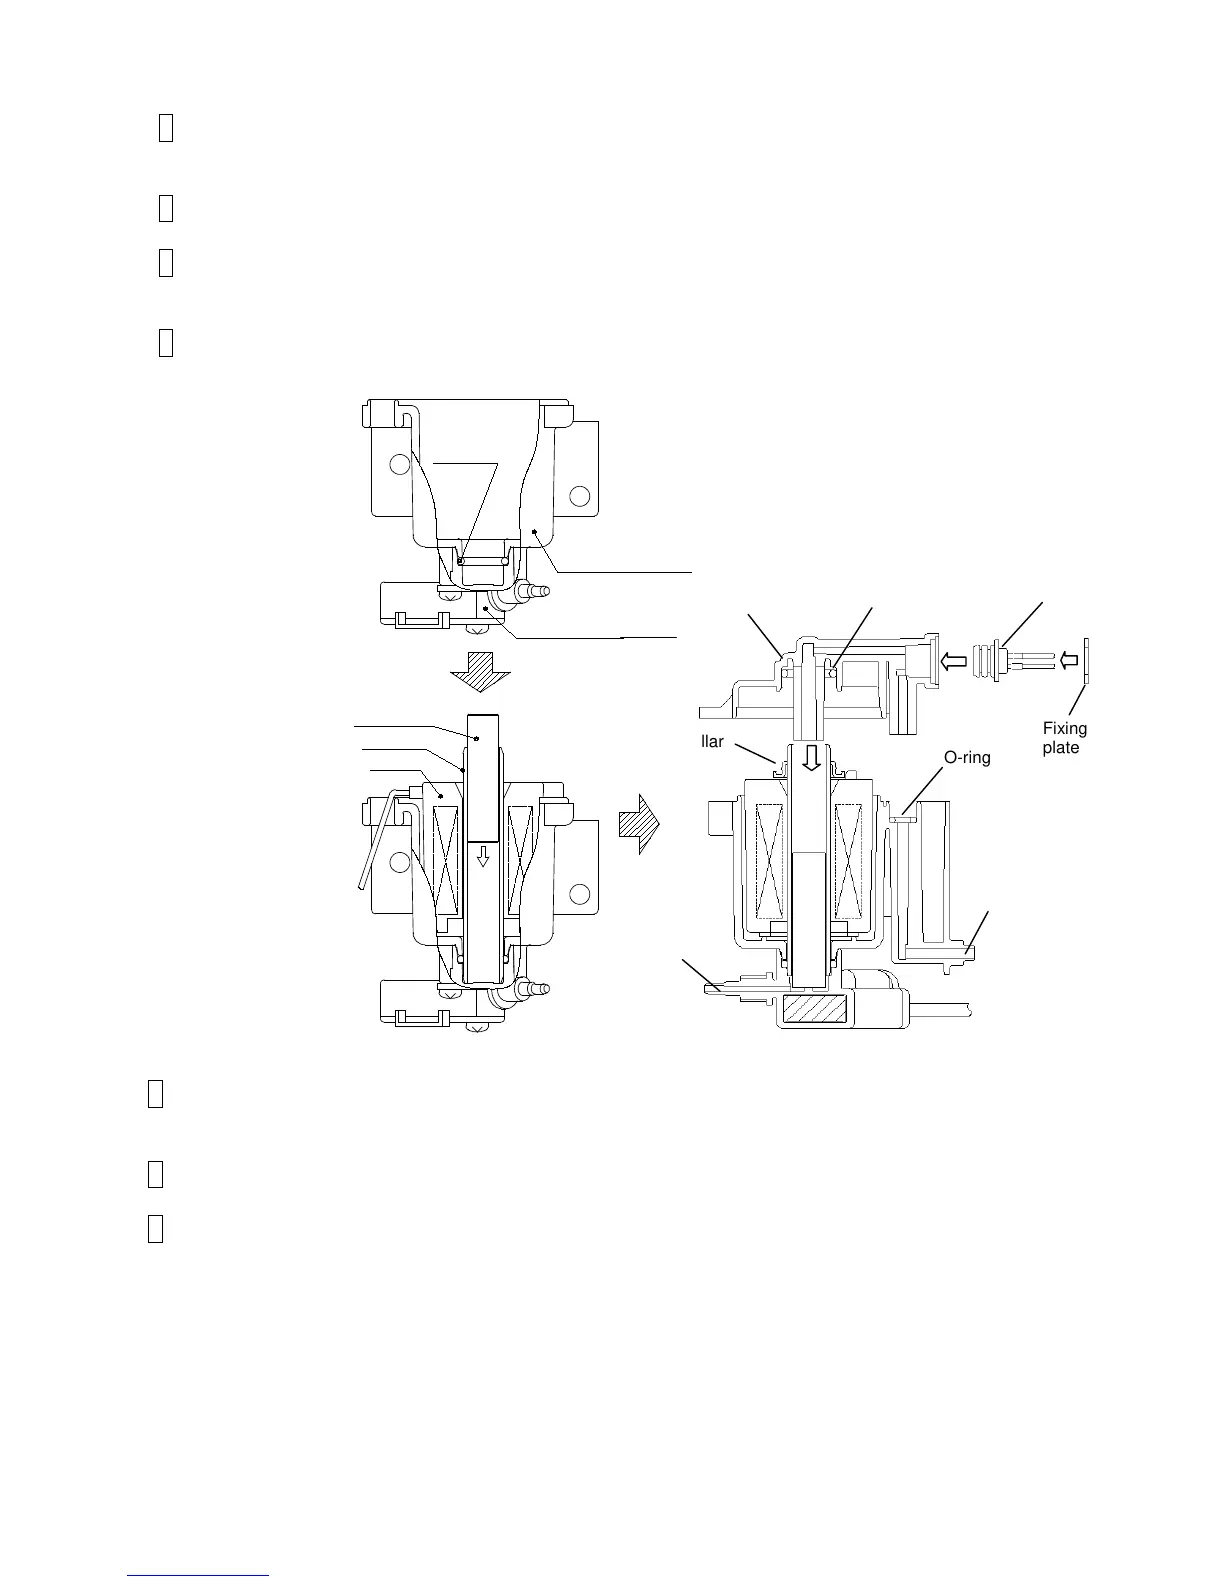
4.12.3 Viscometer assembly procedure
1 Replace the cylinder, and then insert the plunger. Handle the plunger with tweezers
making sure that no dust adheres to the surface of plunger.
2 Set the collar to cylinder, paying extra attention to its orientation (with the convex up).
3 Make sure that the O-ring is set in the viscometer cover, and then assemble the cover into
the viscometer case.
4 Attach the three viscometer setscrews and tighten them. (Tighten the screws with
reasonable force using screwdriver. Tightening the screws excessively will break the
threads.)
4.12.4 Viscometer attaching procedure
1 Set the O-ring on the viscometer OUT side, and use the setscrews (2 pieces) to attach the
viscometer to the circulation unit.
2 Plug in the connectors.
3 Connect the viscometer IN-side tube (mark G).
[Caution] After reassembly, it may be necessary to replace the ink and/or calibrate the
viscometer.
When disassembling and washing during installation:
Calibrate the viscometer. Ink replacement is NOT required.
When replacing the viscometer during installation:
Calibrate the viscometer. Ink replacement is NOT required.
When replacing the viscometer in cases other than installation:
First replace the ink, then calibrate the viscometer.

 Loading...


