EasyManuals Logo

Hitachi IJ UX Service Manual

Hitachi IJ UX
308 pages
To Next Page IconTo Next Page
To Previous Page IconTo Previous Page
Page #186 background imageLoading...
Page #186 background image
4-53
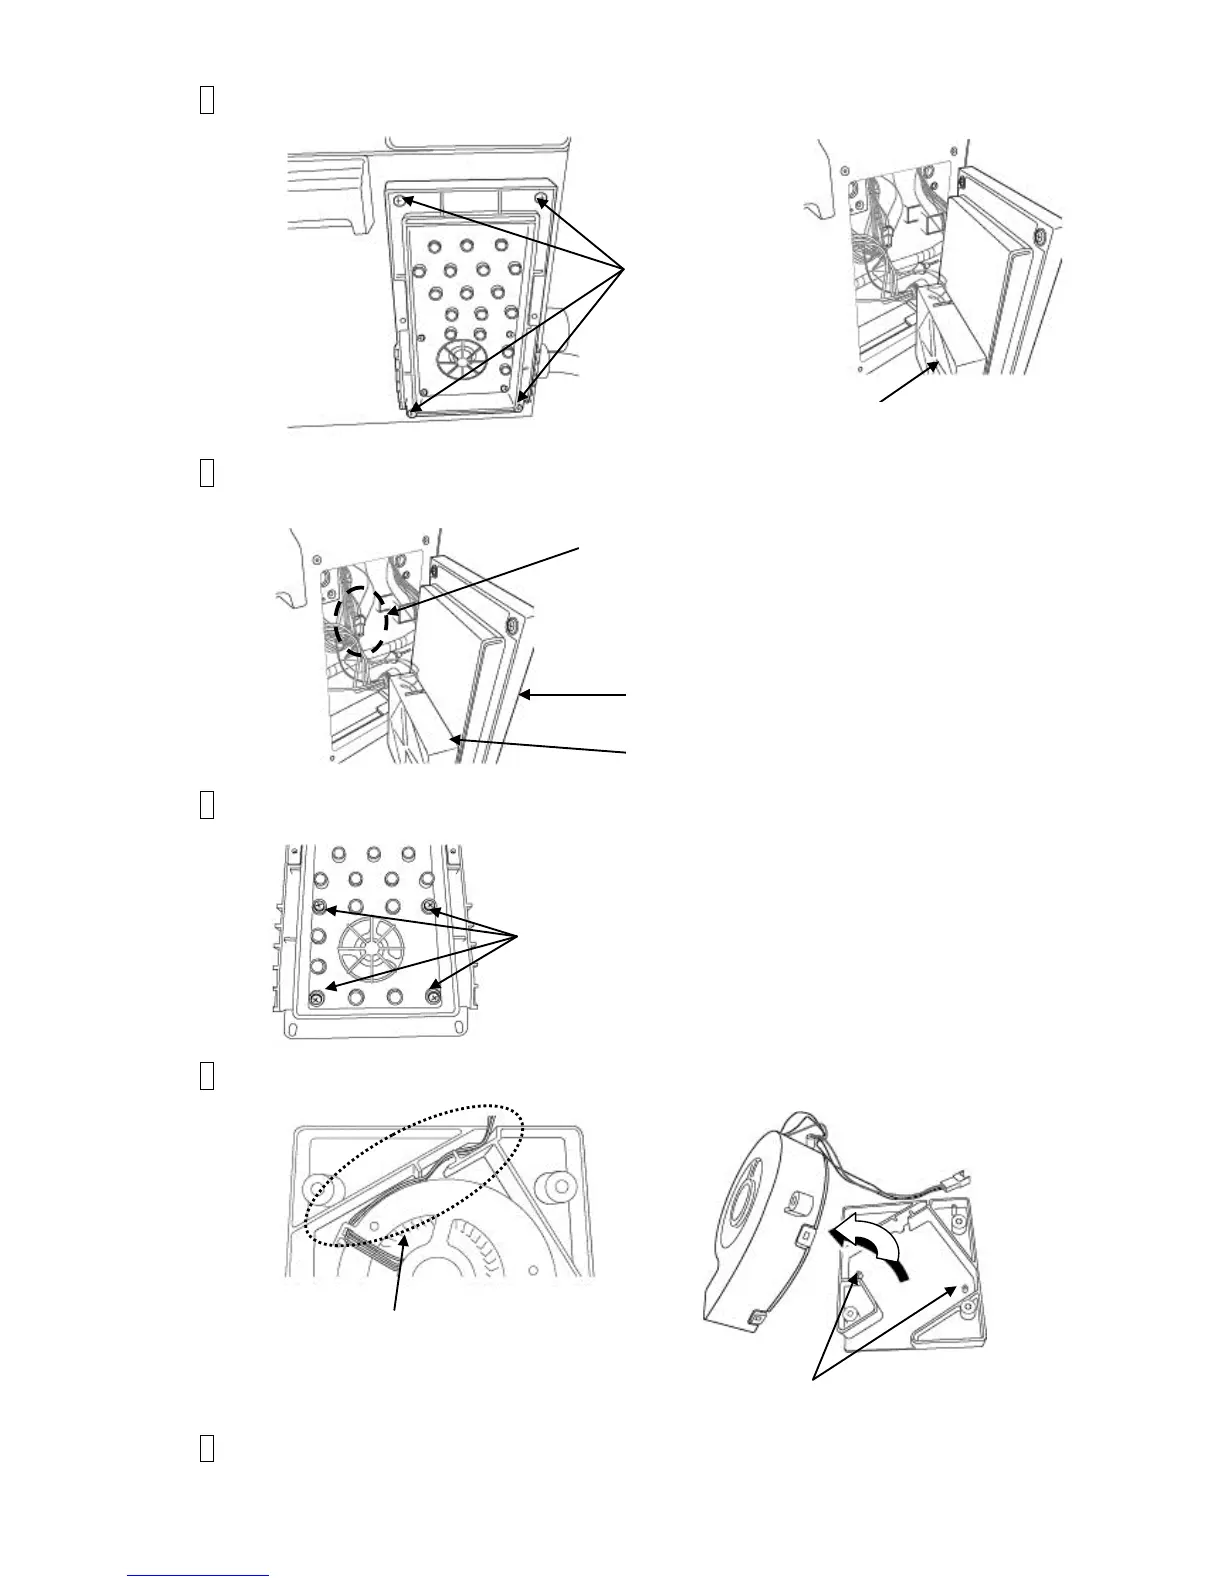
4 Remove the Fastening screws (4 locations) of the Intake fan unit assembly.
5 Disengage the Intake fan harness, connector and remove the Intake fan unit assembly.
6 Remove the Fastening screws (4 locations) of Intake fan cover assembly.
7 Pull out the harness and remove the Intake fan unit from two positioning bosses.
8 Install the new Intake fan unit by reverse order of the procedures above.
Positioning bosses (two locations)
Harness routing
Intake fan harness connector
冷却ユニットクミ
Intake fan cover assembly
Intake fan unit assembly
Fastening screws
(4 locations)
Intake fan unit assembly
Fastening screws (4 locations)

Table of Contents

Other manuals for Hitachi IJ UX

Questions and Answers:

Question and Answer IconNeed help?

Do you have a question about the Hitachi IJ UX and is the answer not in the manual?

Hitachi IJ UX Specifications

General IconGeneral
BrandHitachi
ModelIJ UX
CategoryPrinter
LanguageEnglish

Related product manuals