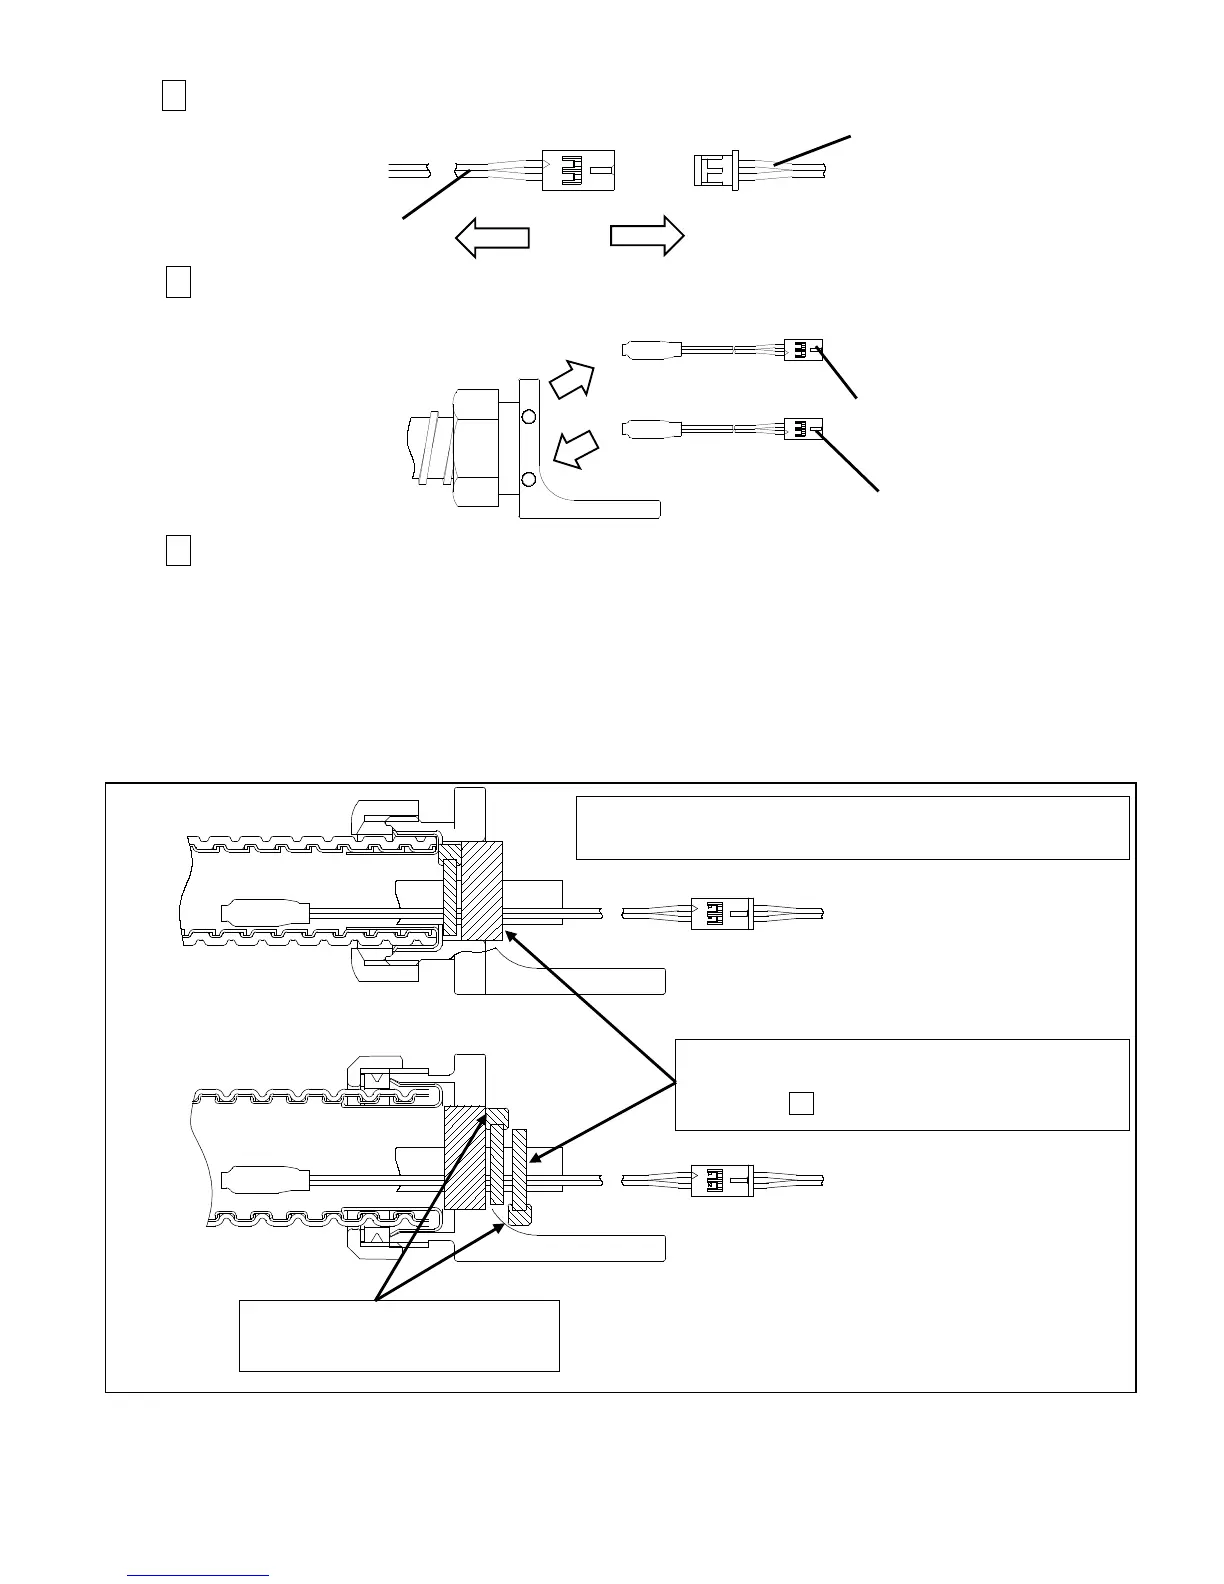
EasyManuals Logo

Hitachi IJ UX Service Manual

Hitachi IJ UX
308 pages
To Next Page IconTo Next Page
To Previous Page IconTo Previous Page
Page #212 background imageLoading...
Page #212 background image
5-18
Remove the thermistor connector.
Take the used thermistor out from the coupling, and then replace it with the new one.
Attach the new banding band and the packing, and then reassemble all the removed
parts in reverse order of the procedures above.
[Cautions]
(1) When attaching new packing, peel off the paper liner first, and then apply the packing around the
bundle of wires and tubes.
(2) When reassembling the removed parts, be sure NOT to pinch any wires.
(3) When attaching the new banding band and the new packing, be sure to the points described in the
figure below.
New thermistor
Used thermistor
White wire
Red wire
[UX-E]
[UX-D, B]
Refer to these figures when attaching the banding band
and the packing(s) for their locations and directions.
Attach the packing(s) and the banding band
referring to the mark on the tube, which is put in
procedure
.
Make the knot of a binding band
an opposite angle.

Table of Contents

Other manuals for Hitachi IJ UX

Questions and Answers:

Question and Answer IconNeed help?

Do you have a question about the Hitachi IJ UX and is the answer not in the manual?

Hitachi IJ UX Specifications

General IconGeneral
BrandHitachi
ModelIJ UX
CategoryPrinter
LanguageEnglish

Related product manuals