EasyManuals Logo

Hitachi IJ UX Service Manual

Hitachi IJ UX
308 pages
To Next Page IconTo Next Page
To Previous Page IconTo Previous Page
Page #91 background imageLoading...
Page #91 background image
3-11
(3) How to lock the actuator
To lock the actuator, press it downward. When locking the actuator, apply the
pressure to the direction indicated by arrow (to the direction of inner side of the
connector) to avoid the separation of rotary shaft from the actuator.
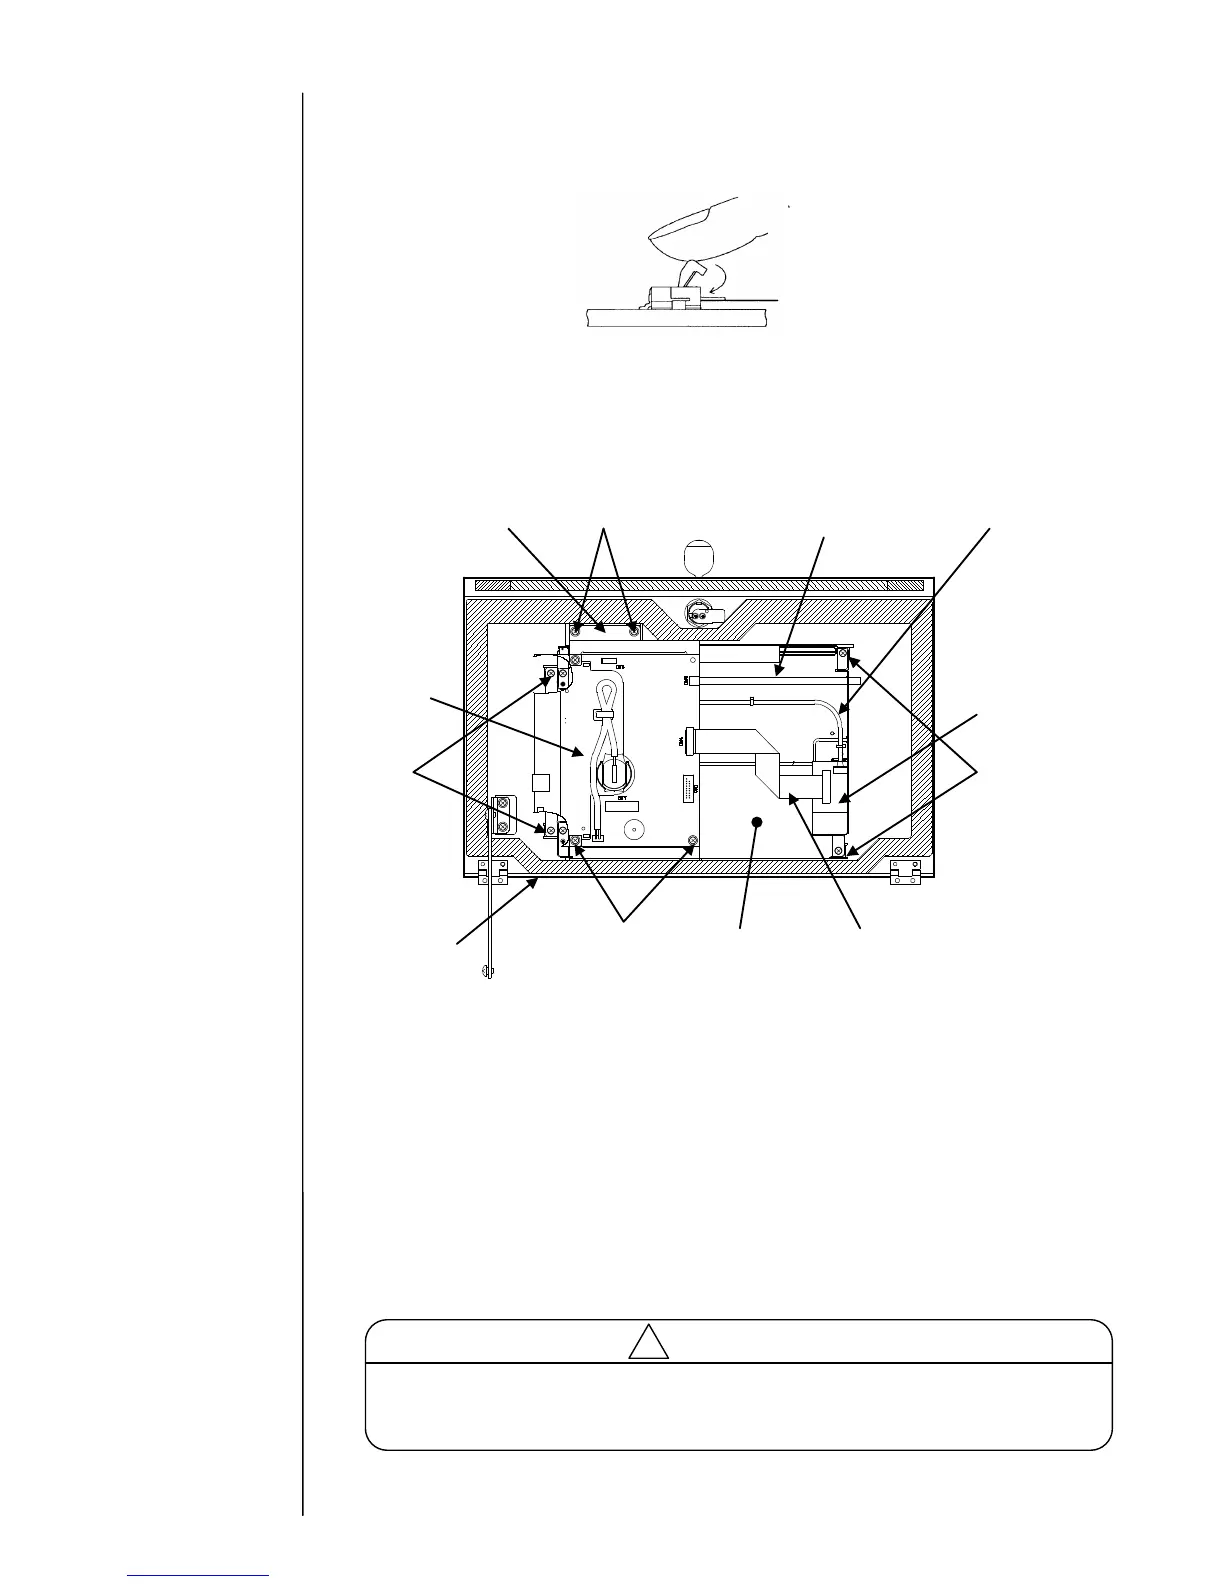
[LCD external view]
[LCD replacement procedures]
(1) Turn off the Main power switch and open the Maintenance door.
(2) Remove Flexible flat cable (FFC) and Touch panel connection cable from EZJ136
board.
(3) Remove Fixing screws 1 (2pieces) and Fixing screws 2 (2pieces), and then remove
EZJ128 board with Board mounting plate.
(4) Remove Backlight harness from LCD.
(5) Remove EZJ136 board with cables connected, from LCD.
(6) Remove Fixing screws 3 (2pieces+2pieces), and then remove LCD.
(7) Replace LCD with new one, and then reassemble all the removed parts and cables in
reverse order of the procedures above.
Tighten Fixing screws 2 (2pieces) and Fixing screws 3 (2pieces+2pieces) with
tightening torque 0.294±0.05Nm. If the tightening torque is too much, LCD will be
broken.
Caution
LCD
Maintenance door
Board mounting plate
Flexible flat cable (FFC)
EZJ128 board
Fixing
screws 2
Touch panel
connection cable
Backlight harness
Fixing screws 1
Fixing
screws 3
EZJ136 board
Fixing
screws 3

Table of Contents

Other manuals for Hitachi IJ UX

Questions and Answers:

Question and Answer IconNeed help?

Do you have a question about the Hitachi IJ UX and is the answer not in the manual?

Hitachi IJ UX Specifications

General IconGeneral
BrandHitachi
ModelIJ UX
CategoryPrinter
LanguageEnglish

Related product manuals