4-13
4.4 ICU Joint Structure and Handling
When removing the tube during the maintenance work, loosen
the tube lock beforehand.
The ICU joint shall be removed only when damaged.
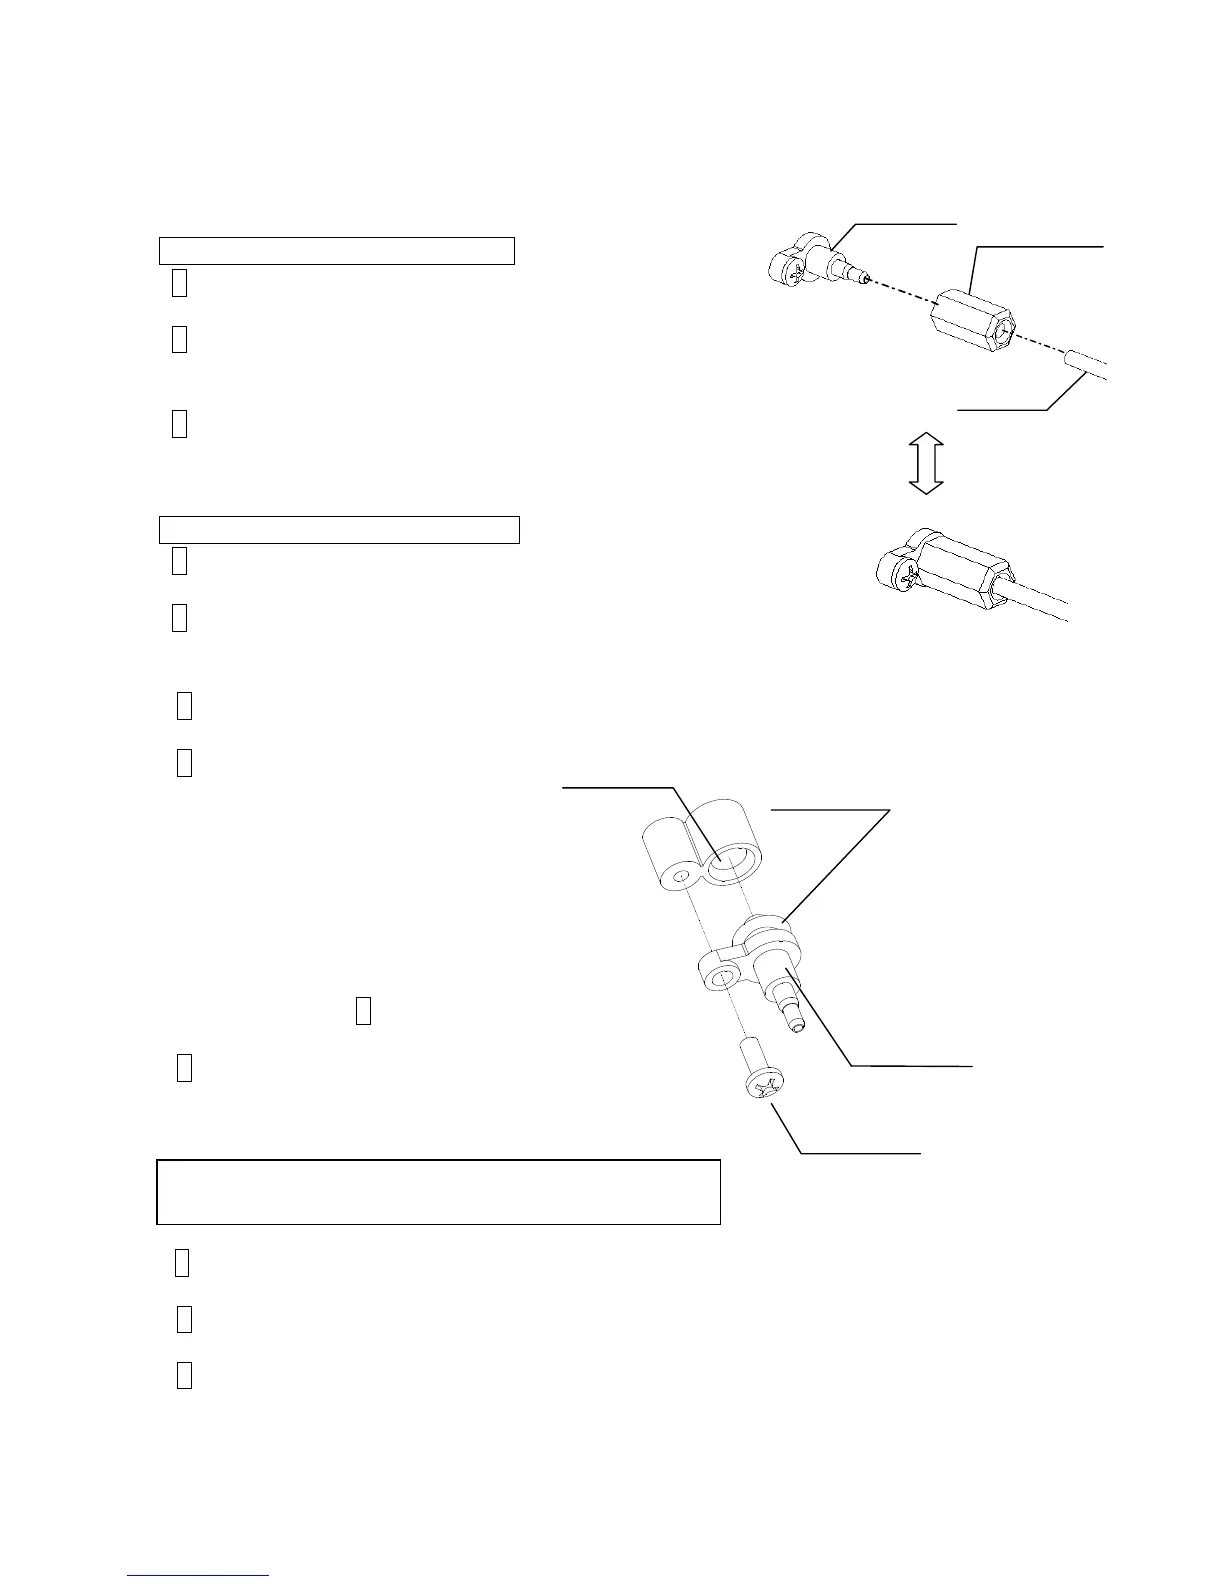
Procedures for installing the tube
1 Pass the tube through the tube lock.
2 Insert the end of the tube into the end
of the ICU joint.
3 Tighten the tube lock.
[Caution] Excessive tightening may
cause damage to the tube.
Procedures for removing the tube
1 Loosen the tube lock.
2 Pull out the tube.
Procedures for installing the ICU joint (only Pump unit replacement or when damaged)
1 Mount the O-ring on the ICU joint.
2 Wet the O-ring with the
makeup and then insert it
into the connecting port of the
circulation unit.
[Caution]
If it cannot be inserted smoothly,
the O-ring may have jammed and get
stuck.
Perform the procedures starting
from Step 1 again.
3 Tighten the fixing screw.
[Caution] Do NOT over-tighten the screw OR
the screw may strip and keep on turning.
Procedure for removing the ICU joint
(only for Pump unit replacement or when damaged)
1 Remove the fixing screw.
2 Pull out the ICU joint.
3 Remove the O-ring left at the connection port of the circulation unit by tweezers.
[Caution] Perform the above operation taking care not to give damage to the internal
surface of the connection port.

 Loading...


