EasyManuals Logo

Hitachi UX Twin Nozzle Service Manual

Hitachi UX Twin Nozzle
355 pages
To Next Page IconTo Next Page
To Previous Page IconTo Previous Page
Page #228 background imageLoading...
Page #228 background image
5-12
5.8 Nozzle replacement
[NOTE] There are two (2) nozzles attached (Nozzle 1 and Nozzle 2).
Follow the same procedures as below to replace each nozzle.
1 Depressurize the printer.
ï¼’ Remove the head cover and the heater cover.
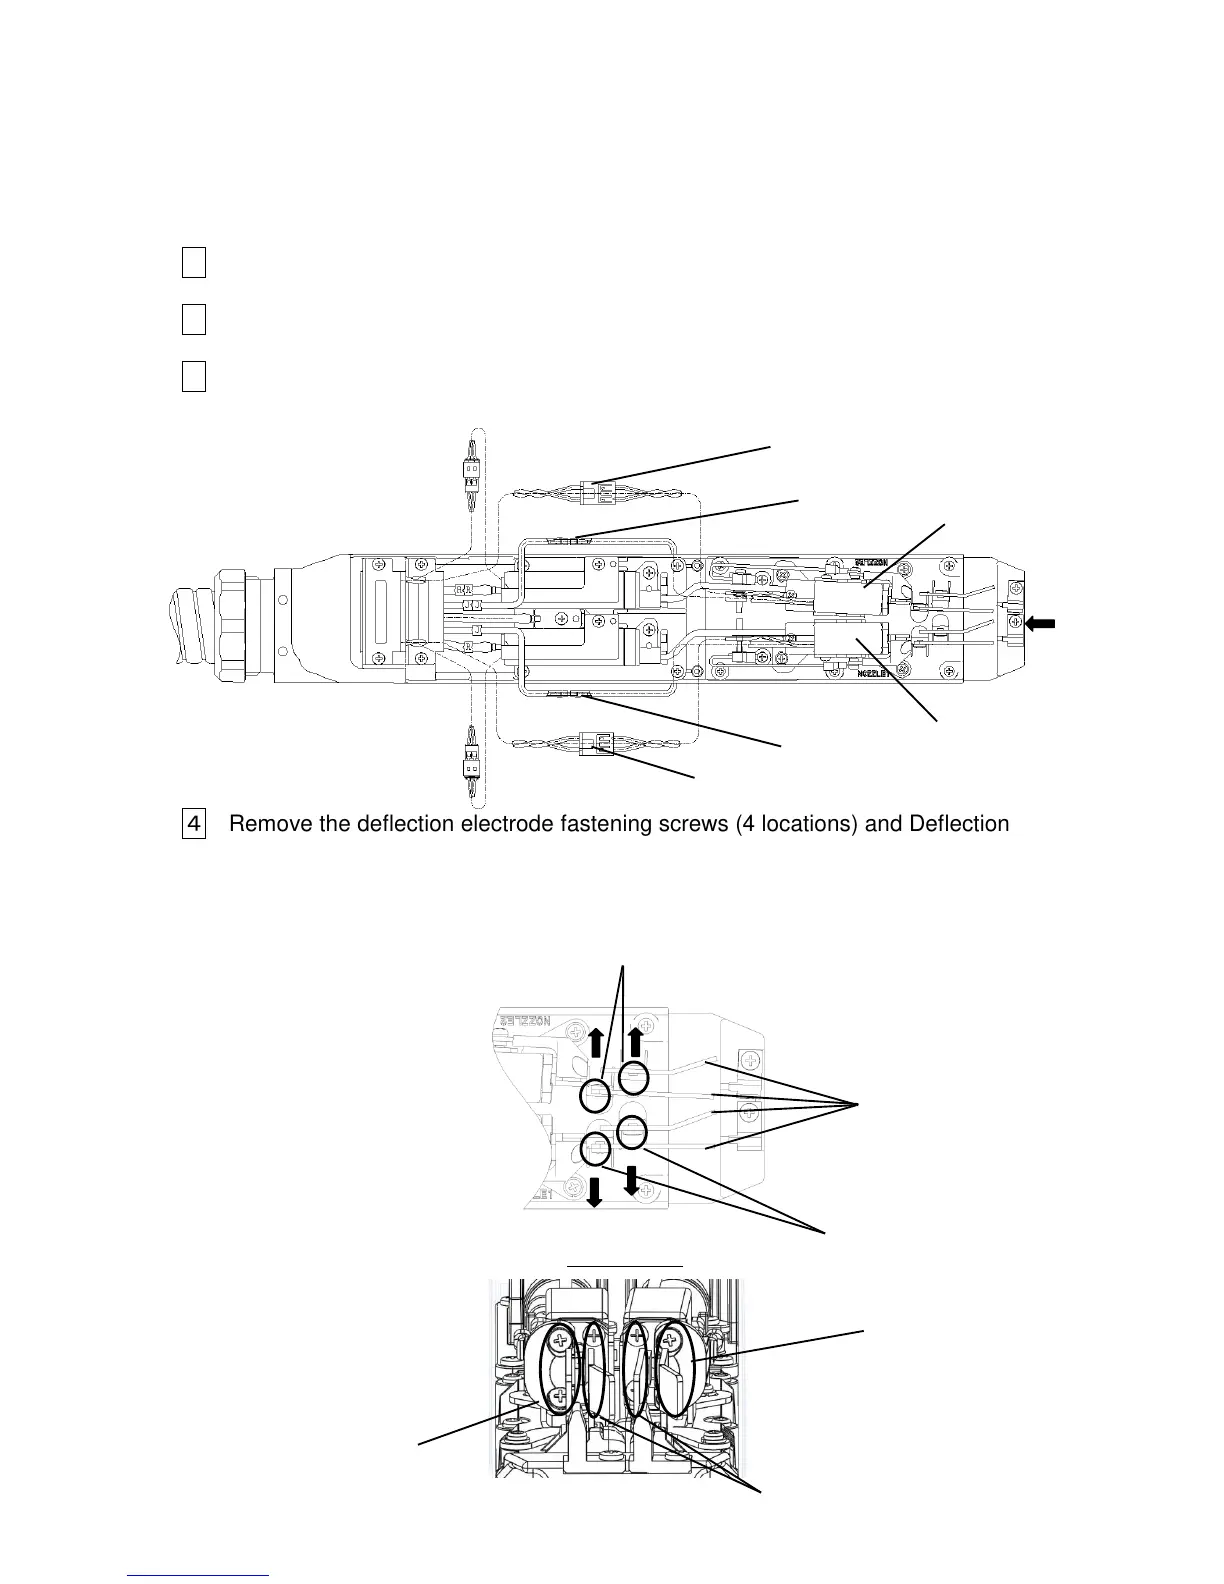
3 Remove the excitation line from the Coupling cover and disconnect
the connector.
ï¼” Remove the deflection electrode fastening screws (4 locations) and Deflection
Electrodes, and remove the charge electrode fastening screws (4 locations).
[CAUTION] When the orifice plate is set, make sure that the number marking should be placed
inside.
Nozzle excitation connector(2)
Nozzle-Out joint
Nozzle 2
Nozzle 1
Nozzle-Out joint
Nozzle excitation connector
(No mark is indicated)
Deflection electrodes
A
Arrow A view
Number marking on Nozzle orifice
is placed inside
Deflection electrode2 fastening screws (2screws)
Deflection electrode1 fastening screws (2screws)
Charge electrode2
fastening screws (2 screws)
Charge electrode1
fastening screws(2 screws)

Table of Contents

Other manuals for Hitachi UX Twin Nozzle

Questions and Answers:

Question and Answer IconNeed help?

Do you have a question about the Hitachi UX Twin Nozzle and is the answer not in the manual?

Hitachi UX Twin Nozzle Specifications

General IconGeneral
BrandHitachi
ModelUX Twin Nozzle
CategoryPrinter
LanguageEnglish

Related product manuals