HYDRAULIC BRAKE
15-13
After there are no more air bubbles in the fluid,
repeat the air bleeding procedure about two or
three times at each bleed valve.
Make sure the bleed valves are closed and operate
the brake pedal. If it still feels spongy, bleed the sys-
tem again.
After bleeding the air completely, tighten the bleed
valve to the specified torque.
Fill the reservoir to the "UPPER" level with DOT 4
brake fluid.
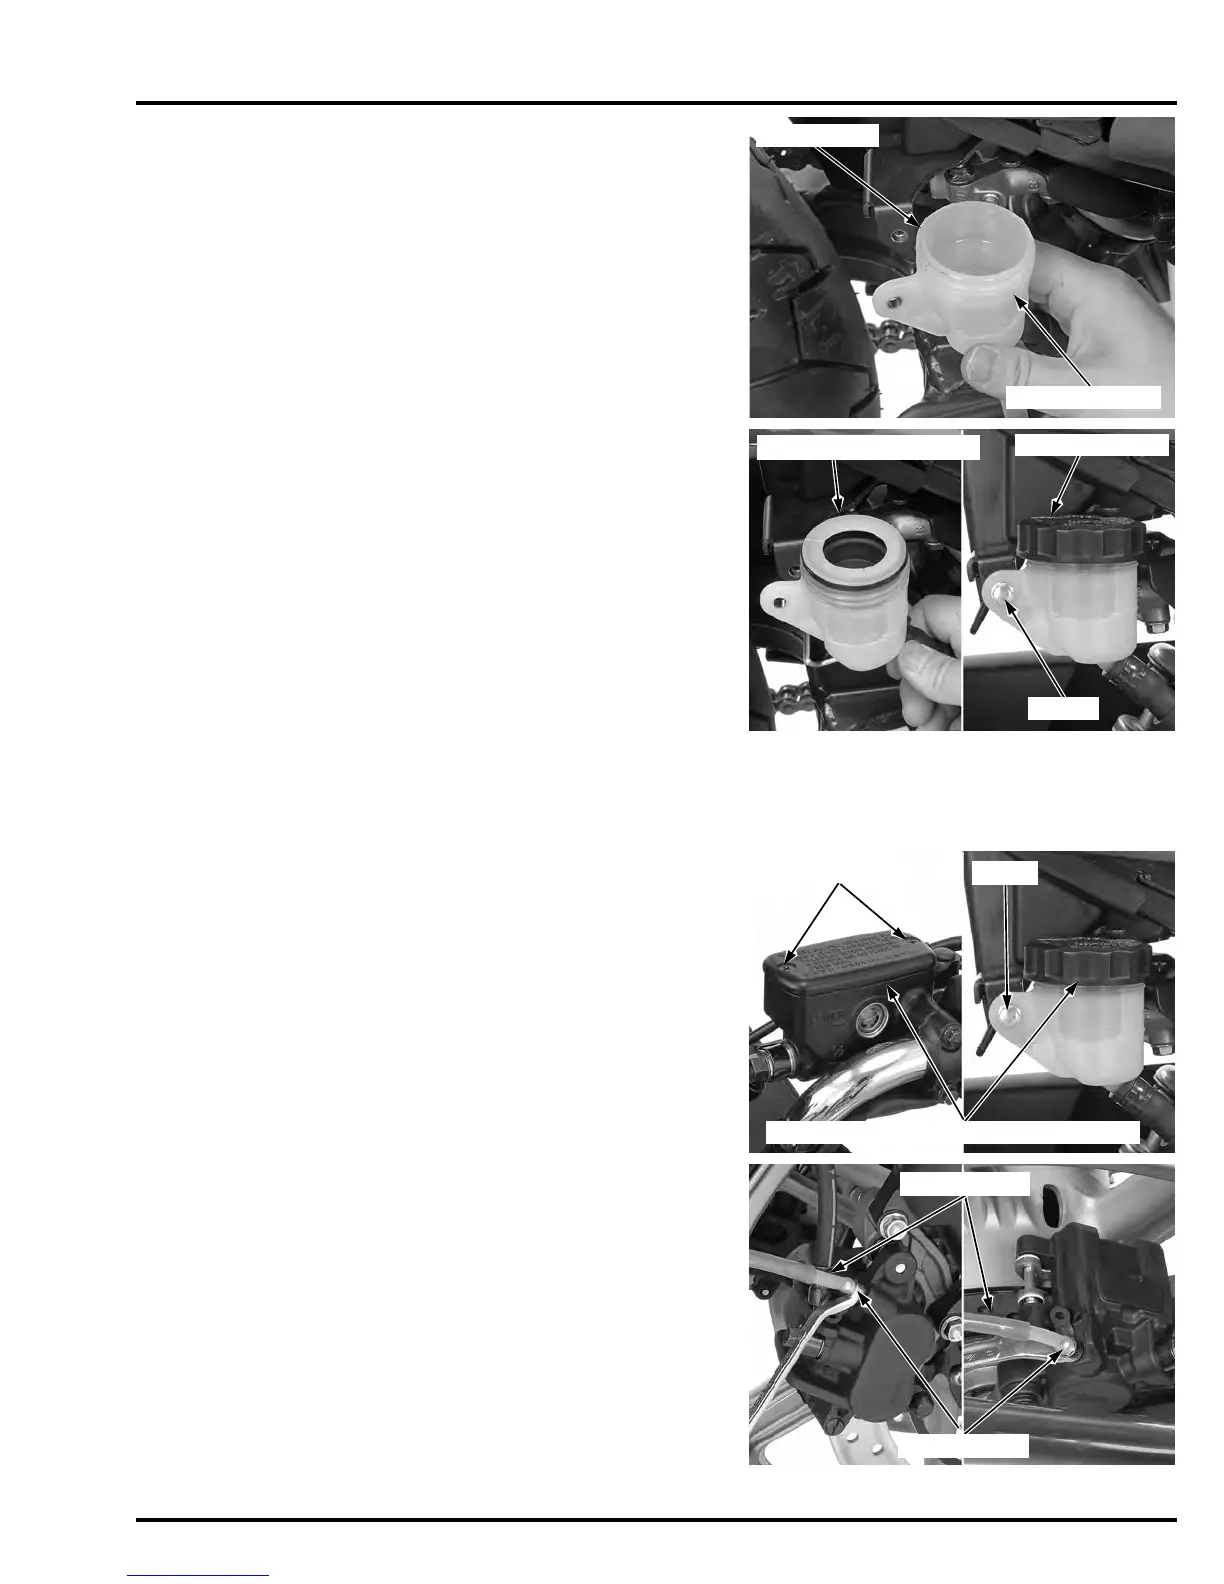
Install the diaphragm, set plate and reservoir cap.
Install the reservoir onto the frame and tighten the
mounting bolt to the specified torque.
Install the right side cover (page 2-5).
BRAKE FLUID REPLACEMENT/AIR
BLEEDING (CBF600S/N)
BRAKE FLUID DRAINING
Turn the handlebar to the left until the master cylin-
der reservoir is level before removing the reservoir
cap.
Remove the screws and reservoir cap.
Remove the set plate and diaphragm.
Remove the right side cover (page 2-5).
Remove the reservoir mounting bolt.
Remove the reservoir cap, set plate and diaphragm.
Connect a bleed hose to the caliper bleed valve.
Loosen the bleed valve and pump the brake lever or
pedal until no more fluid flows out of the bleed
valve.
TORQUE: 5.4 N·m (0.60 kgf·m, 4.0 lbf·ft)
TORQUE: 10 N·m(1.0kgf·m, 7 lbf·ft)
RESERVOIR CAP
BOLT
SET PLATE/DIAPHRAGM
Front brake:
Rear brake:
RESERVOIR CAP/SET PLATE/DIAPHRAGM
SCREWS
BOLT
Manuals by Motomatrix / www.motomatrix.co.uk / The Solution For Lost Motorcycle Coded Keys.
email: info@motomatrix.co.uk


 To Next Page