LIGHTS/METERS/SWITCHES
20-29
FUEL LEVEL SENSOR
REMOVAL/INSTALLATION
Remove the fuel tank (page 5-59).
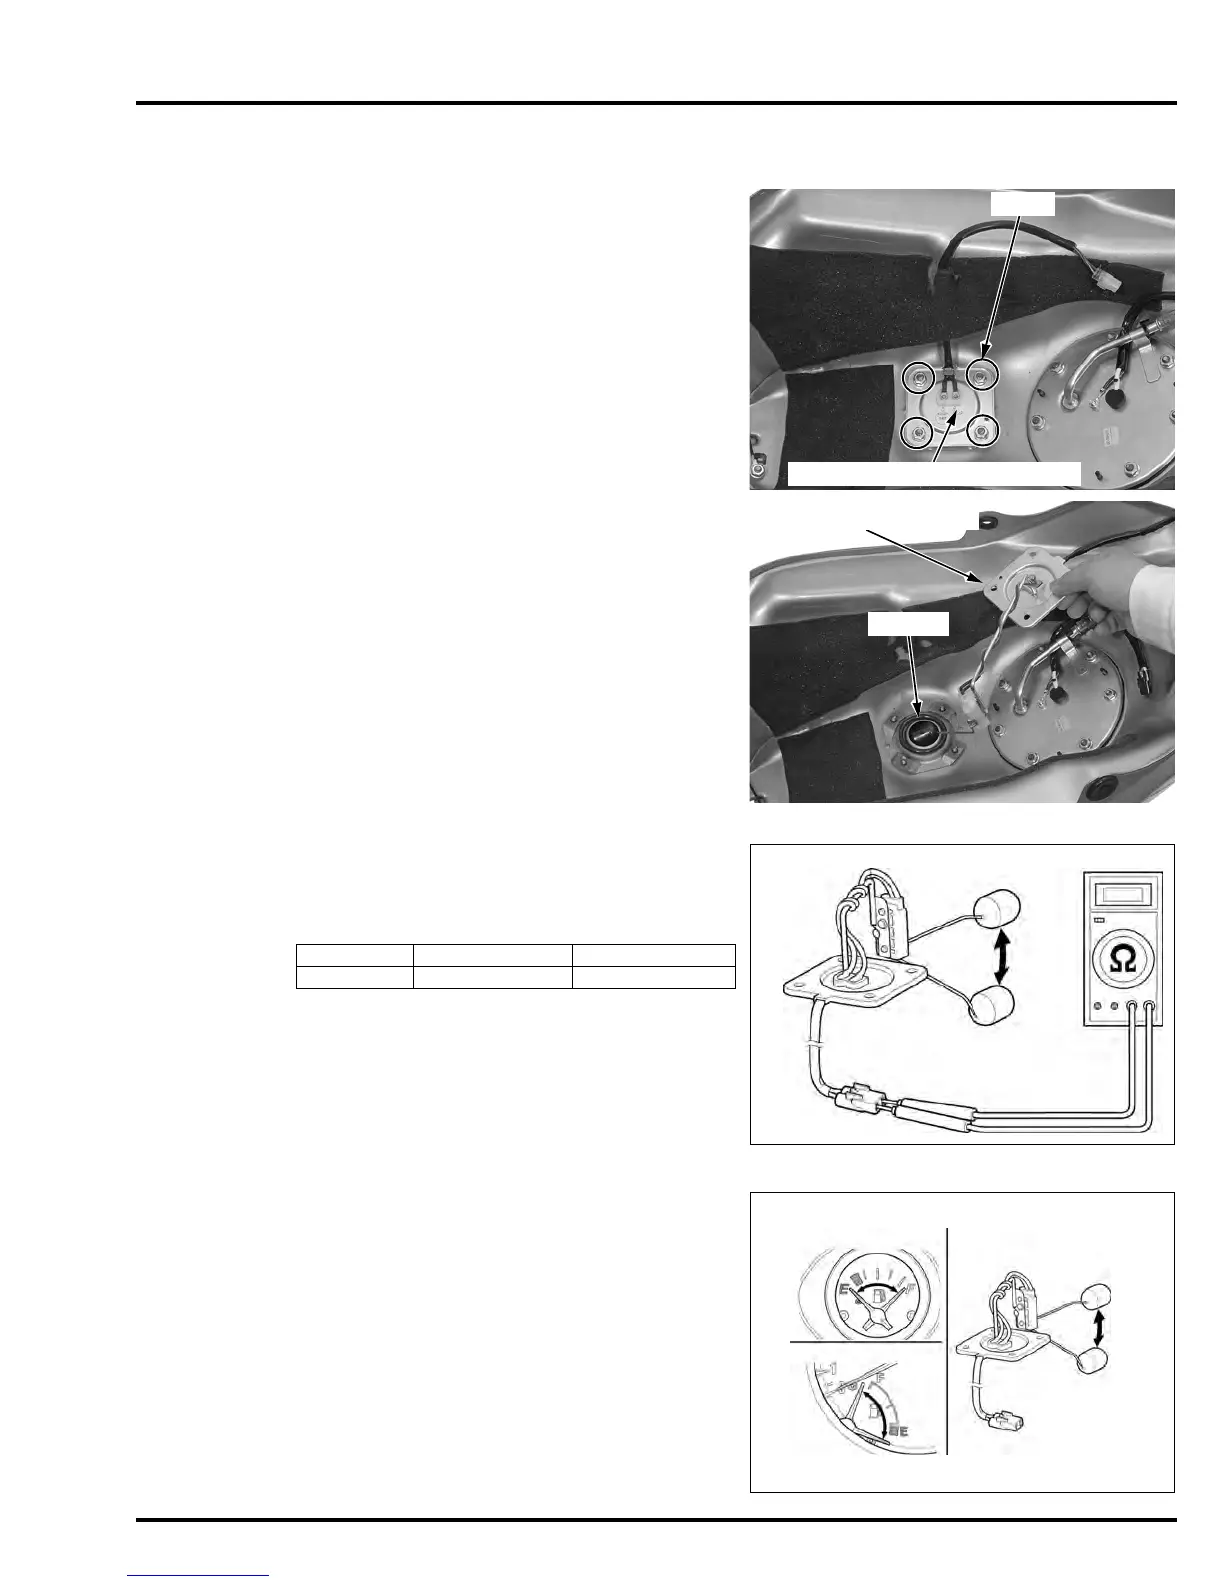
Remove the nuts, fuel level sensor and O-ring.
Check the O-ring is in good condition and replace if
necessary.
Install the fuel level sensor into the fuel tank.
Installation is in the reverse order of removal.
INSPECTION
Check the fuel level sensor and arm for damage.
Measure the resistance at the fuel level sensor 2P
(Natural) connector terminal with moving the float
at the top "F" and bottom "E" position.
FUEL METER INSPECTION
Connect the fuel pump unit 2P (Natural) connector
to the main wire harness.
Move the float from bottom (empty) to top (full)
positions to check the fuel meter needle indication.
Turn the ignition switch ON.
If the fuel meter needle does not indicate properly,
check for open or short circuit in wire harness.
If the wire harness is good, replace the combination
meter printed circuit board with new one (page 20-
13).
Be careful not to
damage or bend
the reserve sensor
arm.
NUTS
FUEL LEVEL SENSOR/O-RING
Be careful not to
damage or bend
the reserve sensor
arm.
TOP "F" BOTTOM "E"
Resistance 6 – 10 Ω 86 – 90 Ω
Full
position:
S/SA model:
N/NA model:
Empty
position:
Manuals by Motomatrix / www.motomatrix.co.uk / The Solution For Lost Motorcycle Coded Keys.
email: info@motomatrix.co.uk