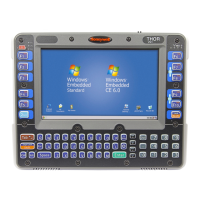
Thor VM3 with Microsoft Windows Embedded Compact 7 User Guide 7
Initial Setup for Thor VM3
This page lists a quick outline of the steps you might take when setting up a new Thor
VM3. More instruction for each step is listed later in this guide.
Contact Technical Assistance if you need additional help.
Hardware Setup
1. Install RAM Mount or Install U Bracket Mount to the vehicle.
2. Place Thor VM3 in the Dock.
3. Secure the optional external keyboard to either an integrated or remote mounting
bracket.
4. Connect Cables for any peripherals.
5. Connect Power.
6. Secure all cables in Strain Relief Cable Clamps.
7. Press the Power Switch on the dock to the on position.
8. Press the Power Button on the Thor VM3.
Note: After the initial power on, the Thor VM3 can be configured to automatically power on,
either when power is attached or the vehicle ignition is turned on.
9. Perform touch screen Calibration.
Software
Languages
The Thor VM3 is shipped with a multi-language operating system. To change the lan-
guage displayed, go to the User Interface Language tab of the Regional Settings control
panel. Available languages are displayed in a pull-down list. After selecting the desired
language a reboot may be necessary. Use the Restart option on the Registry control
panel to reboot.
First Boot
When a new Thor VM3 starts up a EULA (End User License Agreement) may be dis-
played on the touch screen. It remains on the screen until the Accept or Decline button
is tapped with a stylus.
Tap the Accept button to accept the EULA terms and the Thor VM3 continues the
startup process. The EULA is not presented to the user again.
Tap the Decline button to decline the EULA and the Thor VM3 reboots. It will continue
to reboot until the Accept button is tapped with the stylus.
 Loading...