74 Thor VM3 with Microsoft Windows Embedded Compact 7 User Guide
1. Secure the cable to the bracket with plastic tie straps (cable ties).
2. If necessary, the cable ties can be trimmed to length after installation. Cut the
excess tie length off flush and not at an angle to prevent sharp edges that may
cause cuts.
Connect Power
See Power Supply Connector for connector pinout
For the VM1D Standard Dock and VM3D Enhanced Dock, power options include:
• 12-48 VDC Vehicles (10-60 VDC Direct Connection) - Direct connection to vehicle
power.
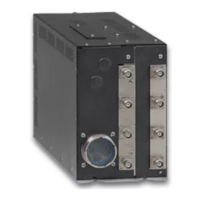
• 60-144 VDC Vehicles (50-150 VDC Power Supply, Screws on Side of Lid) - Requires
the use of a DC/DC power supply.
• 60-144 VDC Vehicles (50-150 VDC Power Supply, Screws on Top of Lid) - Requires the
use of a DC/DC power supply.
• VX6 / VX7 Adapter Cable - For applications where the Thor VM3 replaces a previously
installed VX6 or VX7.
• Thor VX8 / Thor VX9 Adapter Cable - For applications where the Thor VM3 (with a
VM1D Standard Dock or VM3D Enhanced dock (replaces a previously installed Thor
VX8 or Thor VX9.
• CV61 Adapter Cable - For applications where the Thor VM3 replaces a previously
installed CV61.
• Screen Blanking - Optional connection to blank the Thor VM3 display while the
vehicle is in motion.
For the VMXD Enhanced Dock, power options include:
• VMXD Enhanced Dock with Thor VX8/Thor VX9 Power Cable - For applications where
a Thor VM3 (with a VMXD Enhanced Dock) replaces a previously installed Thor VX8
or Thor VX9.
When using the Thor VM3 with AC power, use the VMXD Enhanced Dock for Off-Vehi-
cle Use and:
• External AC/DC Power Supply - For use when DC power is not available to power the
Thor VM3, such as in an office environment.

 Loading...