09/01/133.20 | Installaon www.HandiQuilter.com
Y-Encoder Assembly Installaon (HQ Sixteen only)
Follow the installaon guidelines below according to the scenario below (A, B, or C) which describes your
situaon best.
A. The HQ Pro-Stcher is an upgrade to a stch-regulated HQ Sixteen
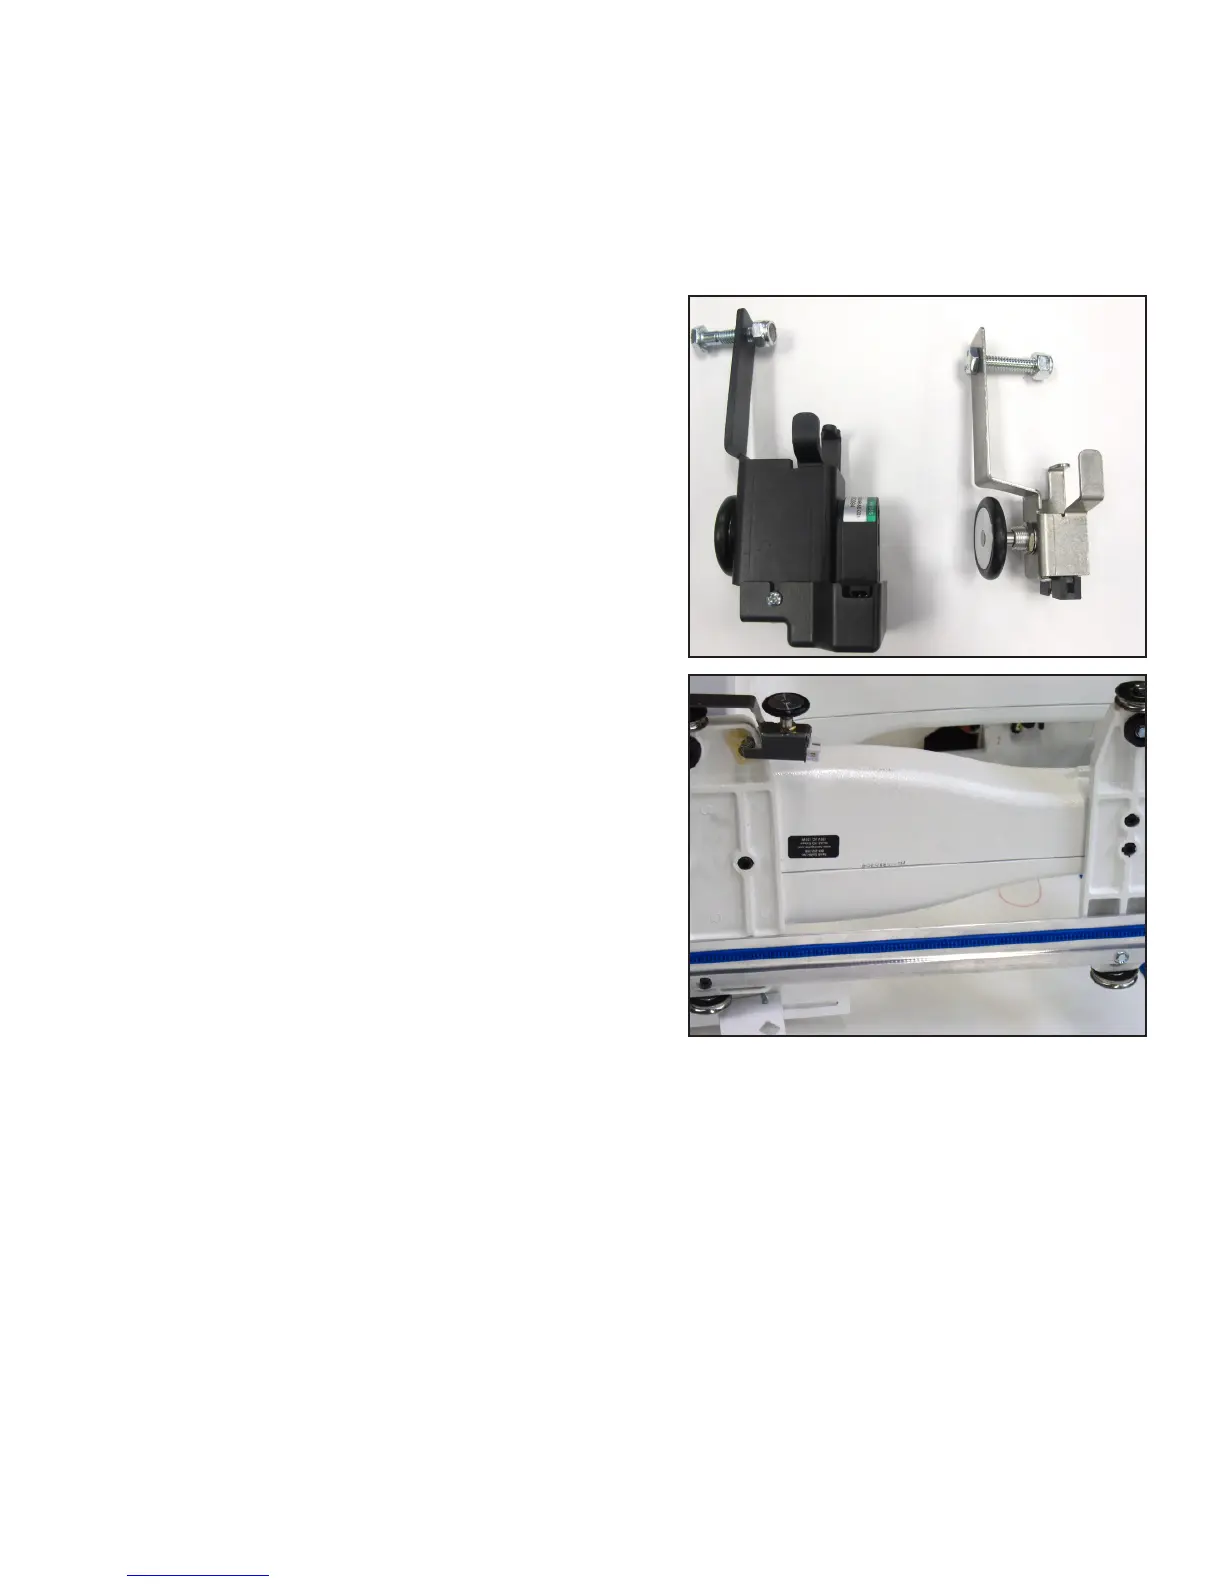
1. Determine which Y-encoder your HQ Sixteen has. If
you have either of the two Y-encoders pictured at
the right (Version 2 or Version 3), you do not need to
replace the Y-encoder. However, if your Y-encoder is
dierent from the ones pictured, you have a Version
1 Y-encoder and will need to connue with steps 2
through 5 below.
2. Place the HQ Sixteen on its side. Remove the encoder
bracket mounng bolt using a 7/16-inch wrench and
removing the bolt and bracket that aach the wheel
to the rear base plate.
3. Replace the old encoder assembly with the encoder which is provided with the HQ Pro-Stcher (see
Parts List, item Q), making sure to put the wheel back in place between the nut and the base plate.
4. Tighten the bolt in place with the 7/16-inch wrench. Use the nut to ghten the wheel to the base
plate and then, while holding the nut in posion with the wrench, ghten the bolt head with another
7/16-inch wrench or nut driver to the point that the encoder bracket can sll spring up and down but
is not excessively wobbly.
5. Reposion the coil spring between the encoder bracket and the boom of the base plate. The
encoder bracket has a tab that the spring goes around and the base plate will either have a nub
built into the casng or a small plasc device designed to entrap the opposite end of the spring.
Version 3
Version 2