09/01/13www.HandiQuilter.com Installaon | 3.5
Installaon (HQ
24
Fusion & HQ
18
Avanté)
These instrucons are for installing HQ Pro-Stcher on the HQ
24
Fusion and HQ
18
Avanté (with an 8-wheel
Precision-Glide carriage). Handi Quilter recommends installaon by an authorized HQ Pro-Stcher
Representave if available.
Tools required
• Power drill
• 4mm Allen wrench
• 5mm Allen wrench
• Sloed screwdriver (one large and one small)
• Phillips screwdriver (one large and one small)
• Manual engagement/disengagement tool (see Parts List, item O)
Installaon of the X-Rack and Y-Rack
To install the X-Rack
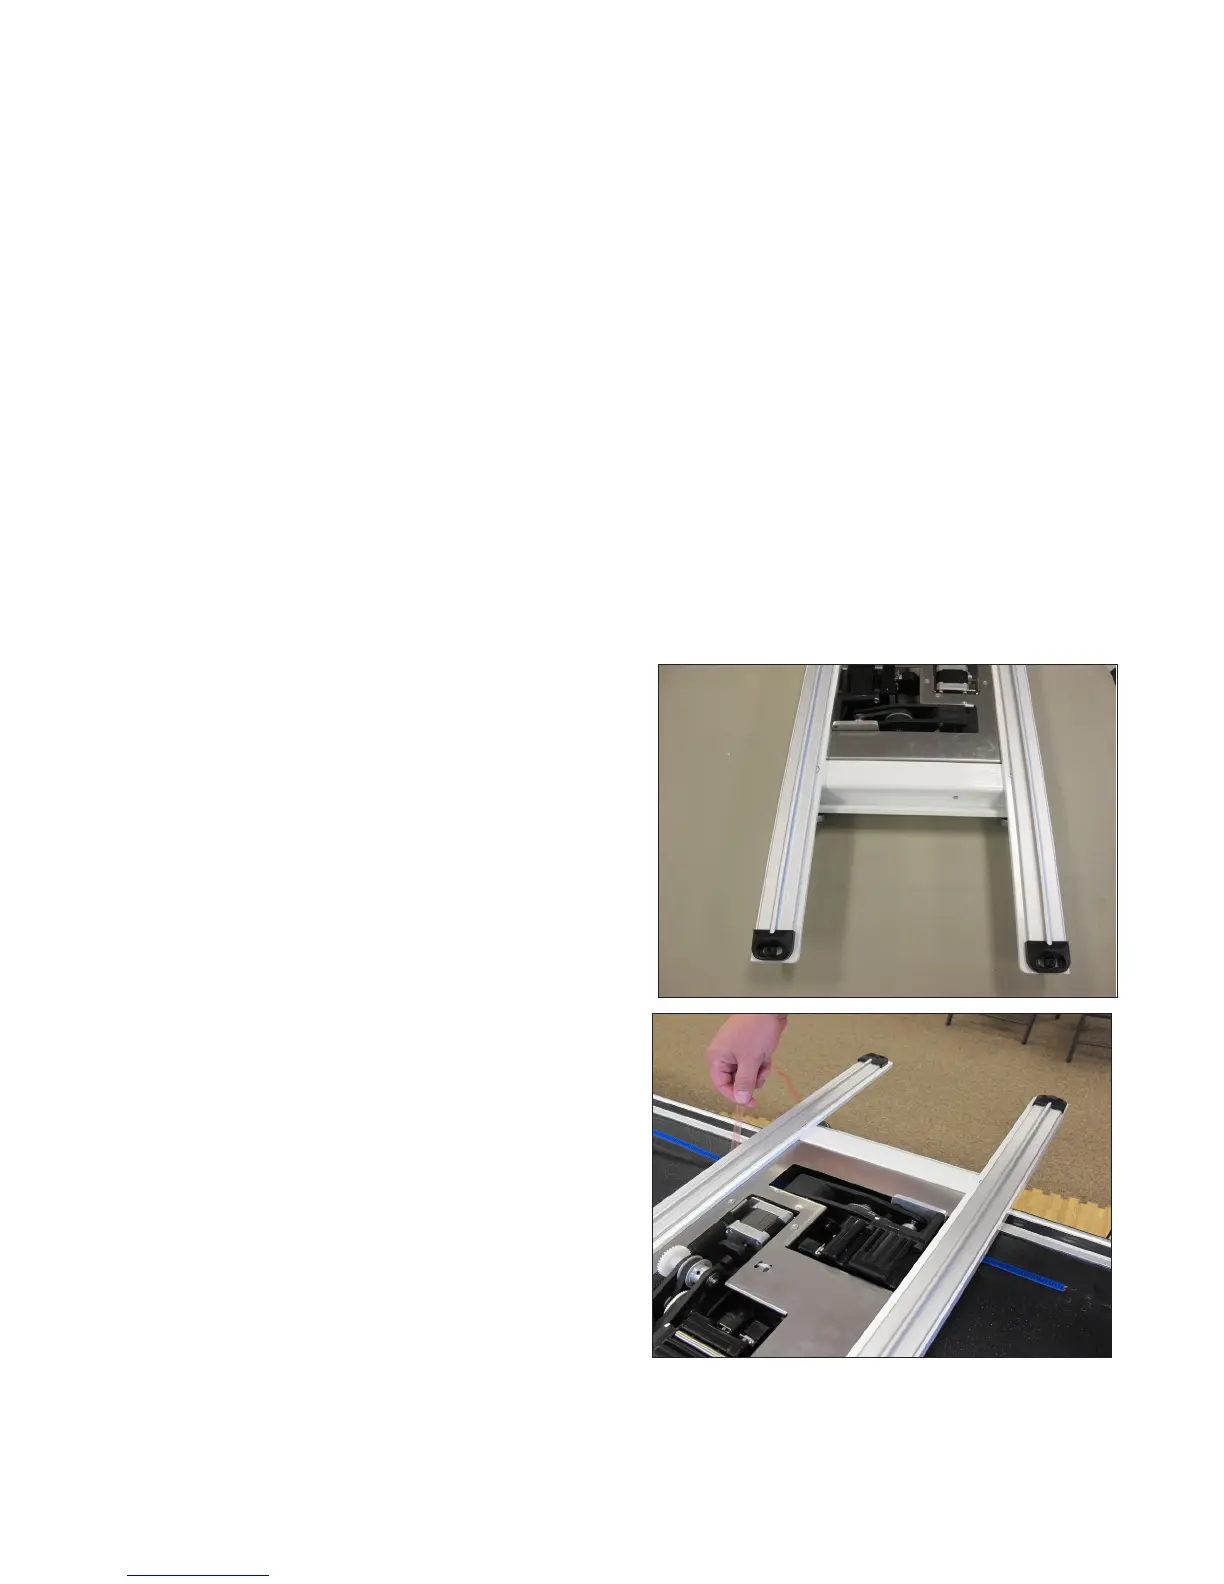
1. Remove the blue 12-foot Flexirack (see Parts List, item
A) and the Pro-Stcher carriage (see Parts List, item E)
from the box.
2. Place the Pro-Stcher carriage on the frame. Starng
at one end of the table, begin mounng the blue
Flexirack to the front of the table while aligning it to
the front white gear on the carriage.
Peel back a few inches of the pink protecve layer
of the tape. Posion the blue Flexirack by aligning it
to the white gear as you move down the table. Press
down on the blue Flexirack to sck it rmly to the
table.