09/01/137.2 | Quilt Menu www.HandiQuilter.com
In addion to doing a manual check, use the two Trace opons to verify the posion of the design’s
bounding box or the dened area relave to the quilt.
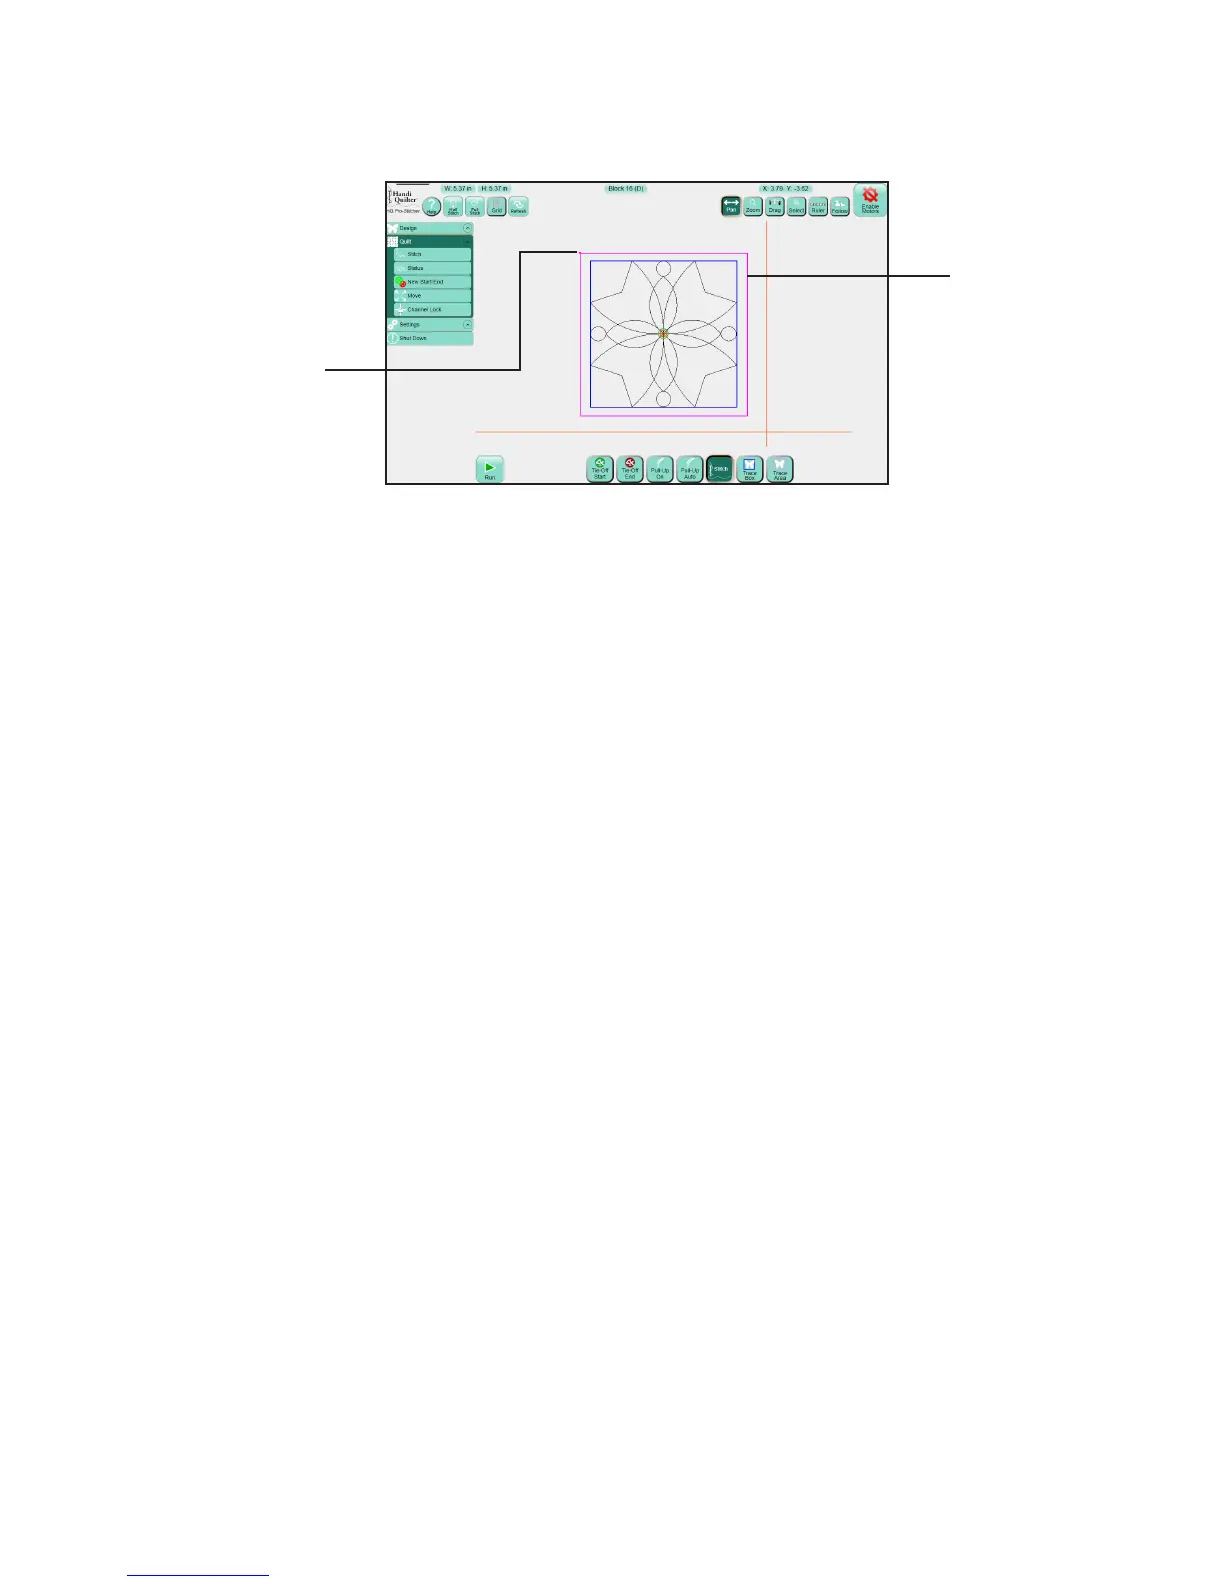
To verify the posion of the design’s bounding box on the quilt
• Select Trace Box and then Run. Pro-Stcher moves the machine around the perimeter of the
design, following the blue bounding box. Watch the needle posion as the machine traces the
design’s bounding box to ensure the design will quilt where expected. If the Stch buon is enabled
(appears darker), Pro-Stcher stches, rather than traces, the bounding box.
To verify the posion of the dened area on the quilt
• Select Trace Area and then Run. Pro-Stcher moves the machine around the perimeter of the
dened area, shown as purple lines on the screen. Watch the needle posion as the machine traces
the area’s perimeter to ensure the design will quilt where expected. If the Stch buon is enabled
(appears darker), Pro-Stcher stches, rather than traces, the perimeter of the area.
NOTE: If you’ve enabled the Stch buon to stch rather than trace the bounding box or the
perimeter of the area, you must manually do eos at the beginning and end of stching.
!
A dot indicates
the start point for
the area.
The design’s bounding
box