09/01/13www.HandiQuilter.com Installaon | 3.21
B. The HQ Pro-Stcher is an Upgrade to a Non-Regulated HQ Sixteen
• Follow the instrucons for aaching a new Y-encoder assembly that came with the Stch Regulator
Upgrade Kit.
C. The HQ Pro-Stcher was originally purchased with a new HQ Sixteen
• No addional installion is required. The correct Y-axis encoder assembly should already be aached
to the HQ Sixteen.
Install the power cord retaining clamp (HQ Sixteen only)
1. Set the HQ Sixteen back up on its wheels and make sure it is unplugged.
2. Remove the four P-Pod mounng screws from the P-Pod (the plasc box on the le side of the
HQ Sixteen which contains the power cord receptacle) using a Phillips screwdriver. Note that the
boom-le screw is longer than the other three.
3. Carefully disconnect all three cables from the P-Pod.
4. If working with an upgrade that included a new P-Pod, connue the following steps using the new
P-Pod. Otherwise use the P-Pod that was just removed as you perform the remaining steps.
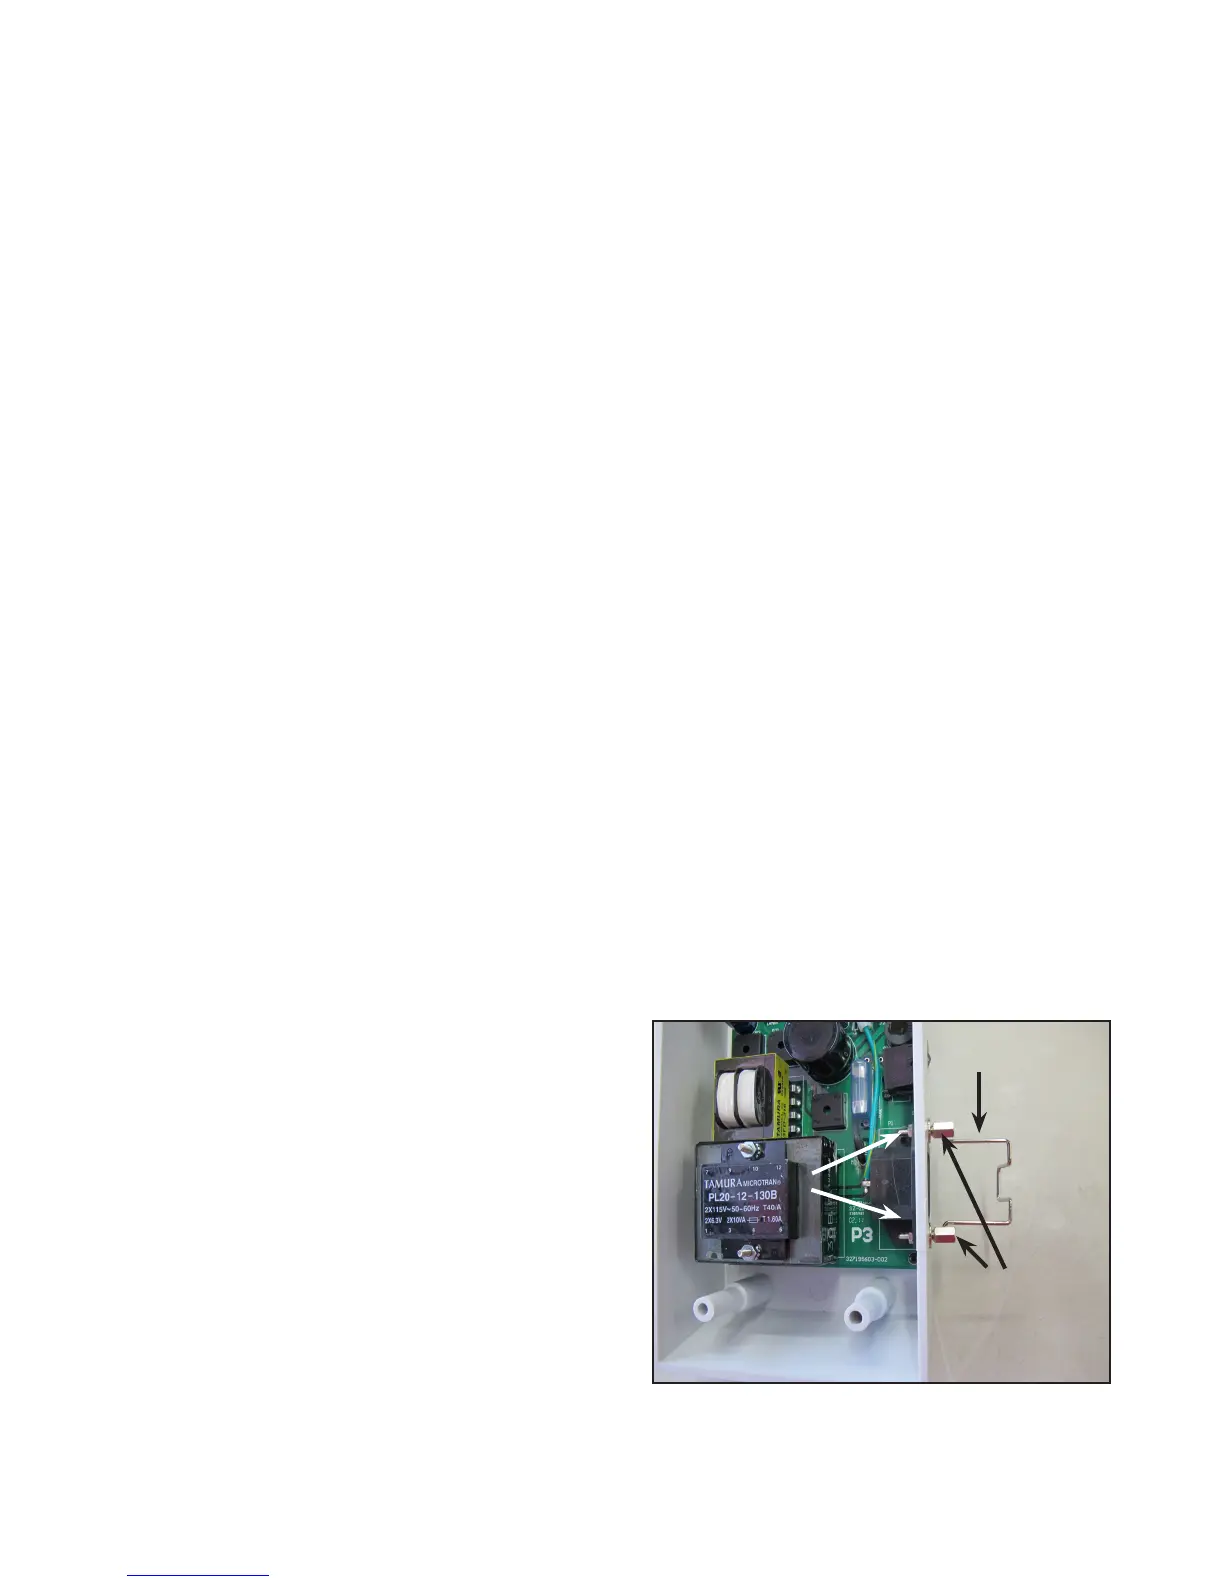
5. Loosen the two screws that mount the power cord receptacle to the plasc P-Pod using a Philips
screwdriver and, if the screws include nuts on the opposite end, a wrench or small pliers to hold the
nut (the two Phillips head screws are accessible from the exterior of the pod while the nuts are on
the interior).
6. Slide the retaining clamp (see Parts List, item R) over one end of the new Y-split power cord (see Parts
List, item I).
7. Insert the power cord into the receptacle on the P-Pod while sliding the two slots on the clamp
behind the two screws that were just loosened.
8. Make sure the power cord is fully inserted, and then
ghten the two P-Pod screws so they hold the clamp
securely against the P-Pod. Insert the small screw
included with the retaining clamp into the clamping
poron of the retaining clamp and ghten so the
clamp is now ght on the power cord.
9. Reconnect the three P-Pod cables and then reaach the P-Pod to the HQ Sixteen head. (Remember
that the long screw should be in the boom-le hole.)
Power Cord Clamp
Nuts
Washers