142 Powermax30 AIR Service Manual 808850
6 – Power Supply Component Replacement
Replace the solenoid valve
Remove the solenoid valve
1. Complete the following procedures:
a. Set the power switch to OFF (O), and disconnect the power cord from the power source.
b. See Remove the power supply cover on page 98.
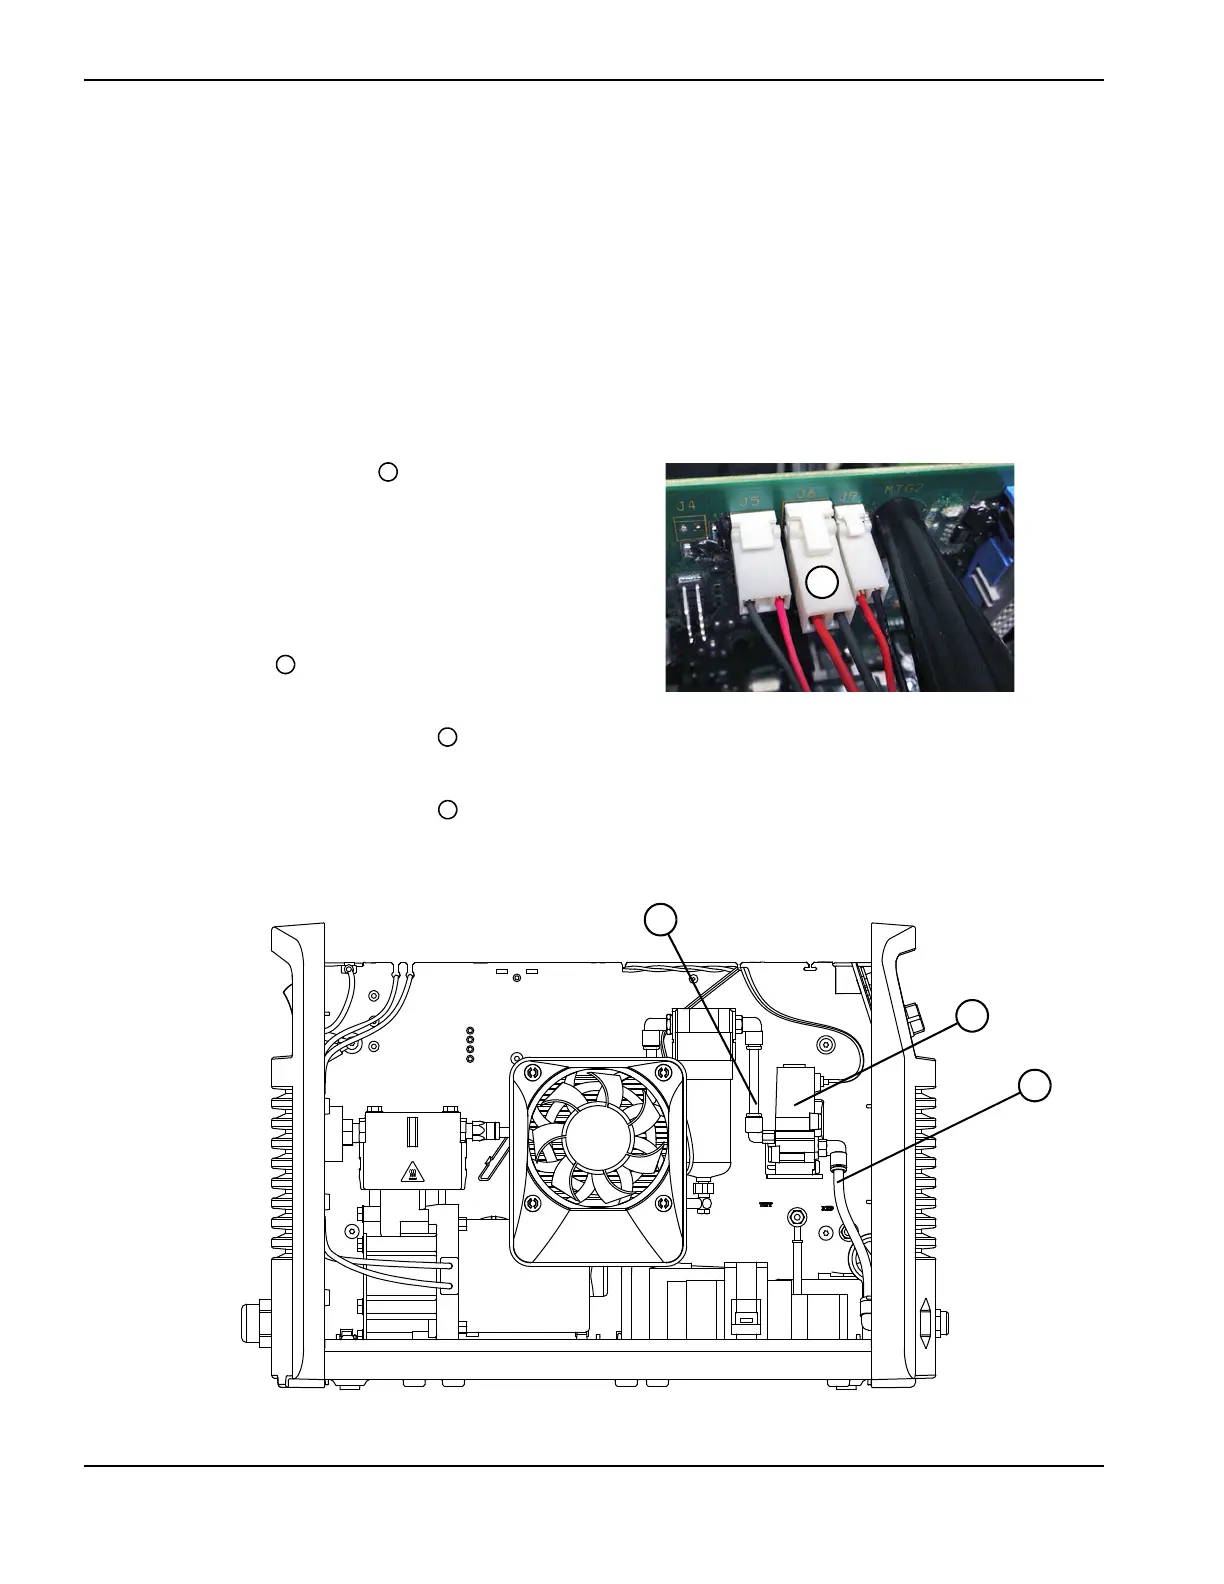
2. Detach the connector from J6 on the power
board. Lift the top edge of the component barrier to
see the connector.
3. Remove the valve’s wires from the notch at the top of
the center panel.
4. Pull back the 2 clips from the center panel that hold
the solenoid valve in place, and work the solenoid
valve free from the clips.
5. Push-to-release the gas supply hose from the
fitting on the left side of the solenoid valve. (See How to use push-to-connect fittings on page 133.)
6. Push-to-release the gas supply hose from the fitting on the right side of the solenoid valve.
Figure 59
Kit number Description
428374 Kit: Solenoid valve (includes gas hoses and elbow fittings)