144 Powermax30 AIR Service Manual 808850
6 – Power Supply Component Replacement
Replace the torch lead and strain relief
Remove the torch lead and strain relief
If you are replacing just the torch lead cable, not the whole torch assembly, refer to Replace the torch lead on page 197
for details on how to remove the old lead from the torch.
1. Complete the following procedures:
a. Set the power switch to OFF (O), and disconnect the power cord from the power source.
b. See Remove the power supply cover on page 98.
c. See Detach the front panel on page 102.
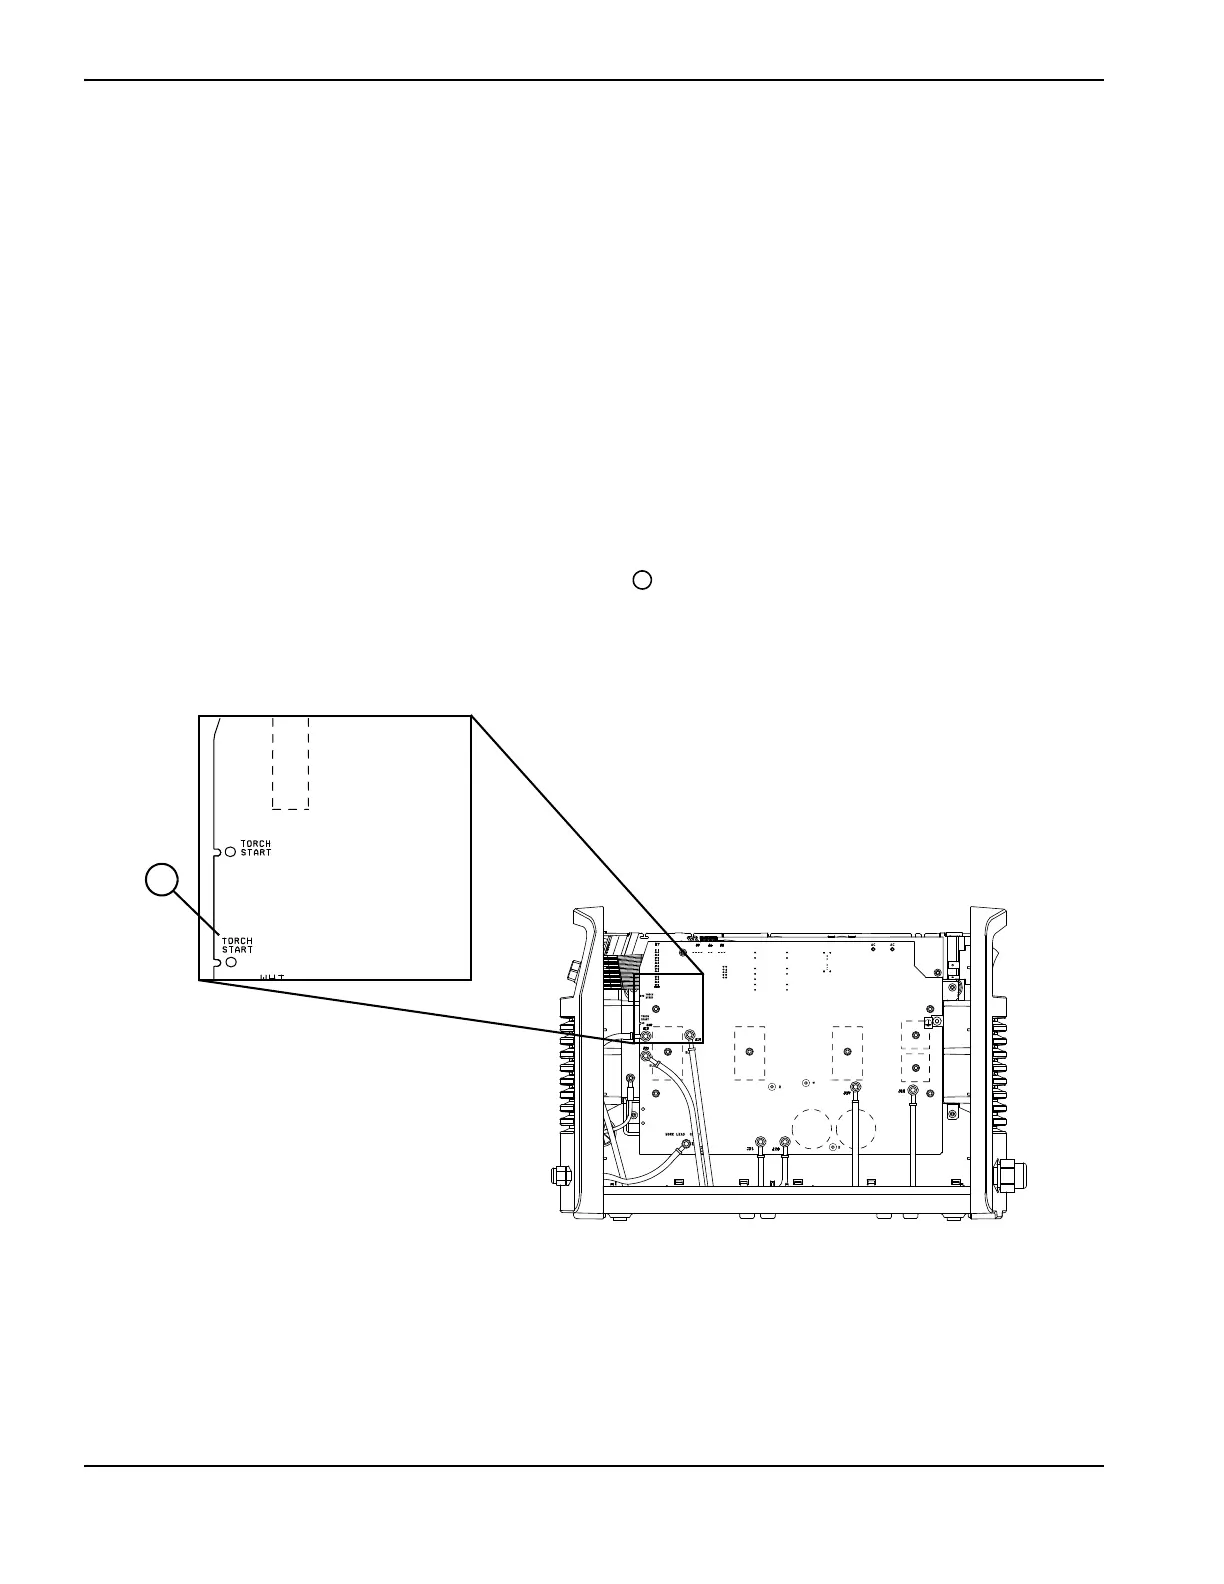
2. Locate the 3-pin connector at the TORCH START slot (J12) on the power board (on the side facing the heatsink)
where the orange, blue, and purple wires from the torch lead connect.
Figure 60
Kit number Description
428176 Kit: Air T30 torch lead, 4.6 m (15 feet), with strain relief
WORK LEAD (BLK)
AC AC
R
w
TORCH
START
BLK
BLK
B
TORCH
START

 Loading...


