Powermax30 AIR Service Manual 808850 133
6 – Power Supply Component Replacement
Replace the drain hose, gas supply hoses, and 90° fitting
The power supply contains a drain hose and 2 gas supply hoses that can be replaced. See Figure 54 on page 135.
The drain hose runs from the bottom of the air filter bowl to the base of the power supply.
One gas supply hose runs from the air filter to the solenoid valve.
The other gas supply hose runs from the solenoid valve to the torch lead.
You can also replace the plastic 90° fitting that connects the gas supply hose from the solenoid valve to the gas supply
fitting from the torch lead.
The gas supply hoses in this system use push-to-connect fittings.
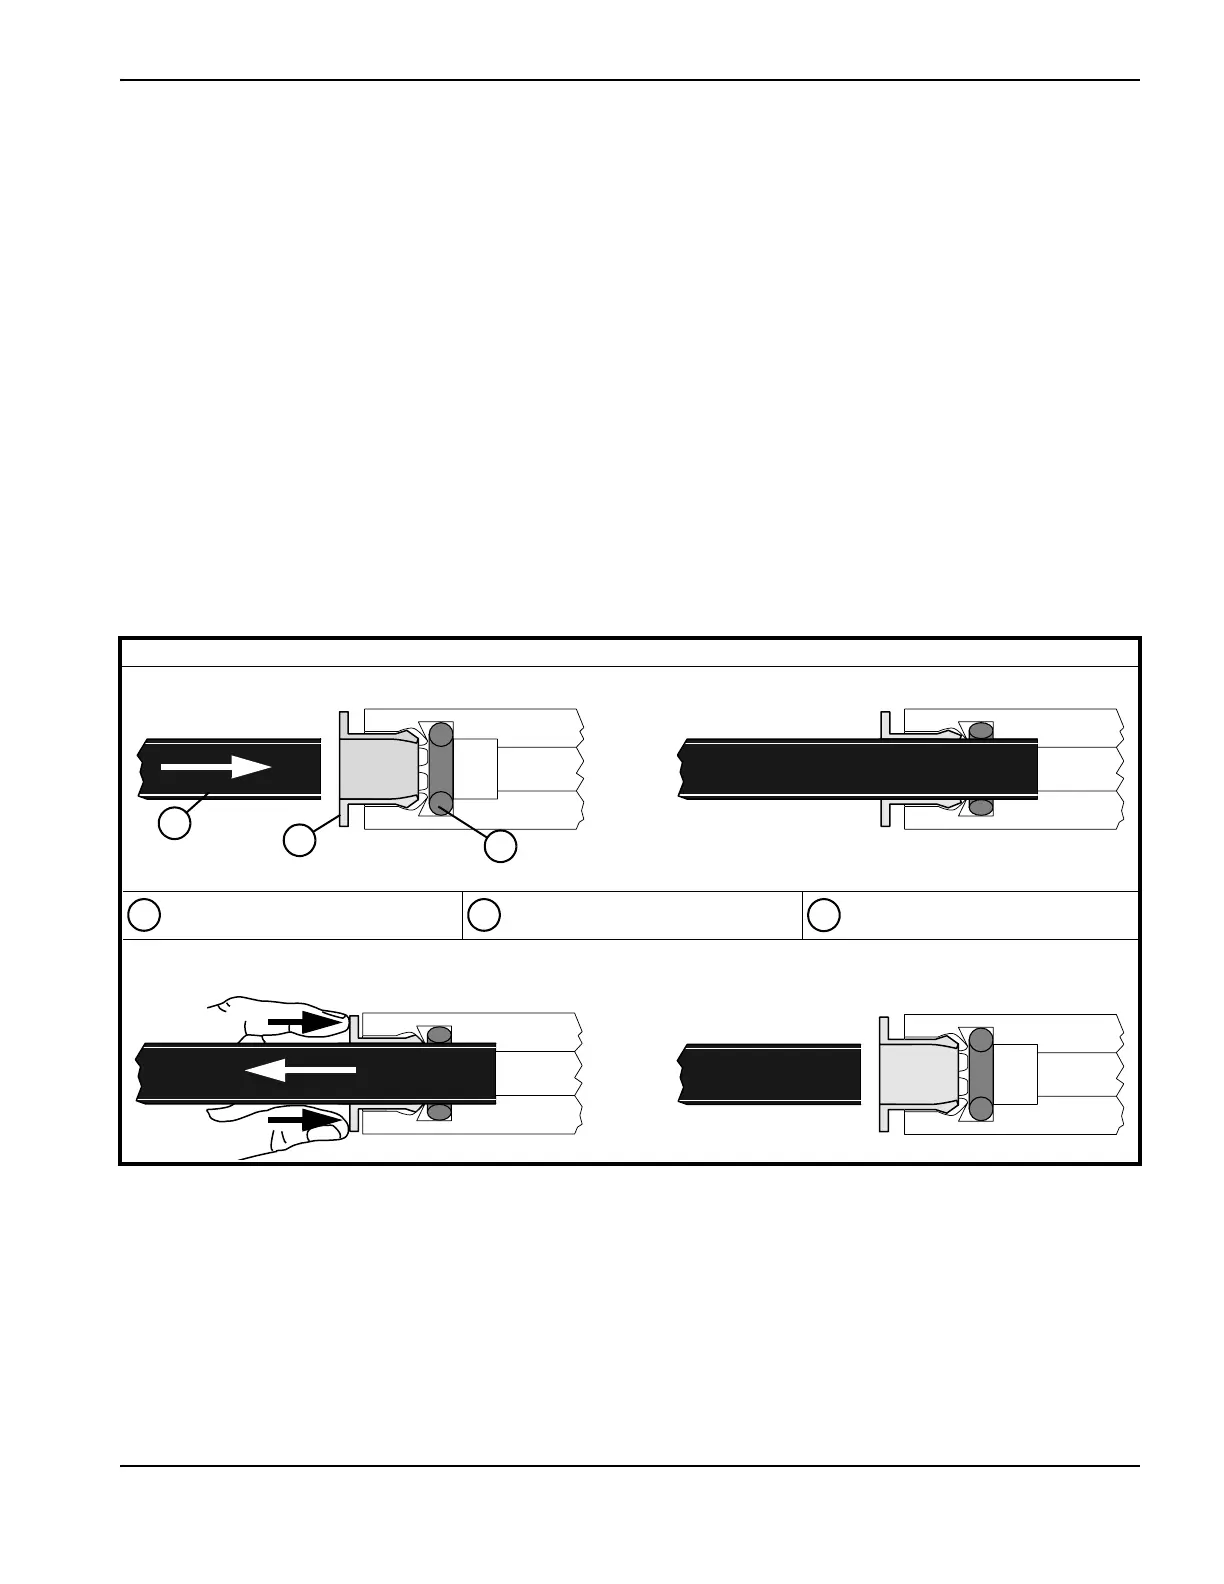
How to use push-to-connect fittings
Kit number Description
428373 Kit: Drain hose, 2 gas supply hoses, elbow fitting
Push-to-Connect
To connect, push the hose into the fitting until it stops. Pull on the hose to verify that it is secure.
To release, push the fitting collet toward the fitting, and pull the hose away from the fitting.