148 Powermax30 AIR Service Manual 808850
6 – Power Supply Component Replacement
Replace the air filter assembly
Remove the air filter assembly
1. Complete the following procedures:
a. Set the power switch to OFF (O), and disconnect the power cord from the power source.
b. See Remove the power supply cover on page 98.
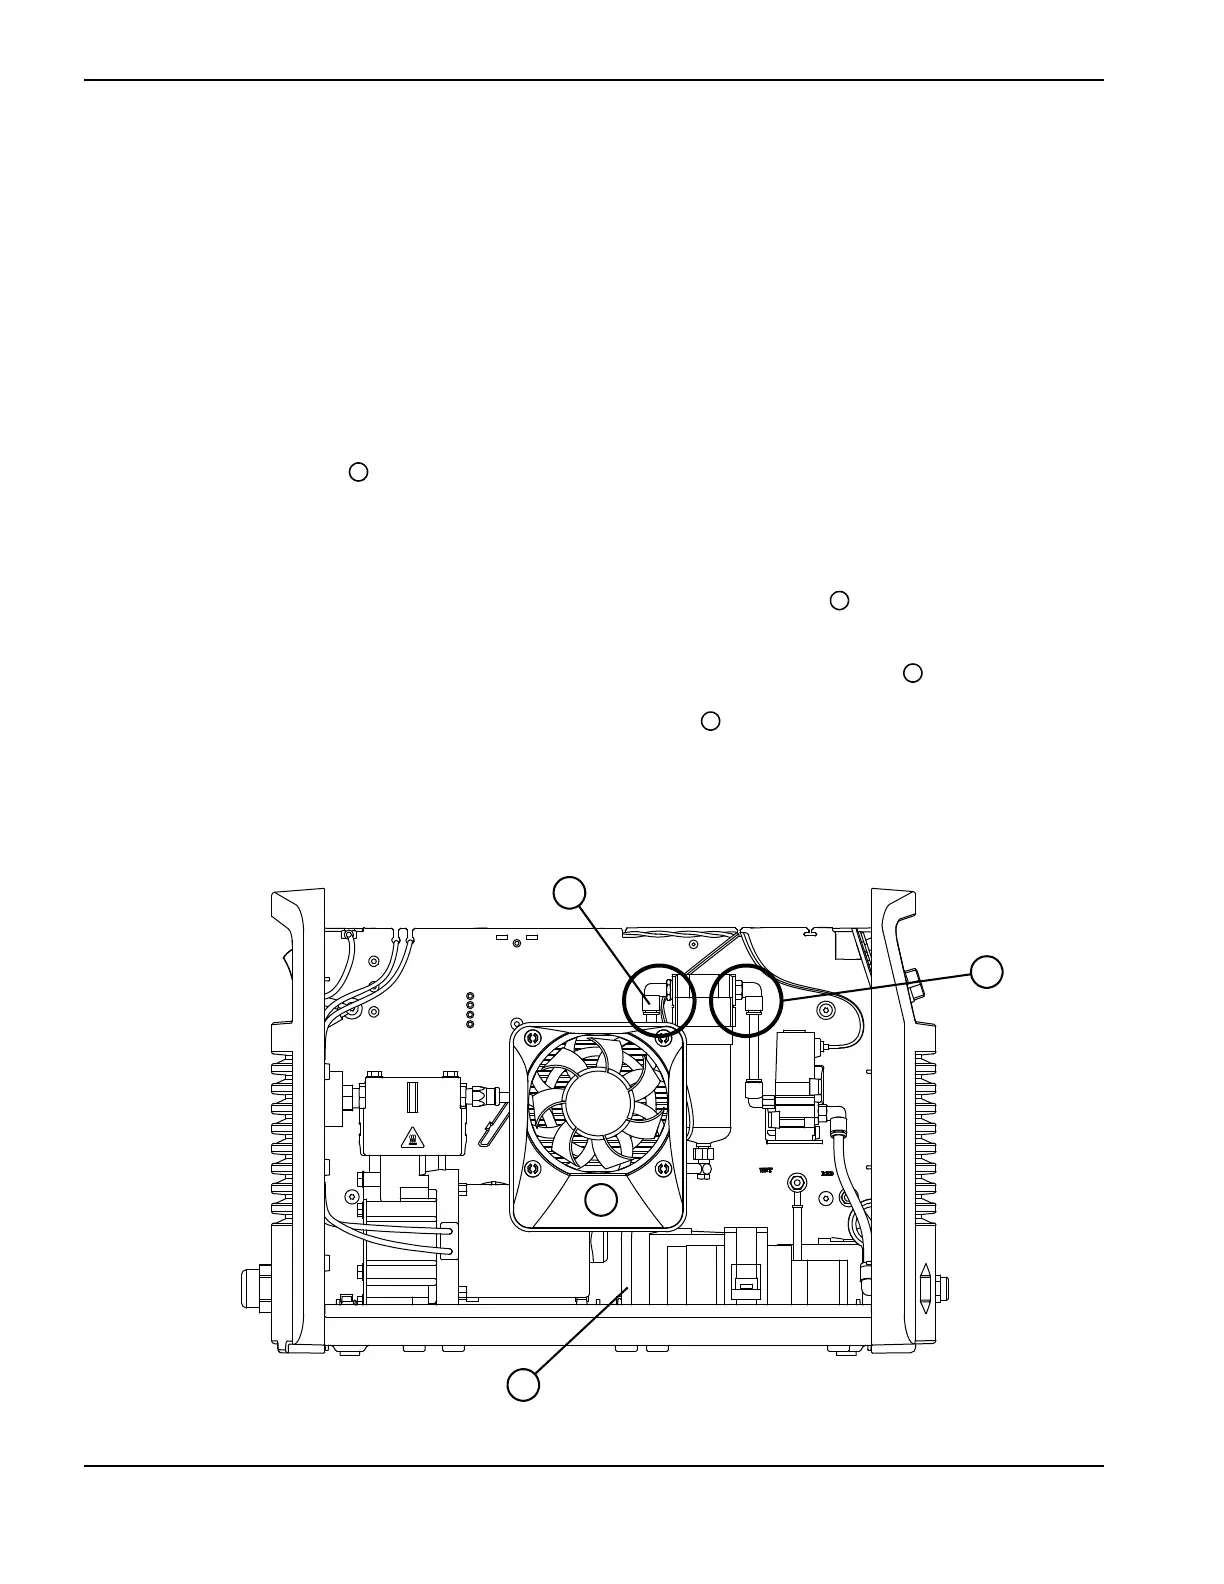
2. Disconnect the drain hose from the hole in the bottom of the power supply’s base. See Figure 64.
It is normal to see water in the drain hose and in the air filter bowl. Remove any water that
spills inside the power supply before operating the system again.
3. Push-to-release the gas supply hose from the fitting on the right side of the air filter . (See How to use
push-to-connect fittings on page 133.)
4. Push-to-release the copper heat exchange coil from the fitting on the left side of the air filter .
If you need better access to the air filter, remove the fan plenum . Use a pair of
needlenose pliers to compress and release the plenum’s top 2 corner clips first before
working the bottom 2 clips free from the fan casing.
Figure 64
Kit number Description
428375 Kit: Air filter assembly (includes gas hose, drain tube, and elbow fittings)