AFL-xxx-CX2 Panel PC
Page 53
Step 6: Install the hard drive into the panel PC by aligning the retention screw holes in
the hard drive brackets with the retention screw holes on the chassis. Insert the
four retention screws.
Step 7: Replace the aluminum back cover to the chassis.
Step 8: Replace the plastic back cover. Step 0:
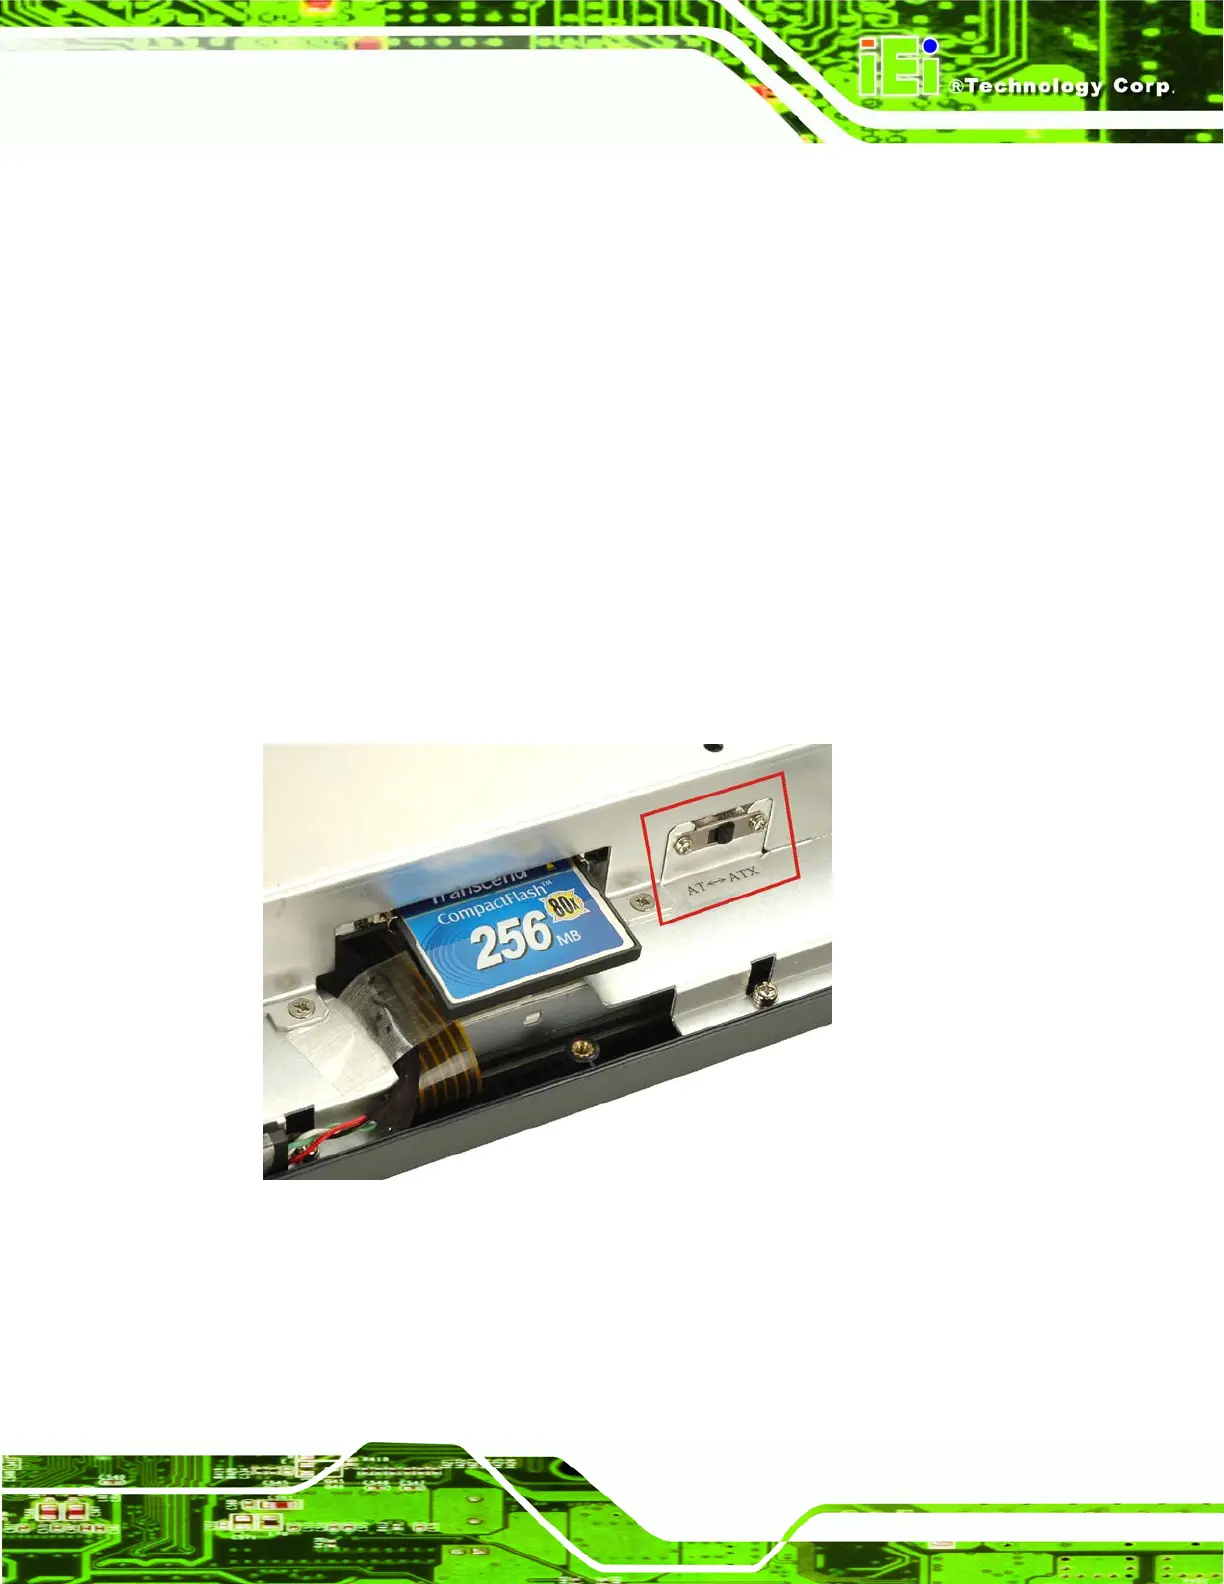
3.7 AT/ATX Mode Selection
AT and ATX power modes can both be used on the AFL-xxx-CX2. The selection is made
through an AT/ATX switch on the aluminum chassis inside the plastic back cover
(
Figure 3-9). To select AT mode or ATX mode, follow the steps below.
Step 1: Remove the plastic back cover. See Section
3.5 above.
Step 2: Locate the AT/ATX switch on the aluminum chassis (
Figure 3-9).
Figure 3-9: AT/ATX Switch Location
Step 3: Adjust the AT/ATX switch. Step 0:
 Loading...