AFL-xxx-CX2 Panel PC
Page 59
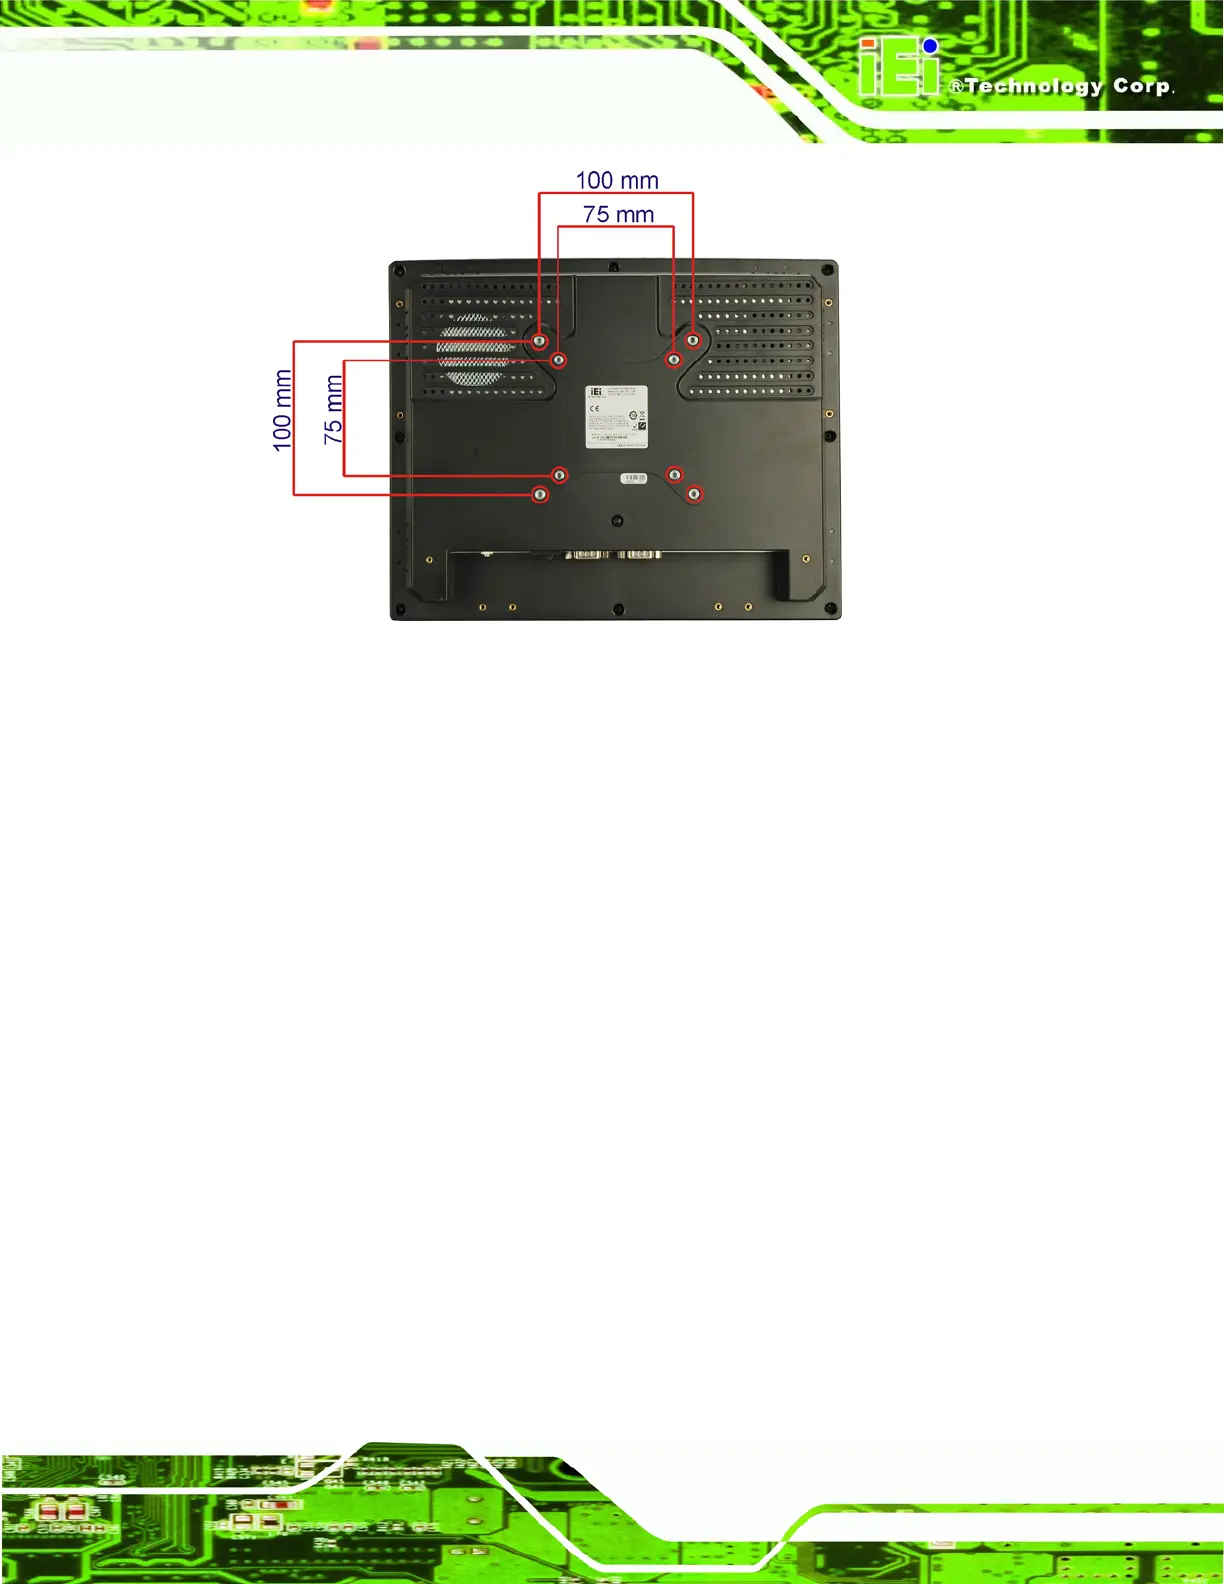
Figure 3-14: Arm Mounting Screw Holes (AFL-10A-CX2 and AFL-12B-CX2)
Step 4: Secure the flat panel PC to the interface pad by inserting four retention screws
through the bottom of the mounting arm interface pad and into the flat panel
PC.Step 0:
3.8.3 Panel Mounting
To mount the AFL-xxx-CX2 into a panel, please follow the steps below.
Step 1: Select the position on the panel to mount the flat panel PC.
Step 2: Cut out a section from the panel that corresponds to the rear panel dimensions
of the flat panel PC. Take care that the panel section that is cut out is smaller
than the overall size of the metal frame that surrounds the flat panel PC but just
large enough for the rear panel of the flat panel PC to fit through (
Figure 3-17
and
Figure 3-18).
 Loading...